Hair Upload
- Use GPark Editor to upload assets.
- Once uploaded, resources cannot be updated. If modifications are needed, the resource must be re-uploaded.
- Resources synchronized locally cannot be directly overwritten. If modifications are needed, the resource must be re-imported and uploaded.
- Resources with multiple animation clips in FBX format cannot be imported properly and need to be re-exported from DCC software (3ds Max, MAYA, Blender, etc.).
- When importing animations, the corresponding skeleton model must be selected for preview. Choosing the wrong model may cause the character to sink, float, or stretch.
- For dynamic bone models, you can choose the following options as needed:
- Use physics simulation, which requires configuring a dynamic bone physics template.
- Use animation effects, which requires creating and configuring dynamic bone animations.
- Use both effects together. Configure the physics template and add dynamic bone animations. In this case, the physics effect will take priority when the character is in motion, and the animation will take priority when the character is stationary.
- For dynamic bone models, you can choose the following options as needed:
Resource Import
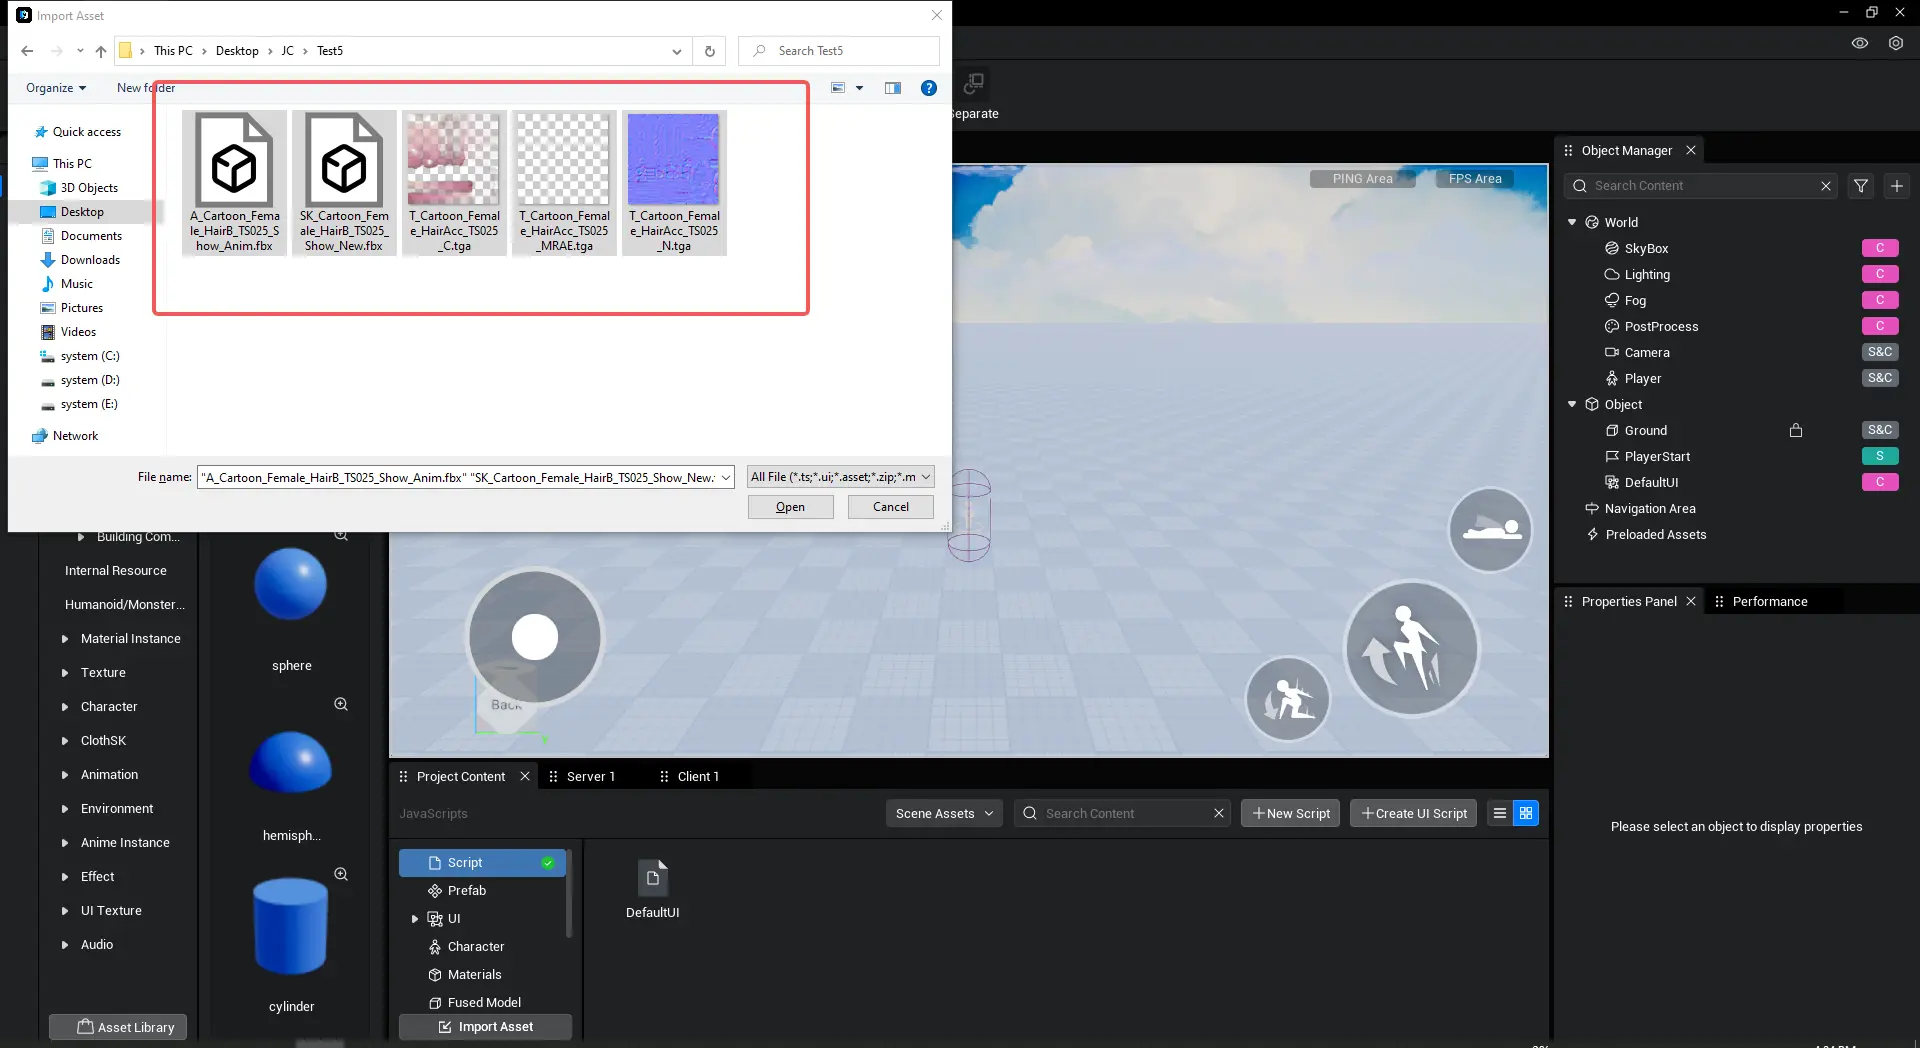
Click on "Resource Import" and select the files to upload (model FBX + textures + dynamic bone animations).
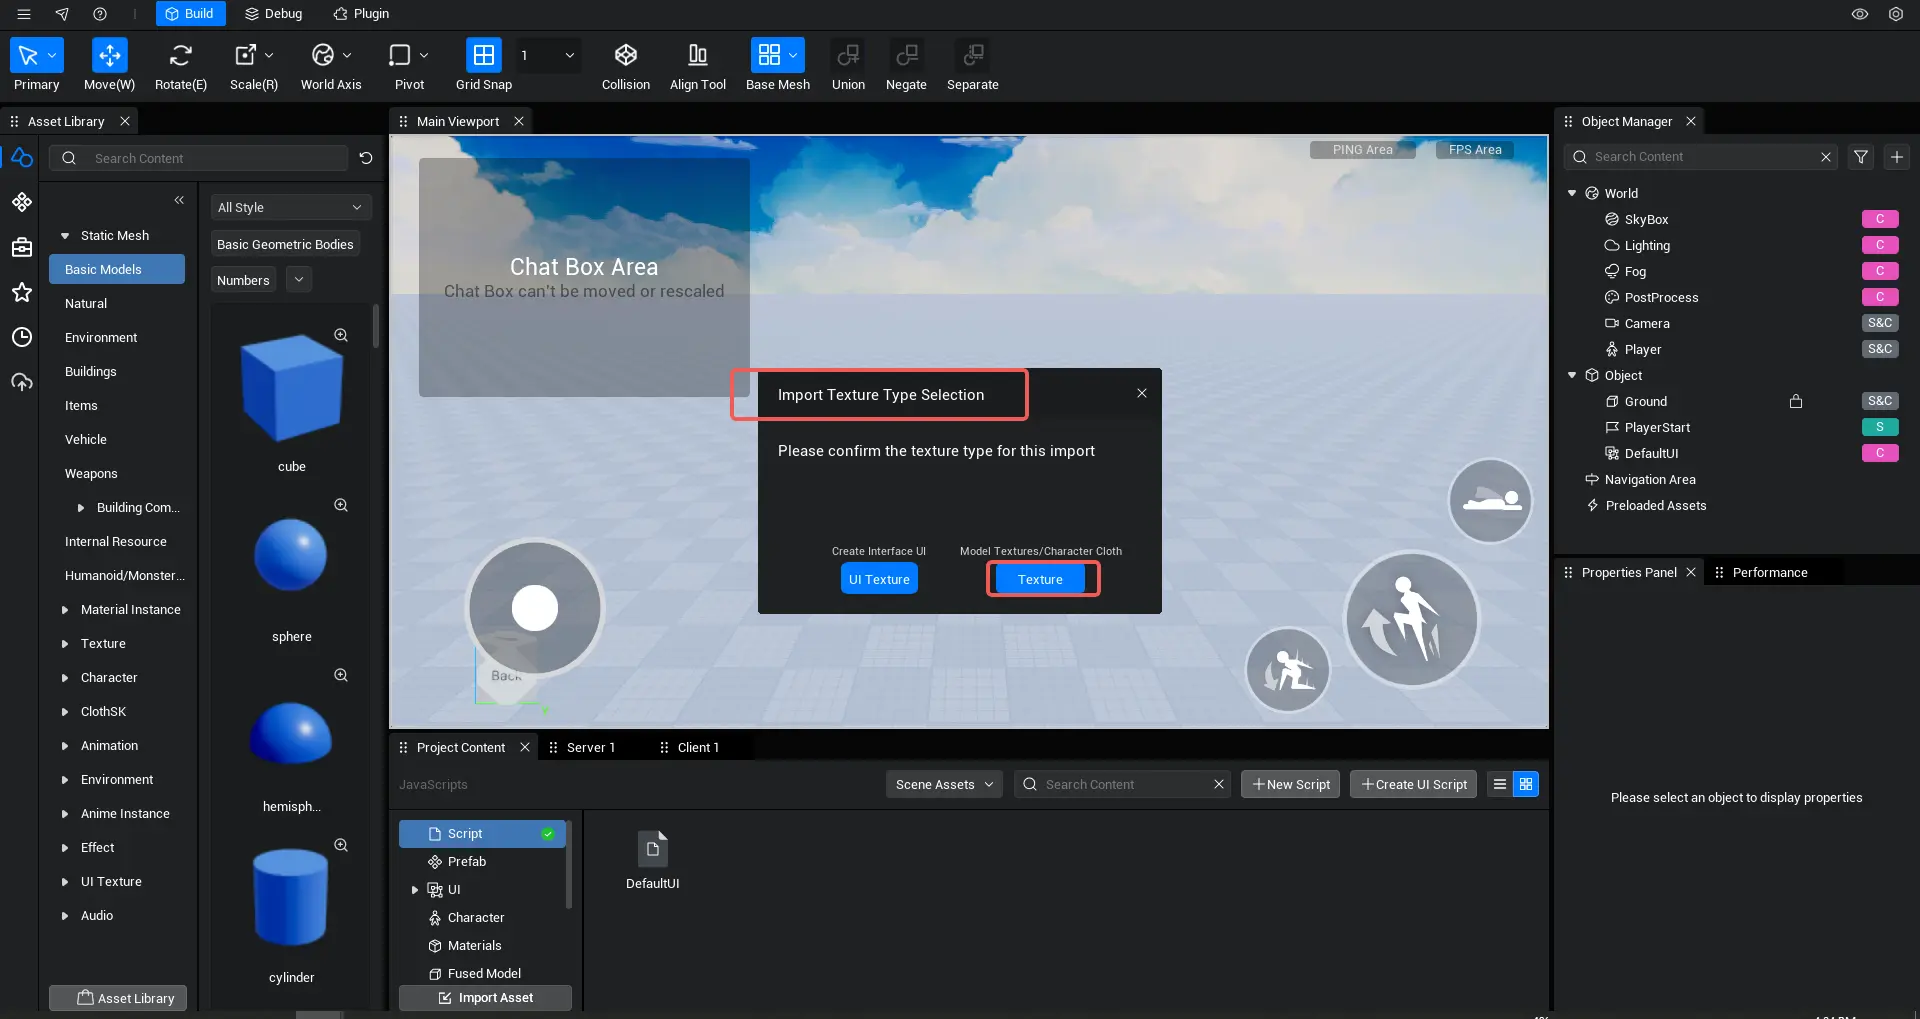
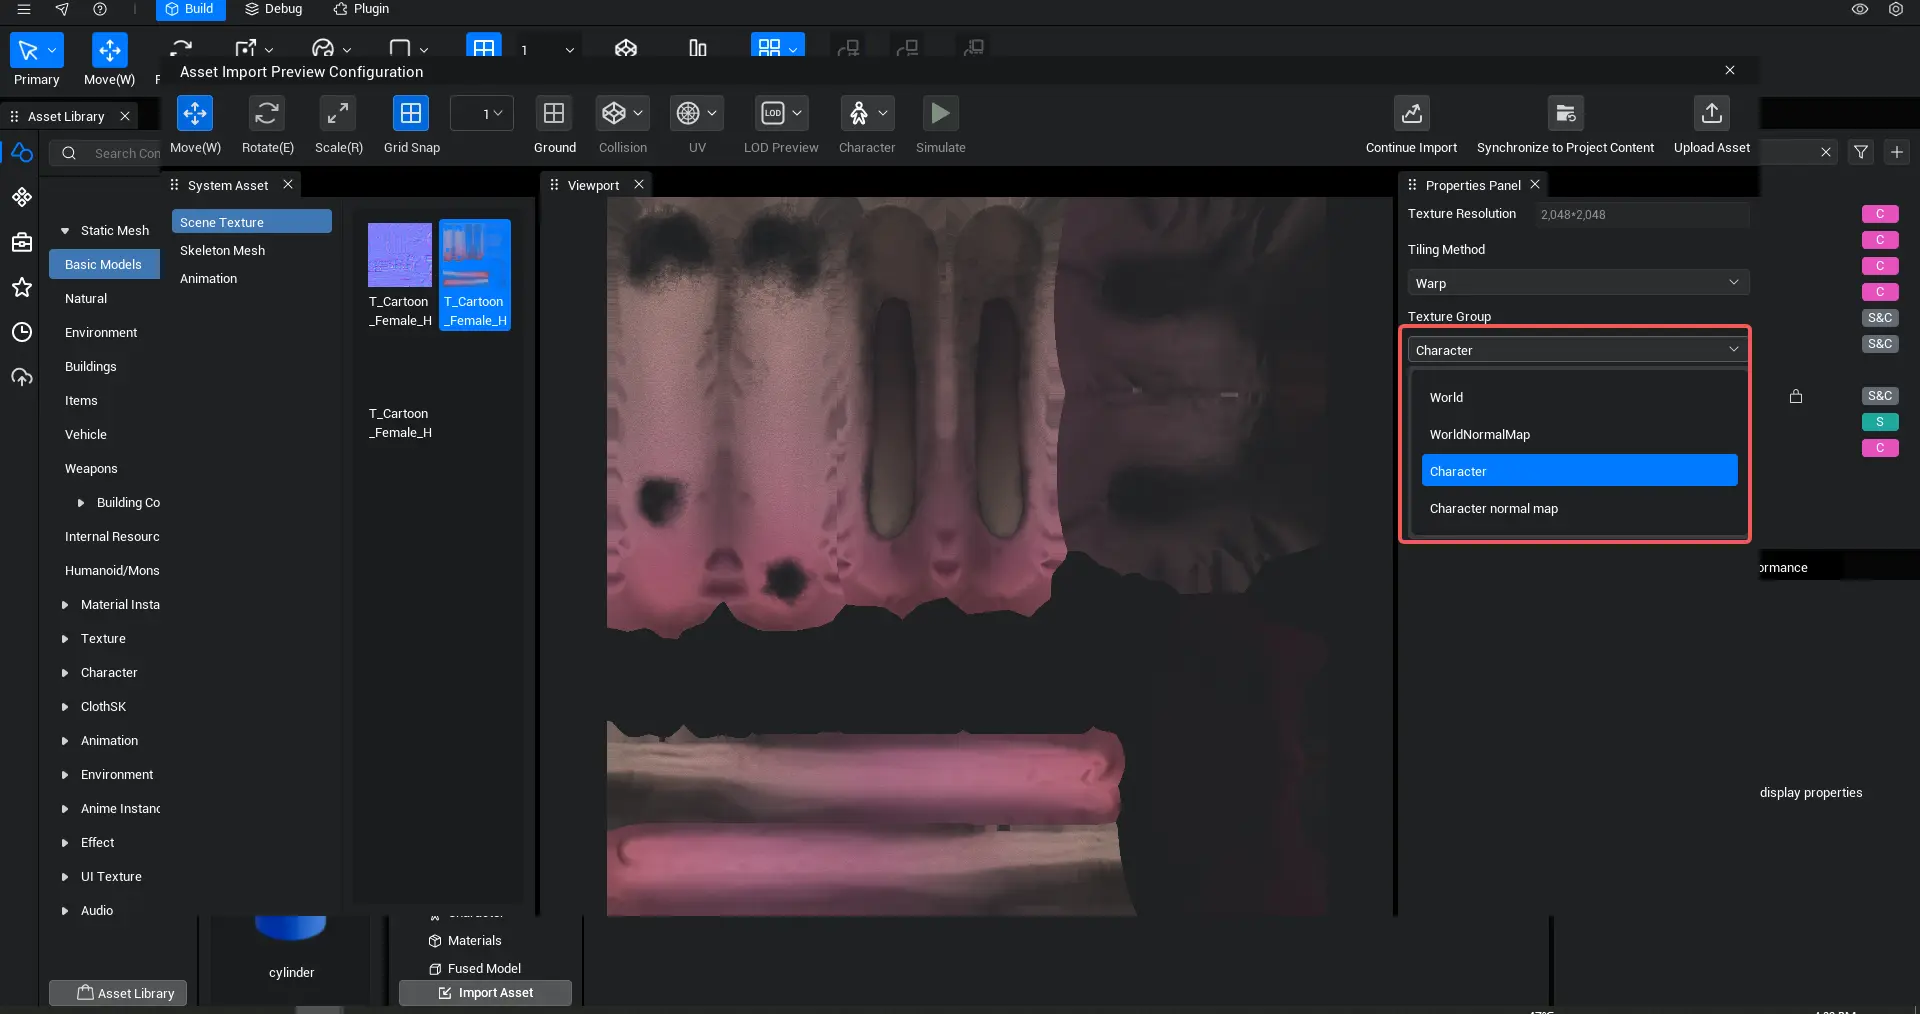
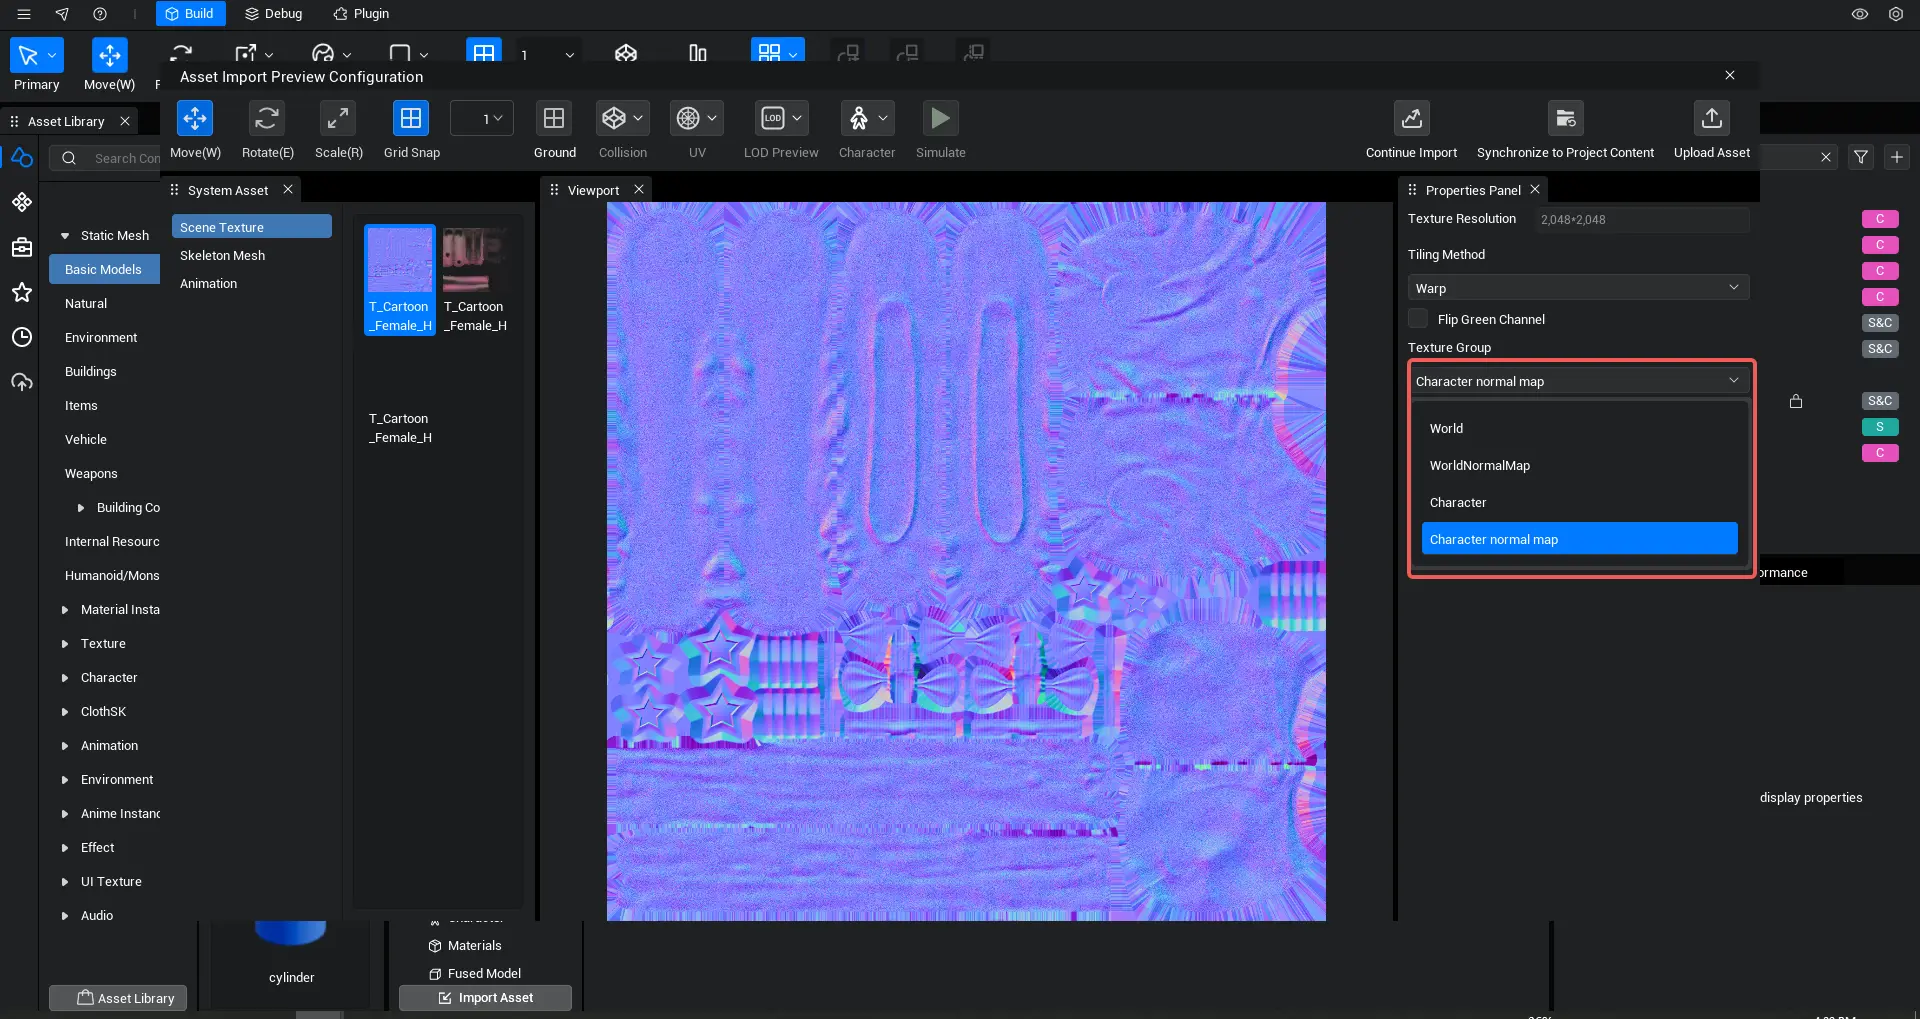
Confirm the texture type.
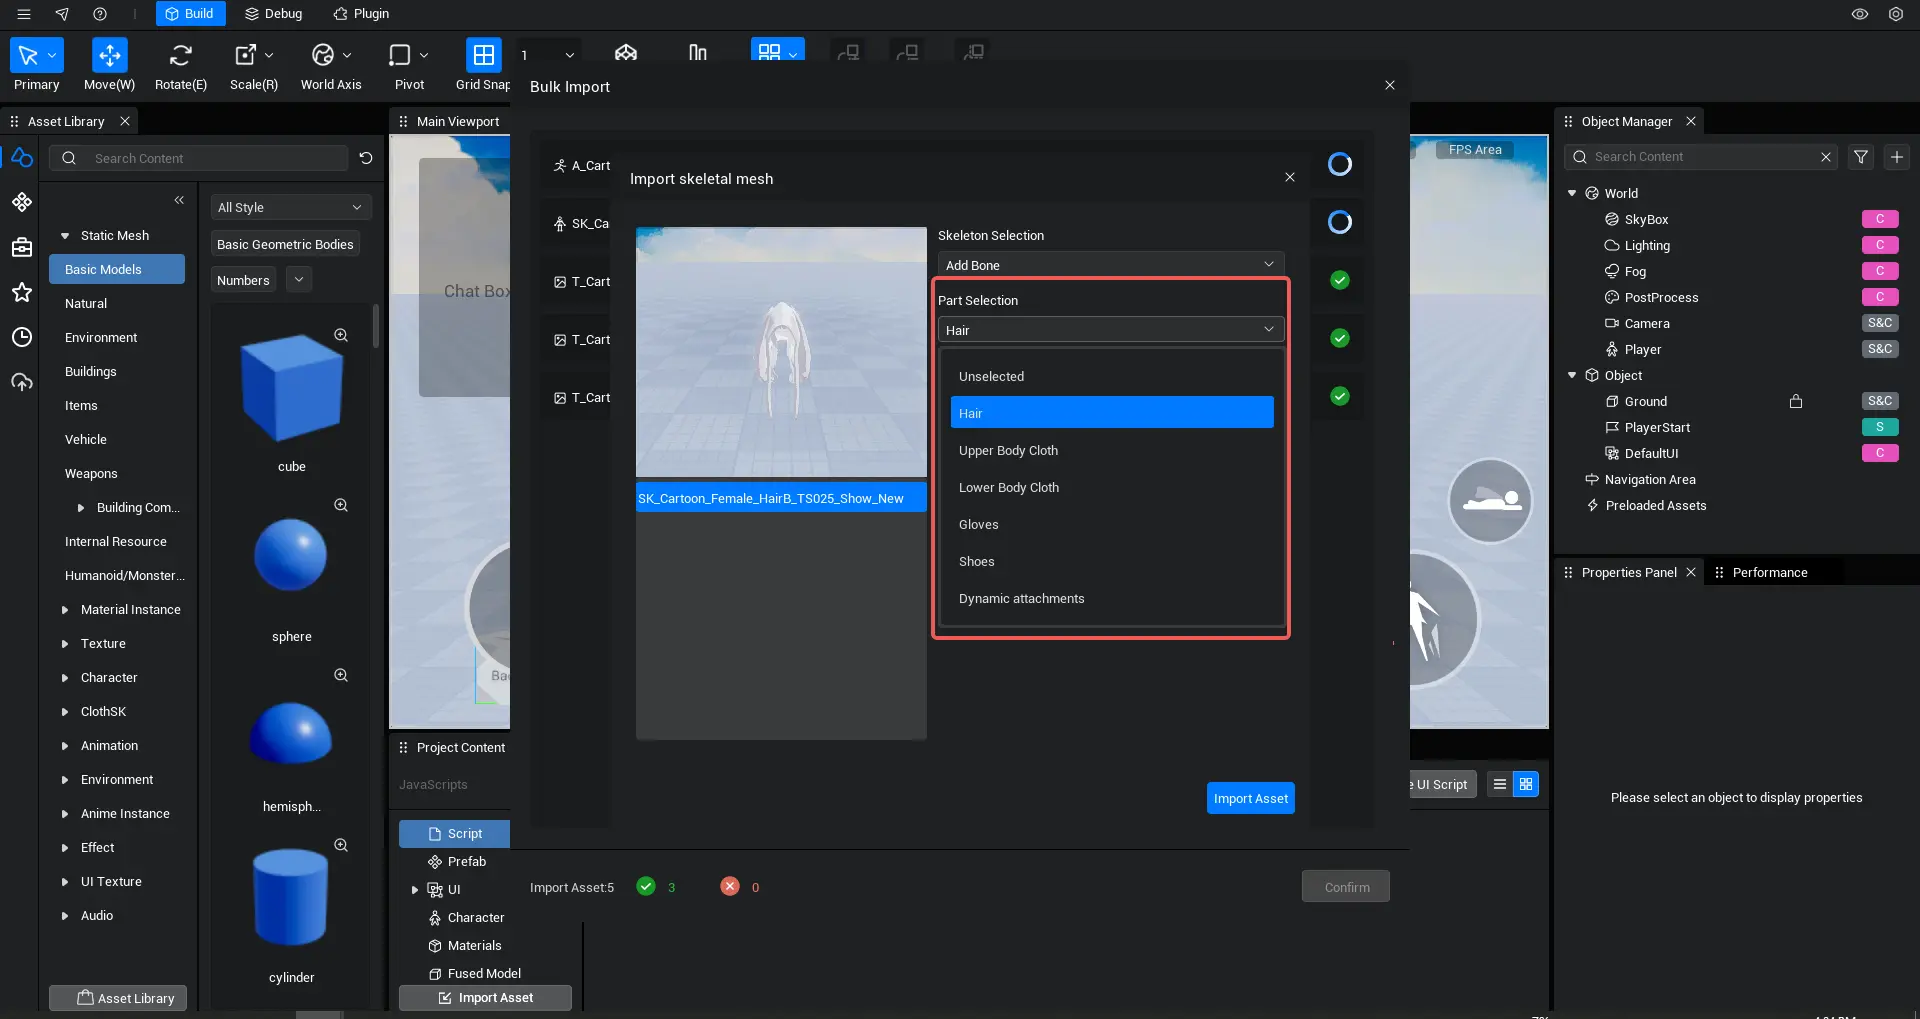
Select the category for the imported asset. Ensure that the skin material is named: "body". The asset will automatically recognize the skin material.
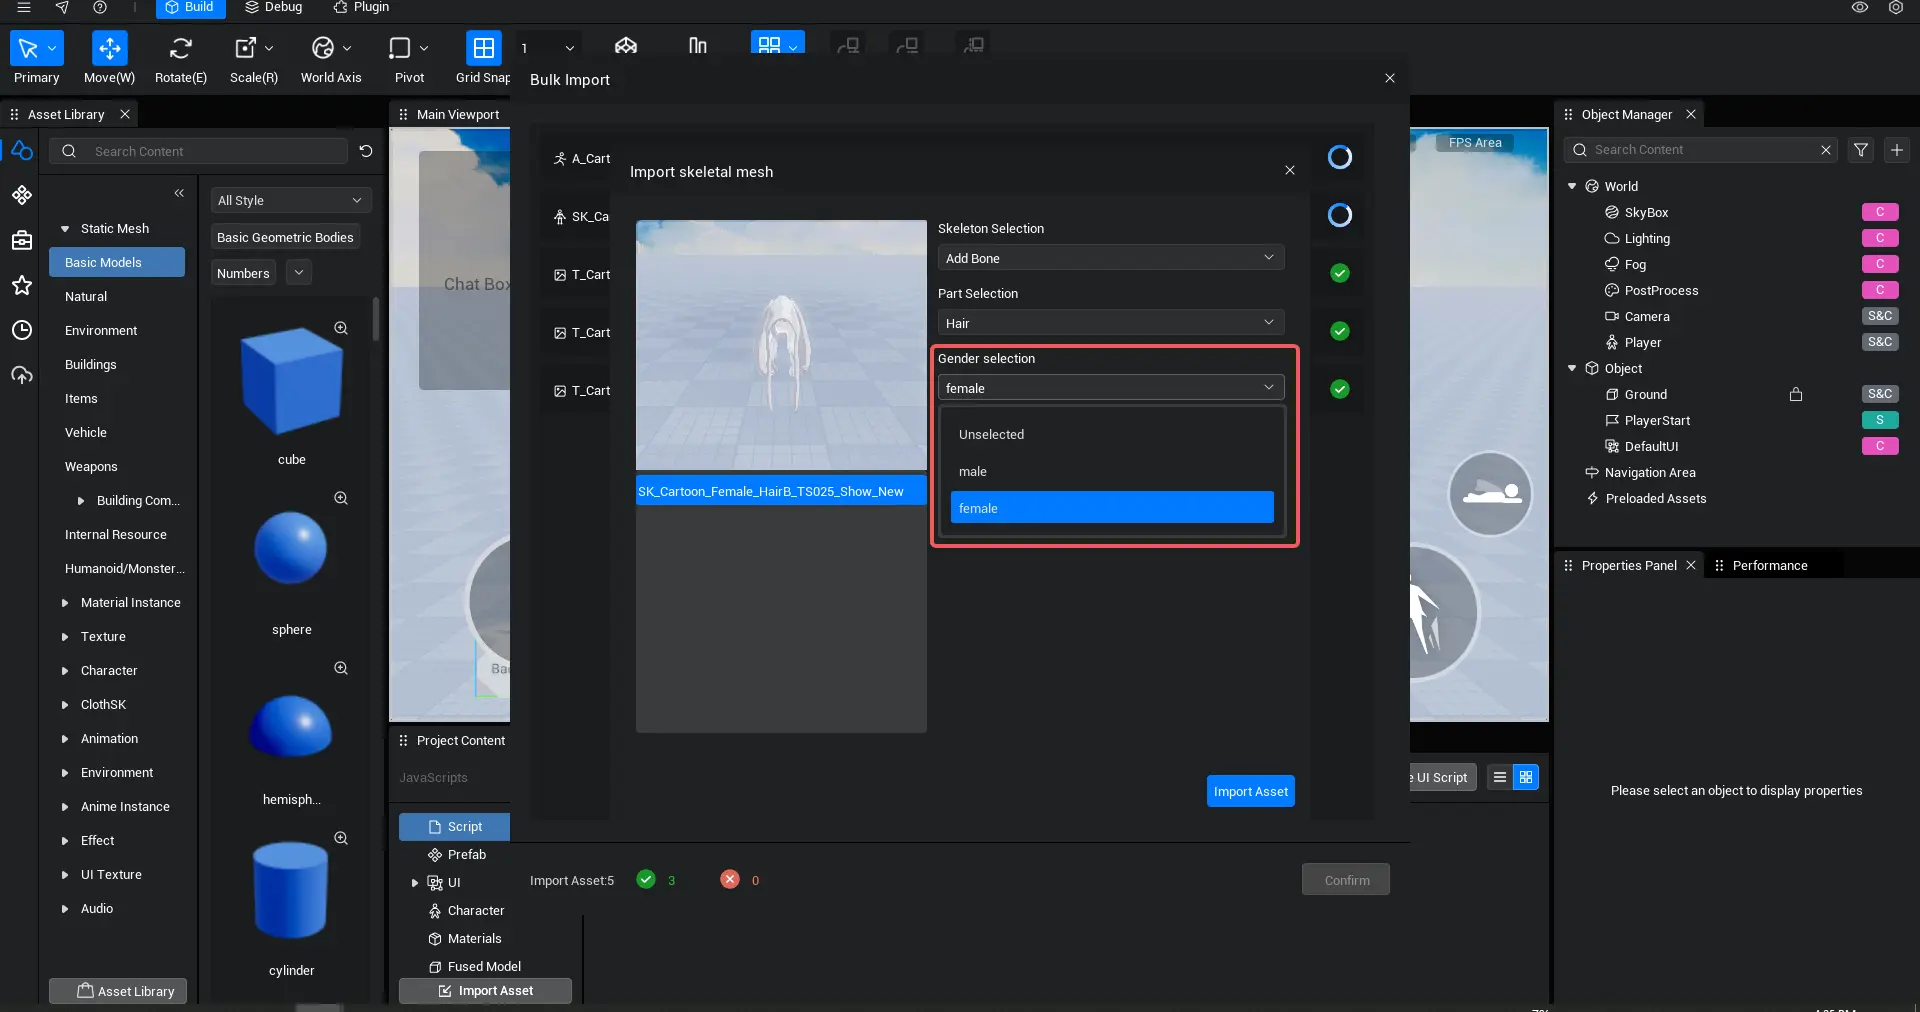
Select the gender and click "Import Resource".
Select the skeleton corresponding to the animation and click "Import Resource".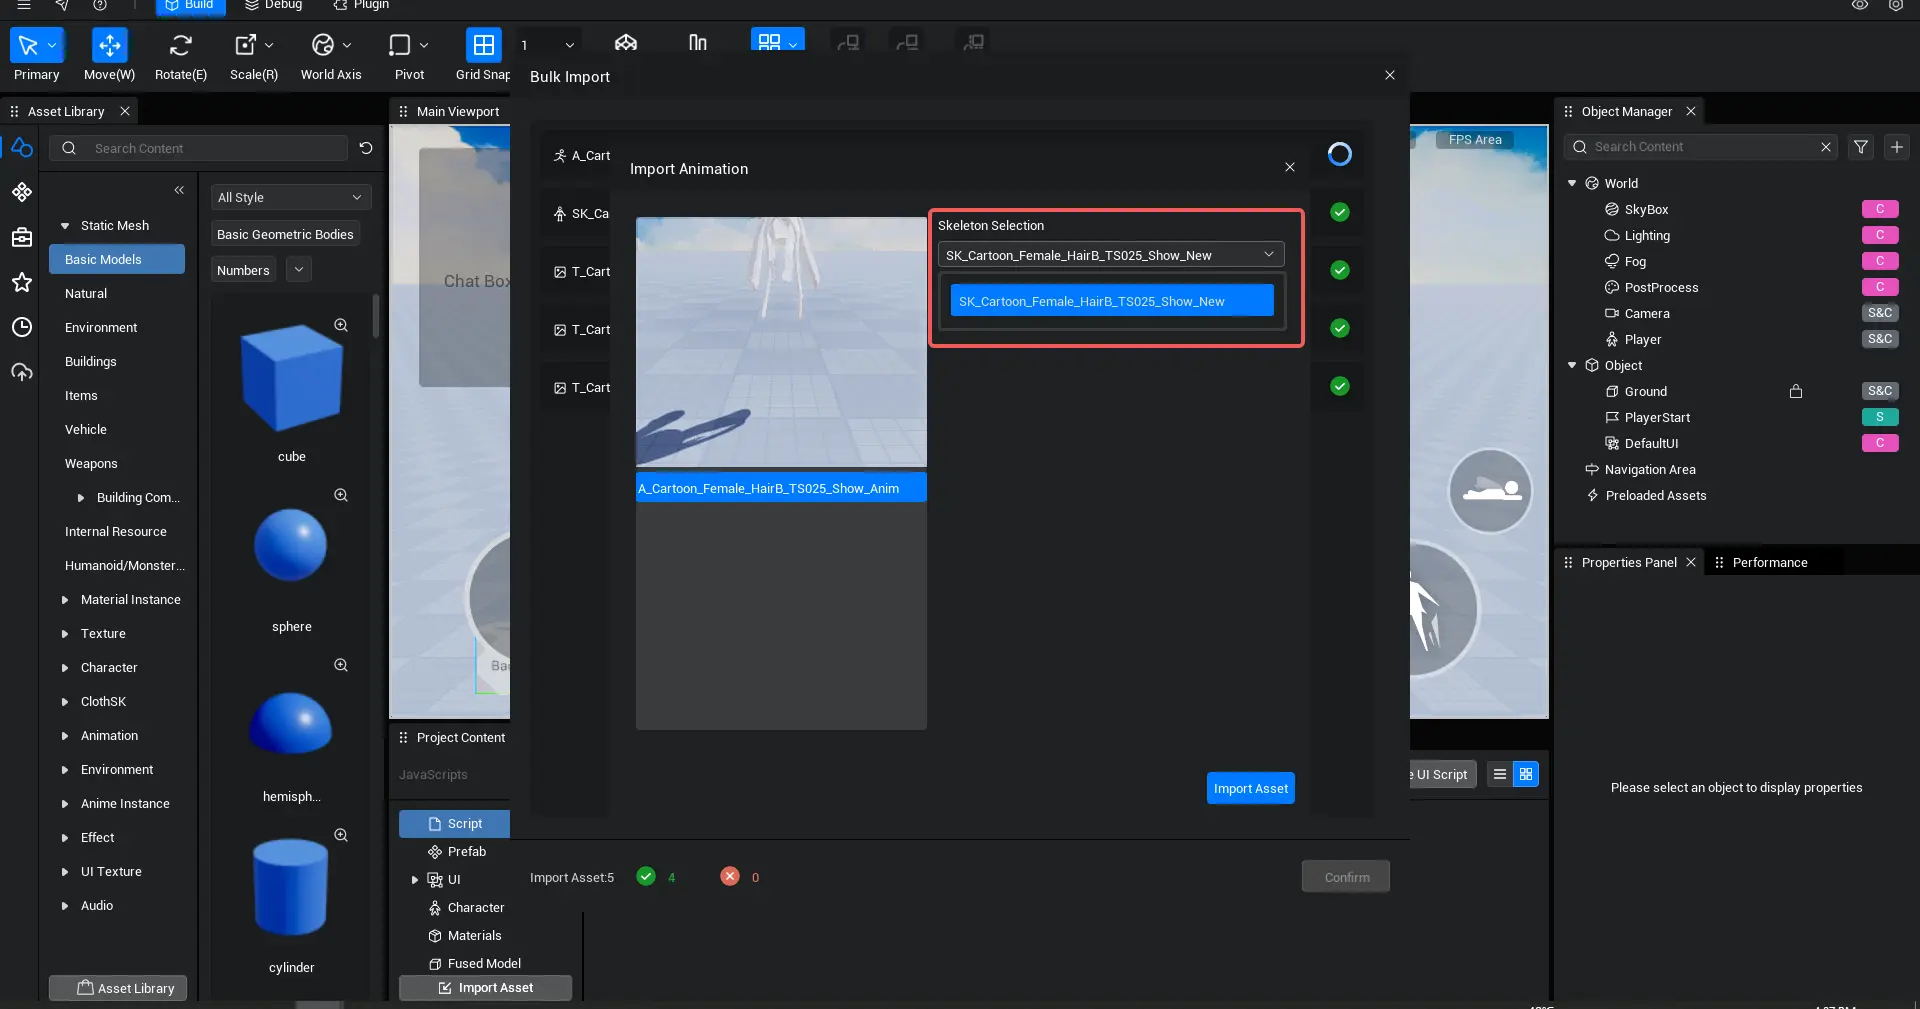
Texture Settings
Configure the color/MRAE texture for the character.
Configure the normal map as the character's normal map.
Resource Configuration
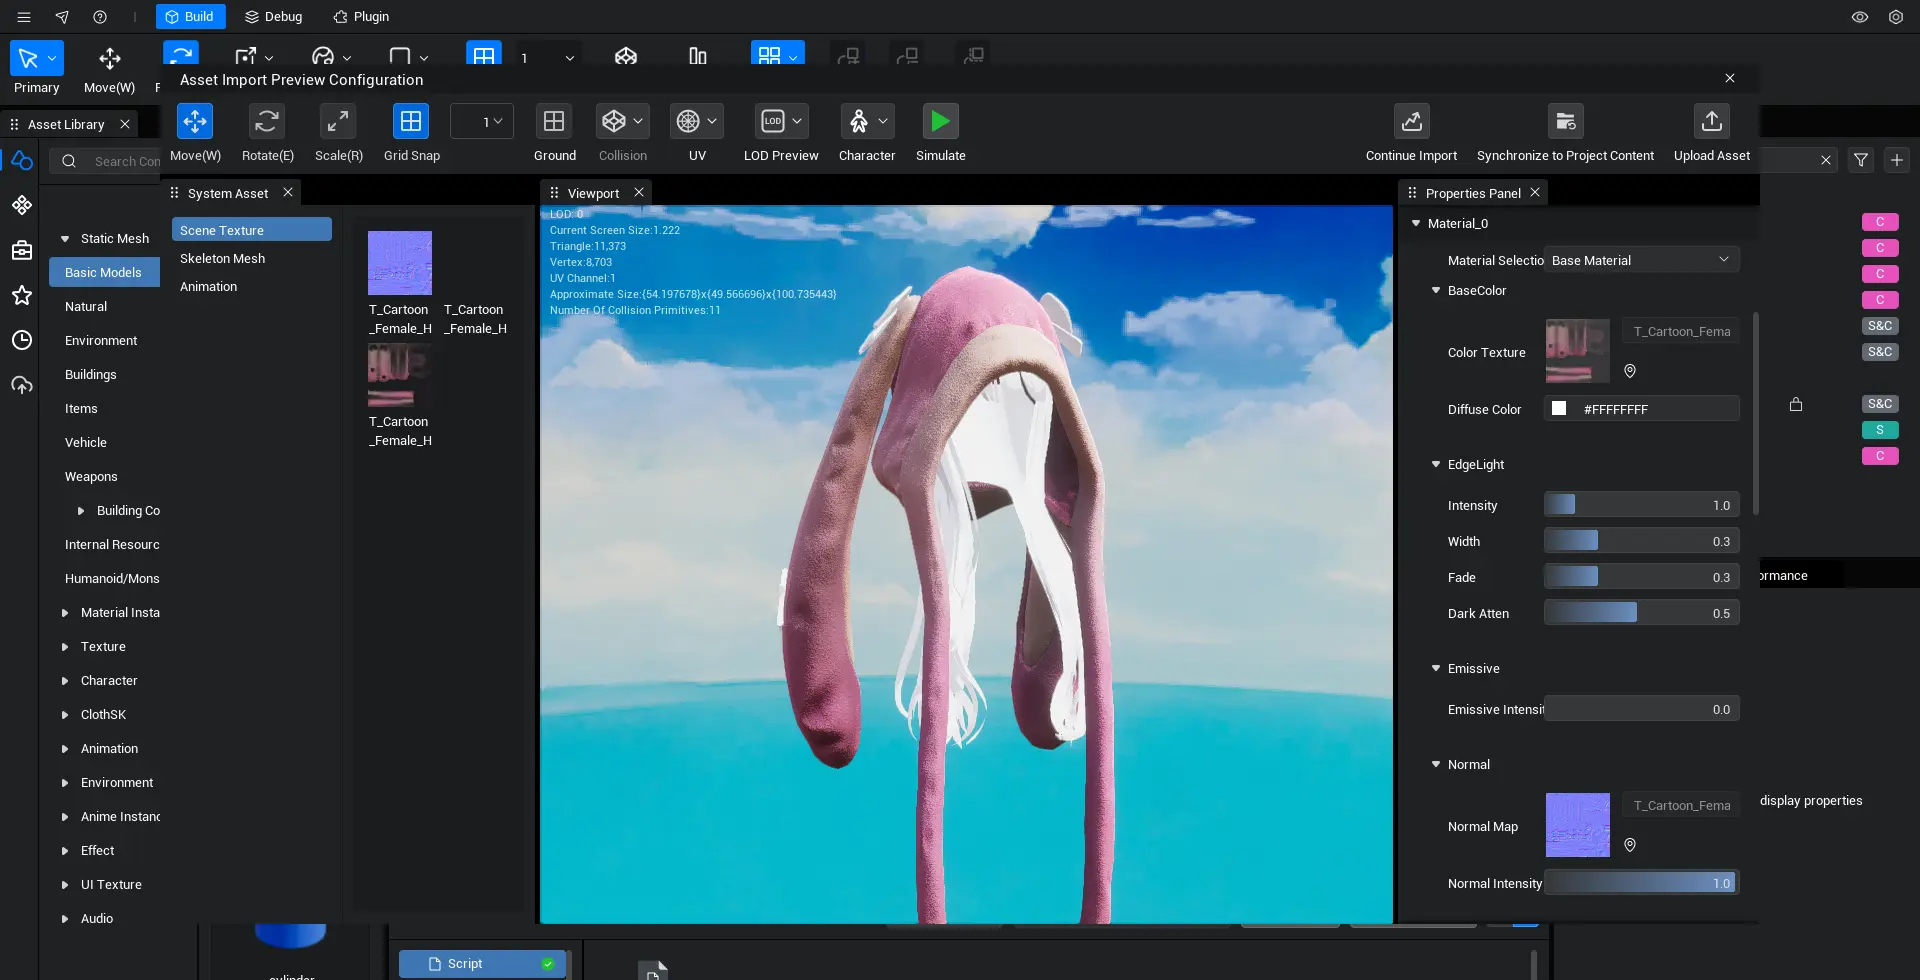
Configuring Material Textures
Select the model, enter the properties panel, and drag the textures to the corresponding positions.
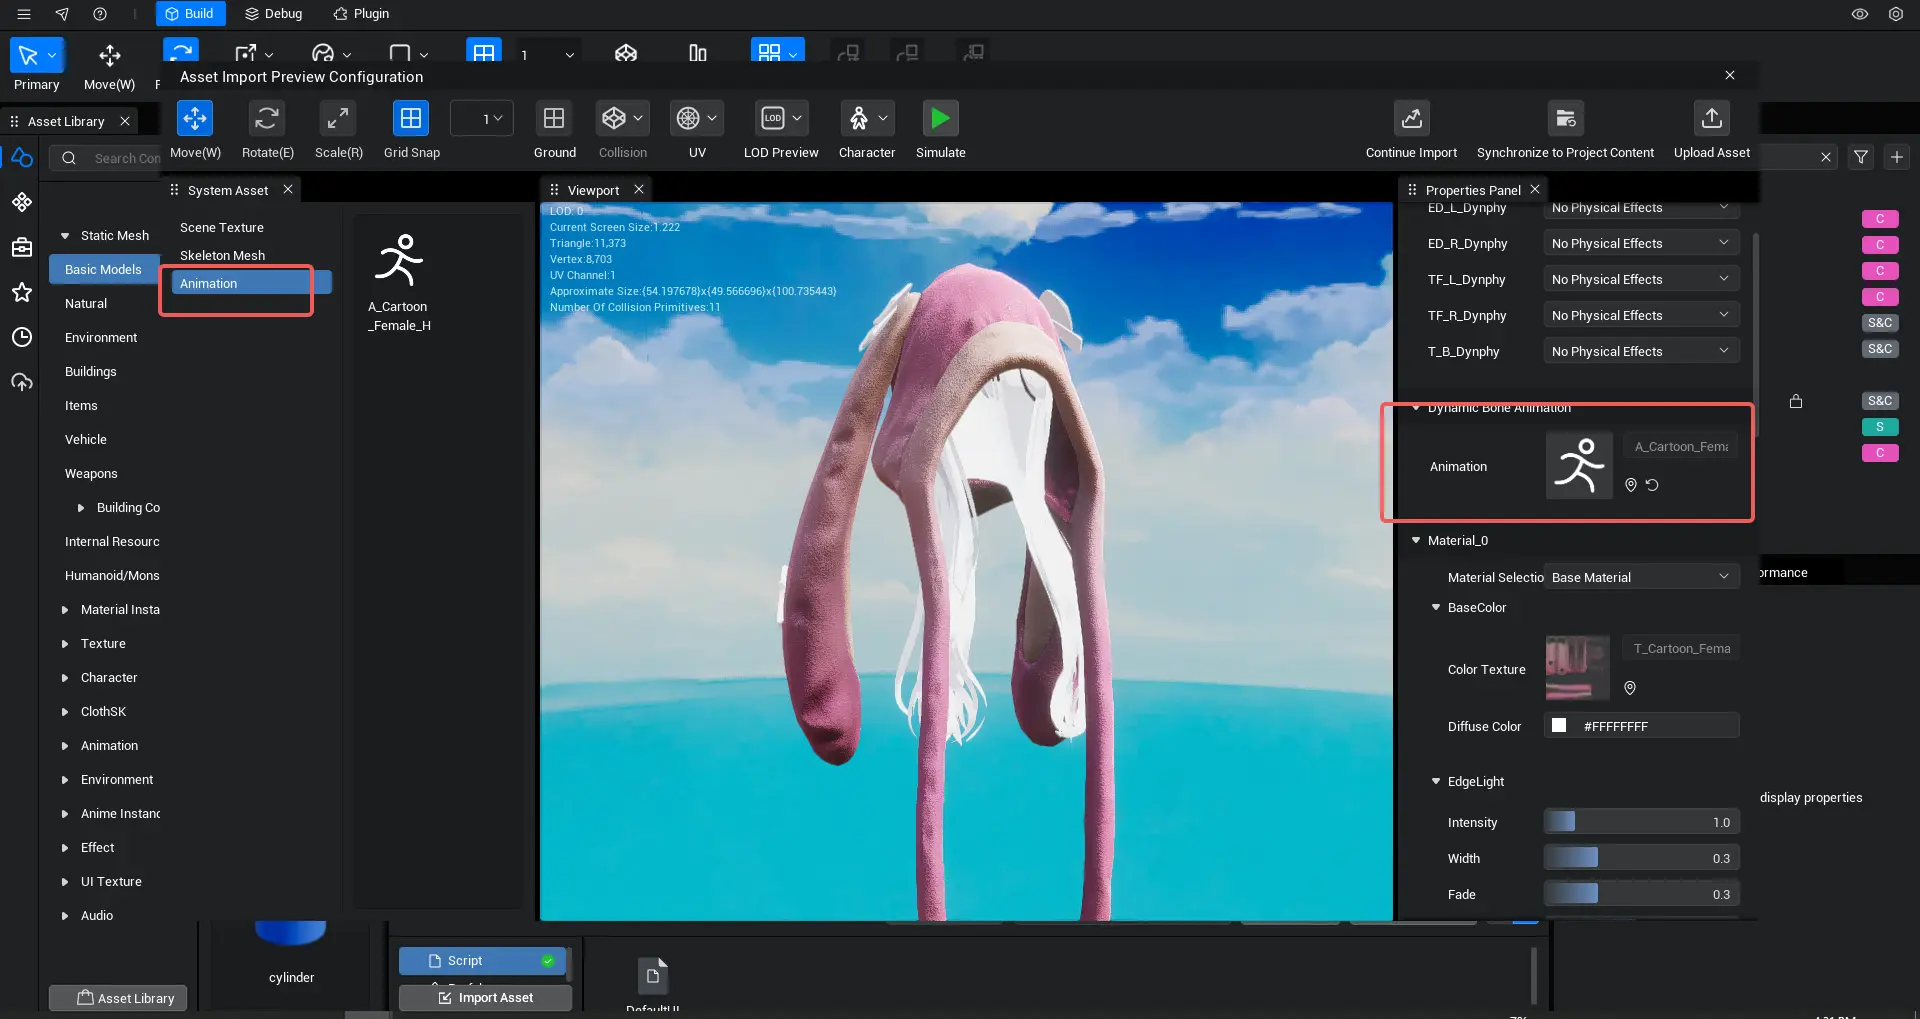
Configuring Dynamic Bone Animations
Configure the prepared dynamic bone animations. If no animations are prepared, this step can be skipped.
Click on the animation file on the left to preview the animation effect.
After configuring the animation file for the model, click "Simulate" to preview the effect.
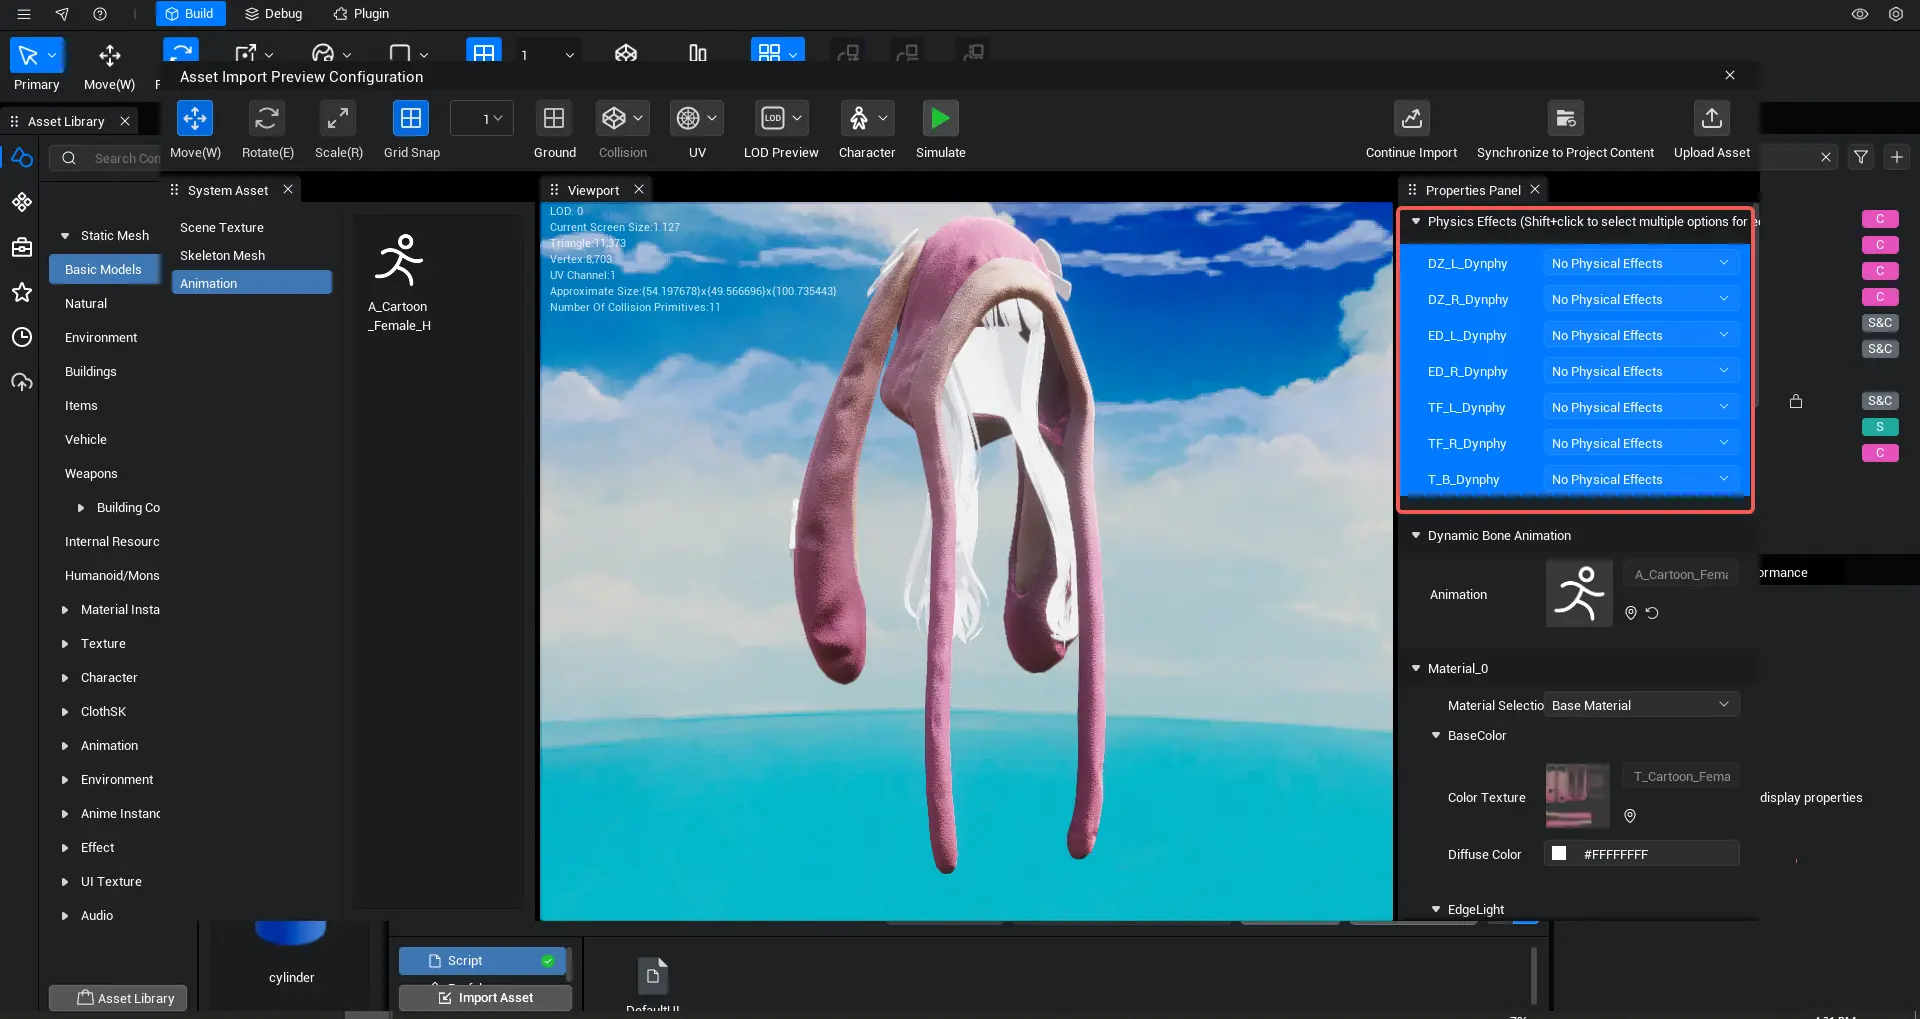
Configuring Dynamic Bone Physics Effects
Based on the dynamic bones created, configure the dynamic effect template for the bone chain. If there are no dynamic bones, this step can be skipped.
If no dynamic bones are applied, configure it as "No Physics Effect".
Simulation Preview
After configuring the resources, you can preview the model's skeleton, LODs, etc.
Select the appropriate physics effect template, click "Simulate", and observe the effect of the physics template. Choose the most suitable template based on the effect.
Upload
After configuring the resources, click "Upload Resource". Once the review is complete, the resource will be uploaded to the asset library, and you can check the upload progress in the Creator Center.