Editor Customization and Upload
Character Editor
Customization
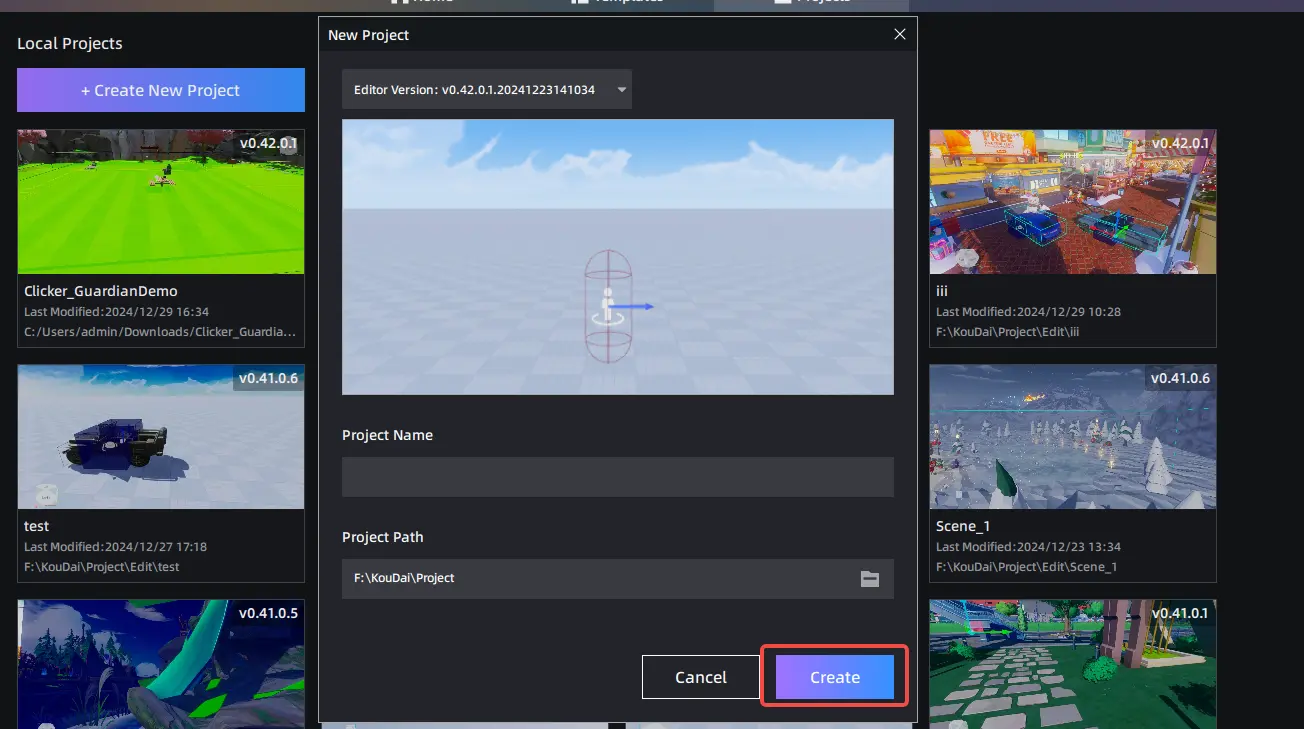
Open the Editor
Create a new project.
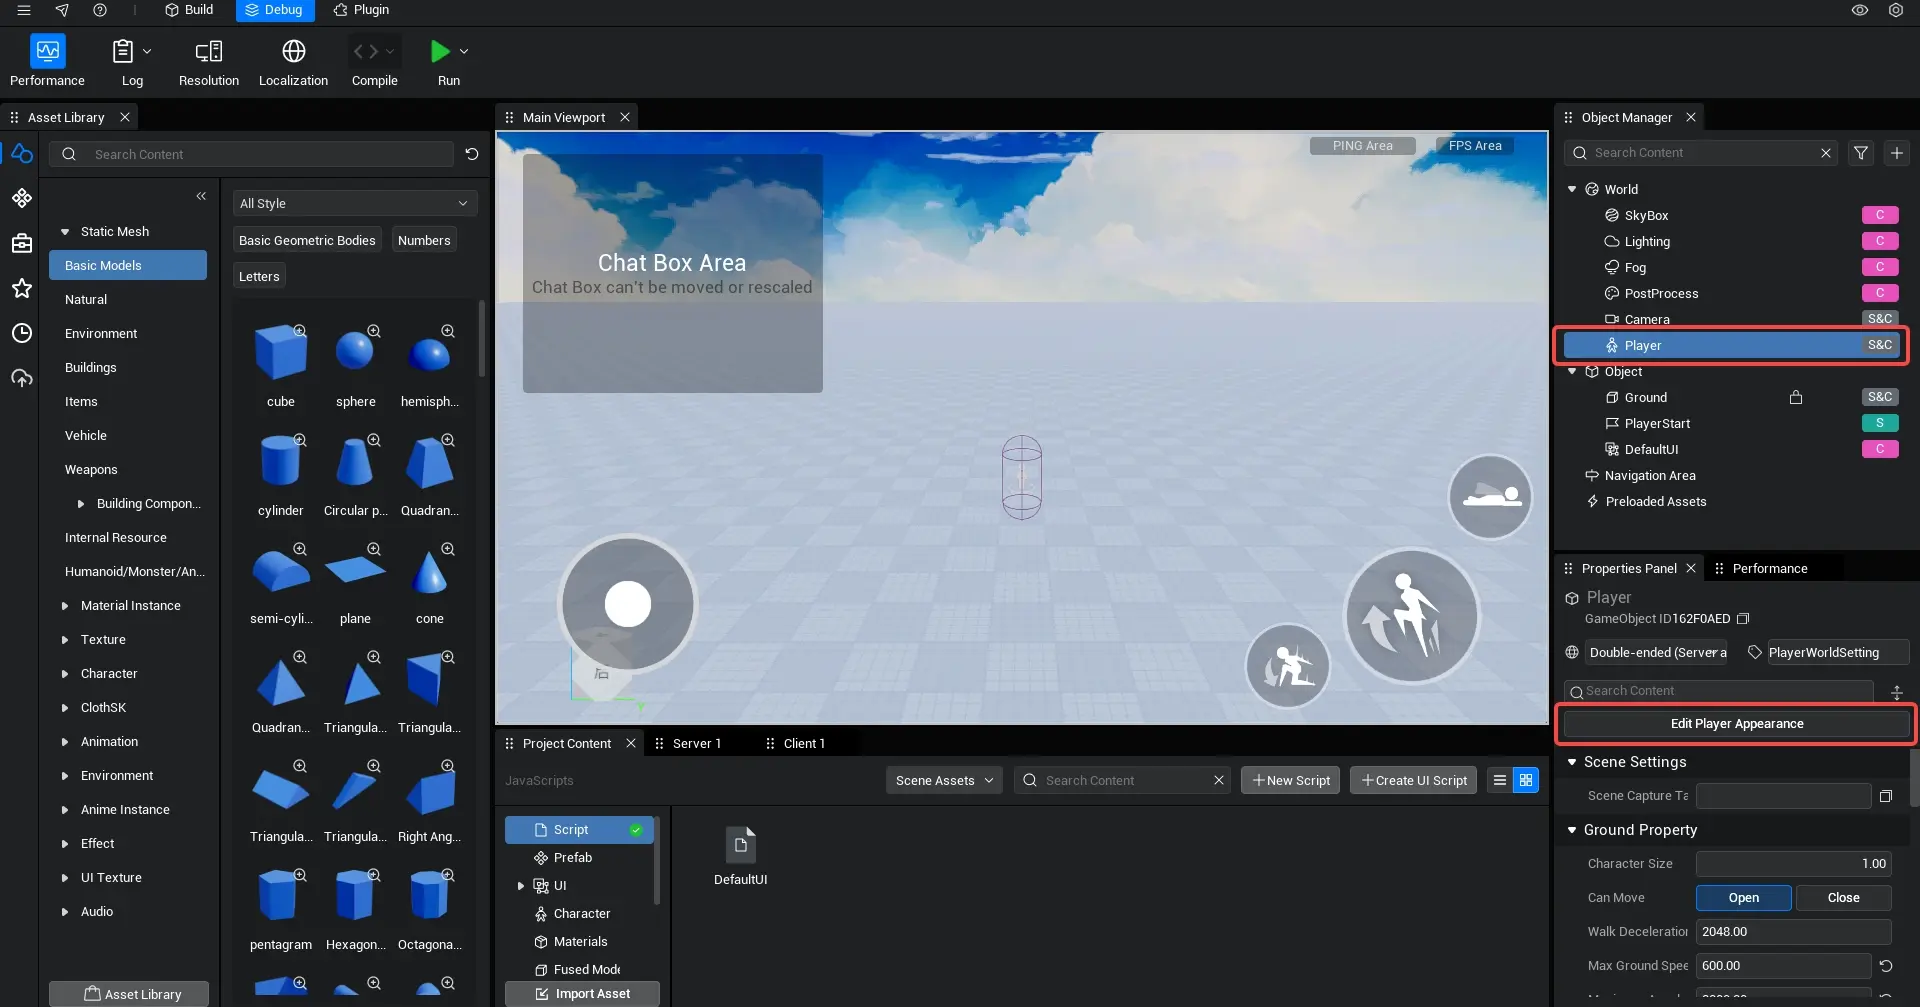
Click Player on the right panel and select Edit Player Appearance.
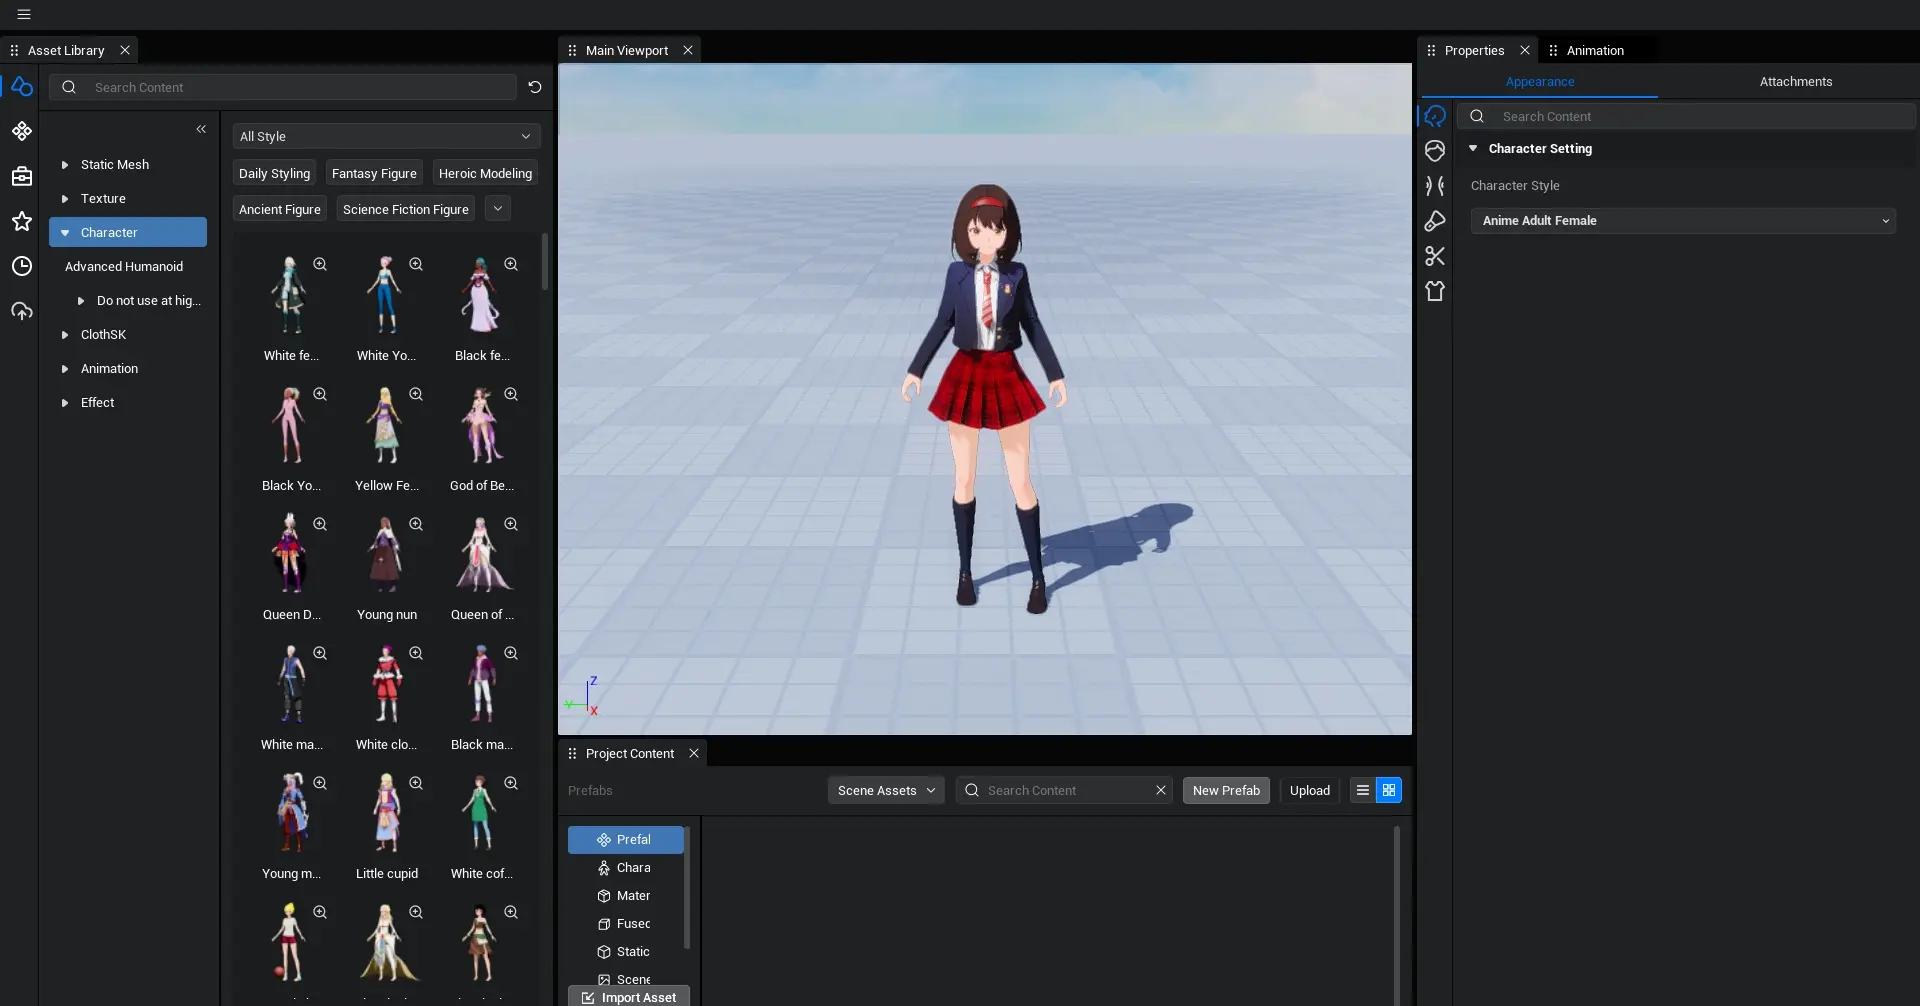
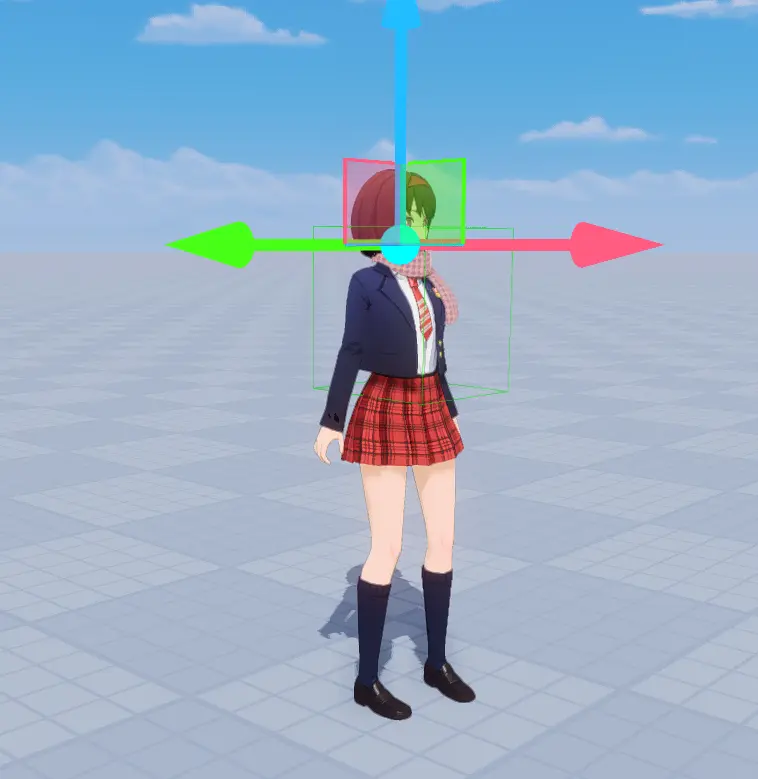
Select your desired character settings
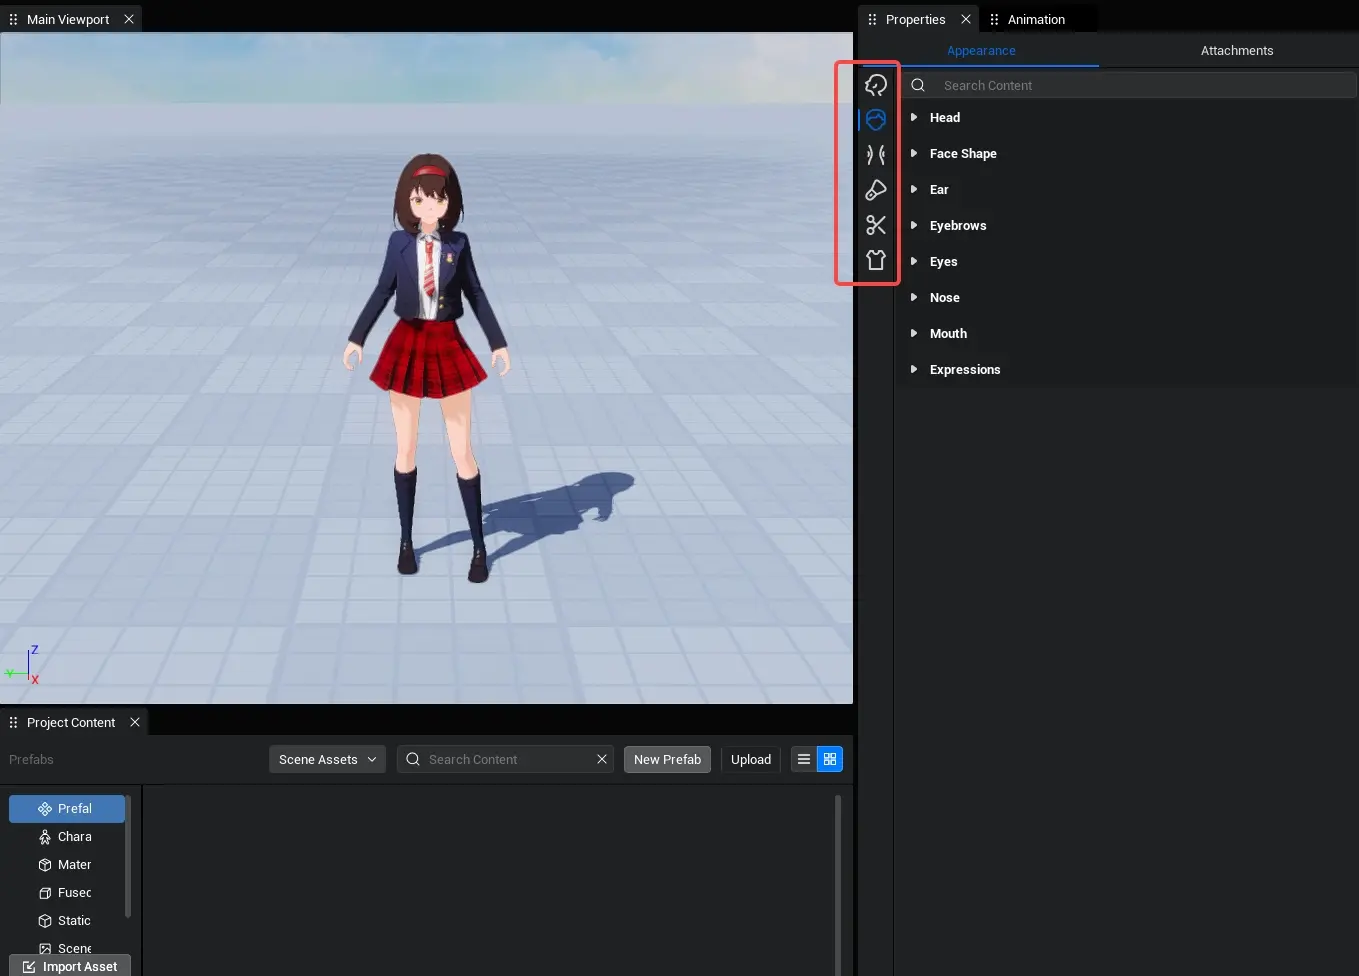
Adjust Parameters
Use the attribute panels to tweak parameters and customize your character.
While adjusting, observe both front and side views to ensure structural accuracy and avoid clipping issues.
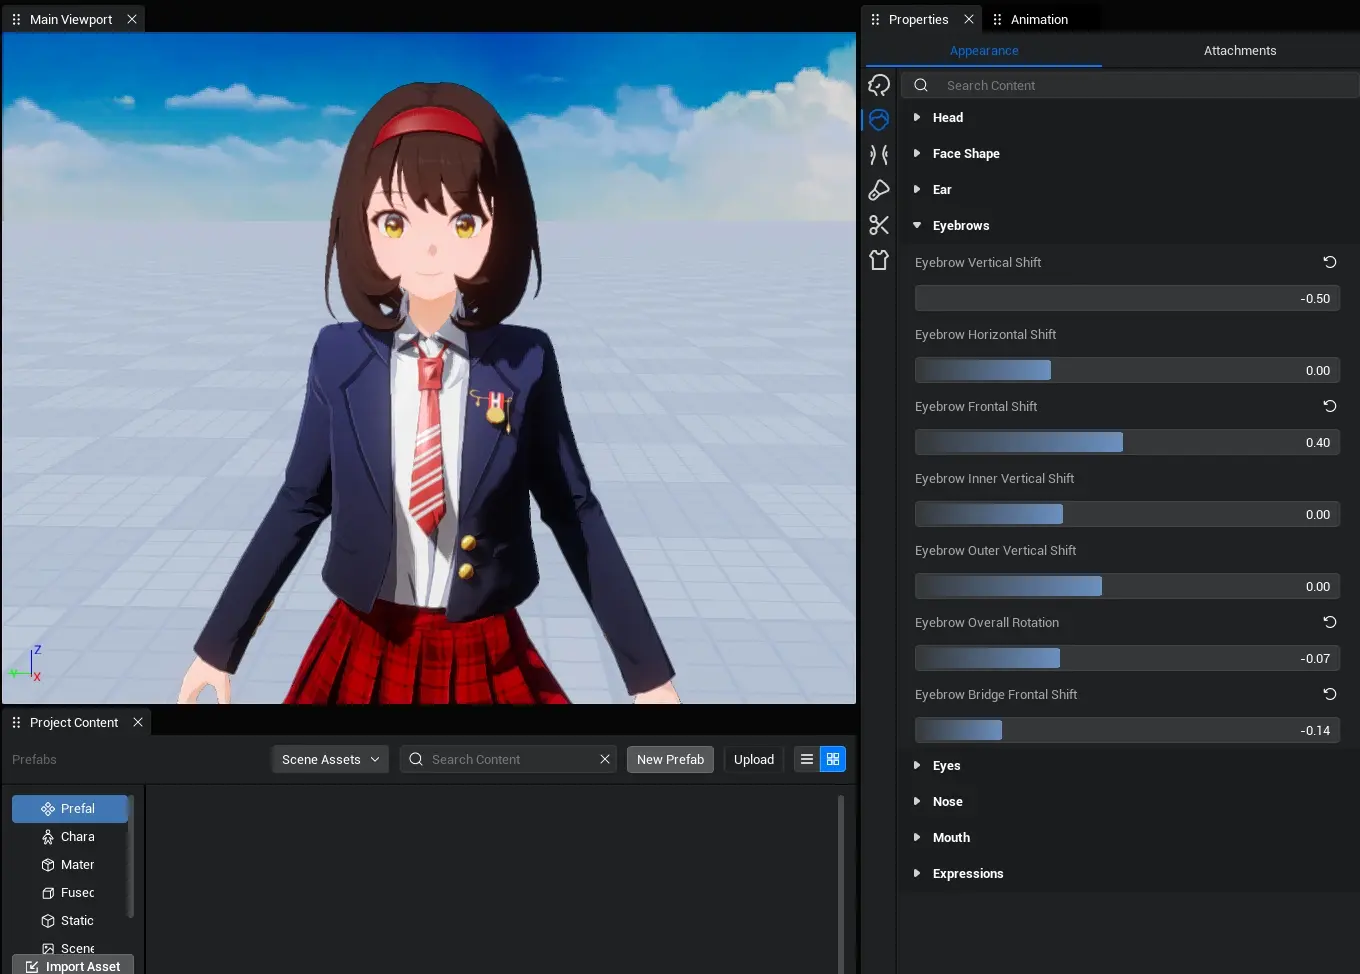
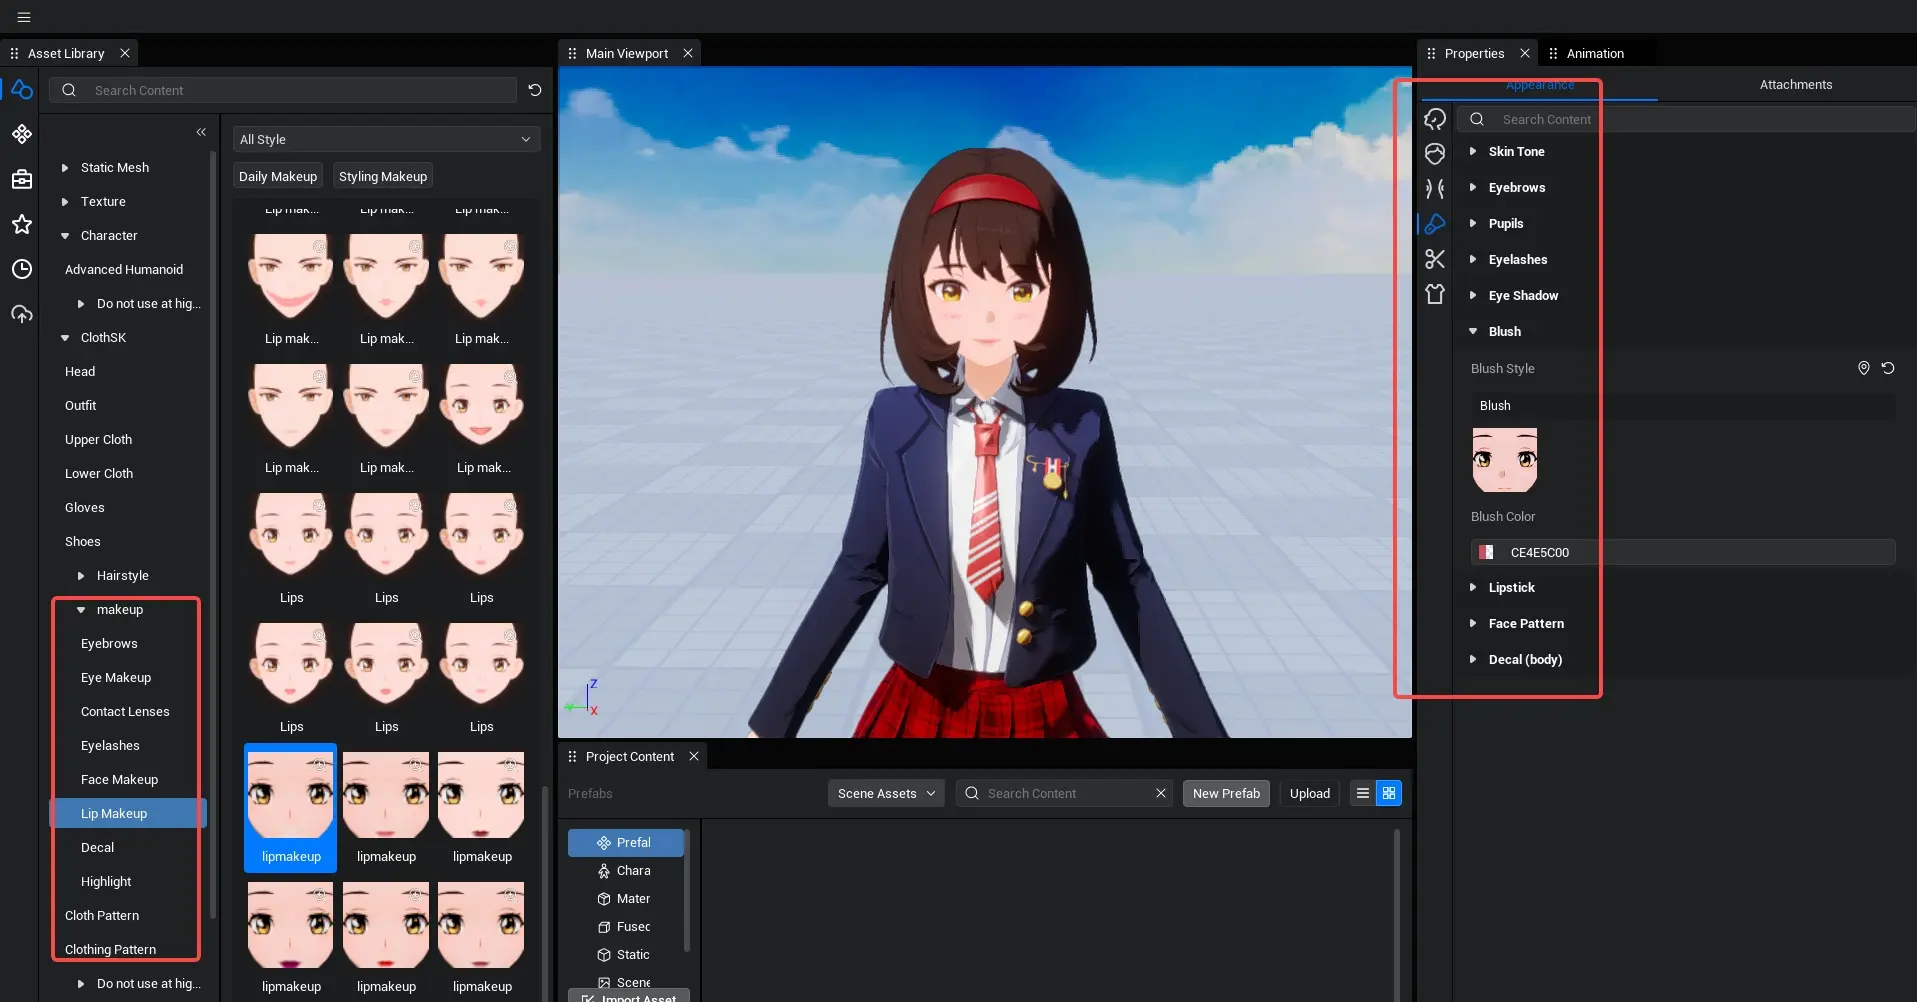
Makeup
- Navigate to the Makeup section.
- From the resource library on the left, select and apply different makeup options to customize the appearance.
Outfit Customization
- Select Outfit Resources
- Click the Clothing Icon in the UI.
- Locate the desired outfit resources in the left panel, filter by character type, and download the required assets.
- Apply Clothing
- Drag and drop the clothing resources into the designated slots on the right panel.
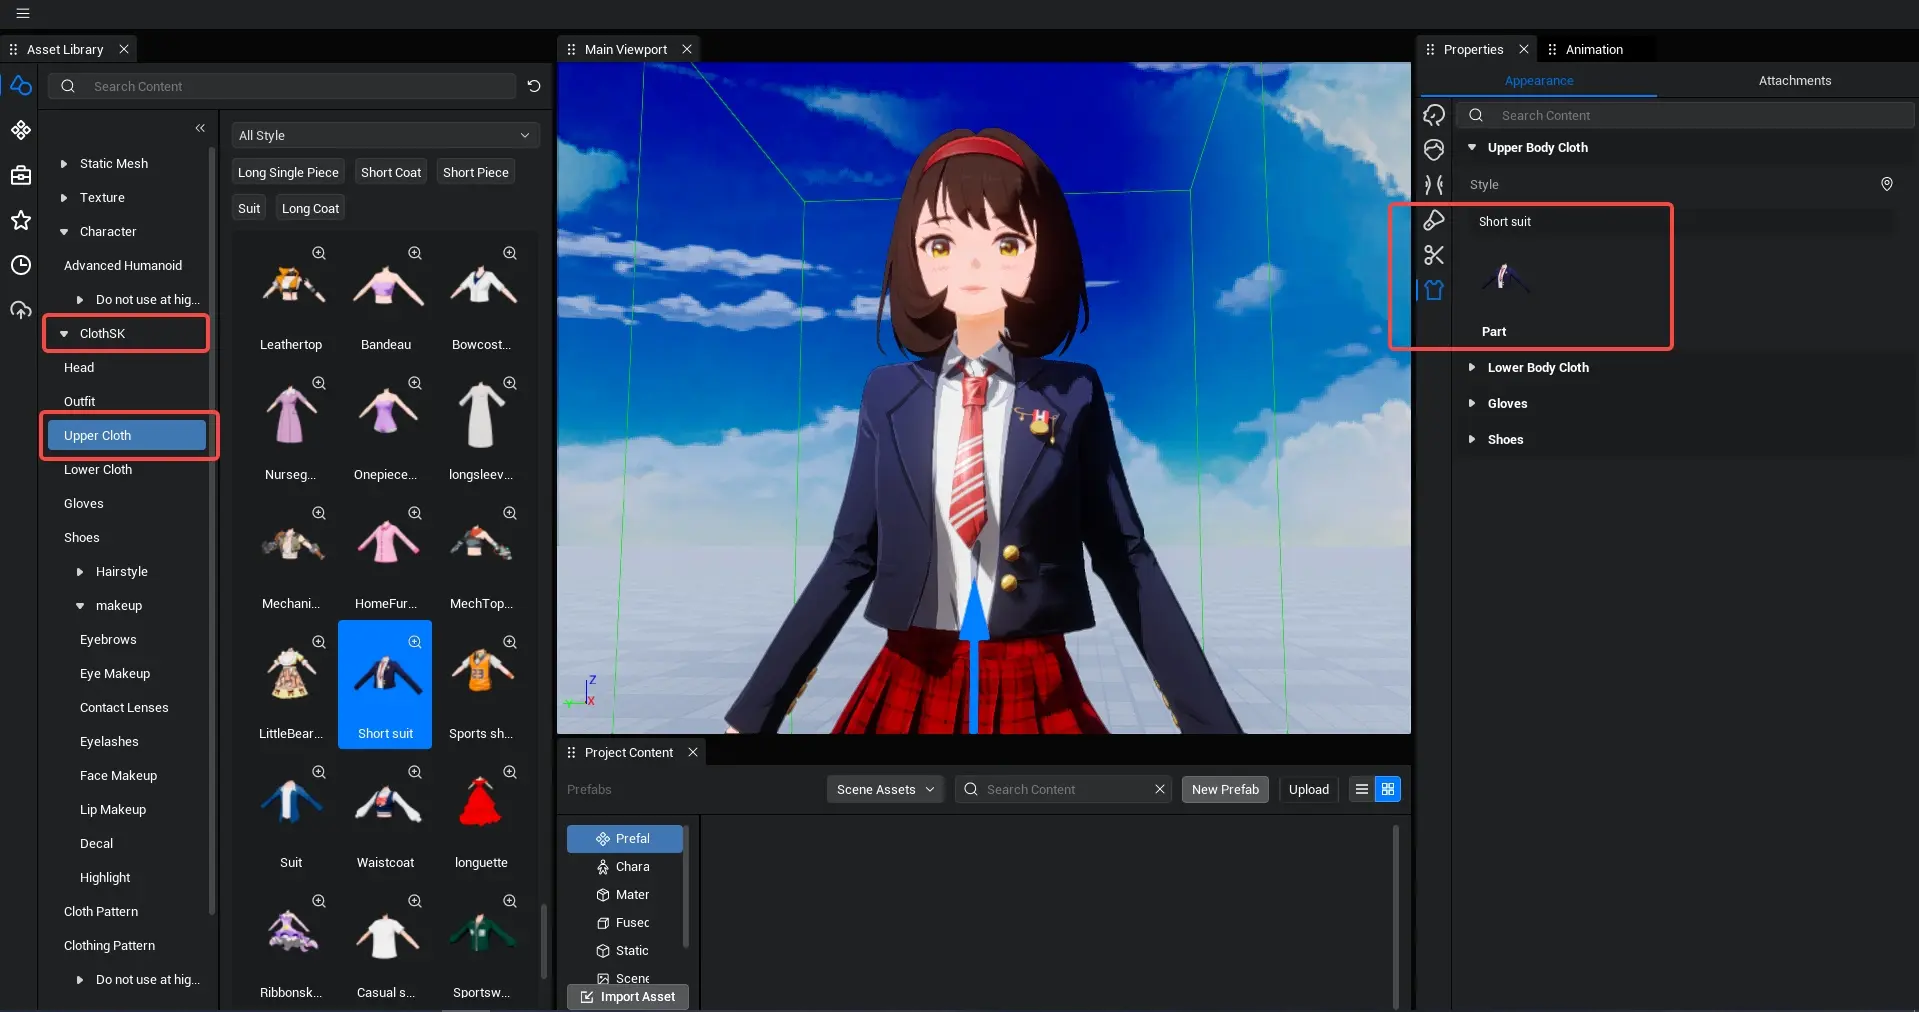
Use the adjustment panel to modify textures and colors according to your preferences.

Accessories
After finalizing the character, choose appropriate static or dynamic accessories from the categorized library.
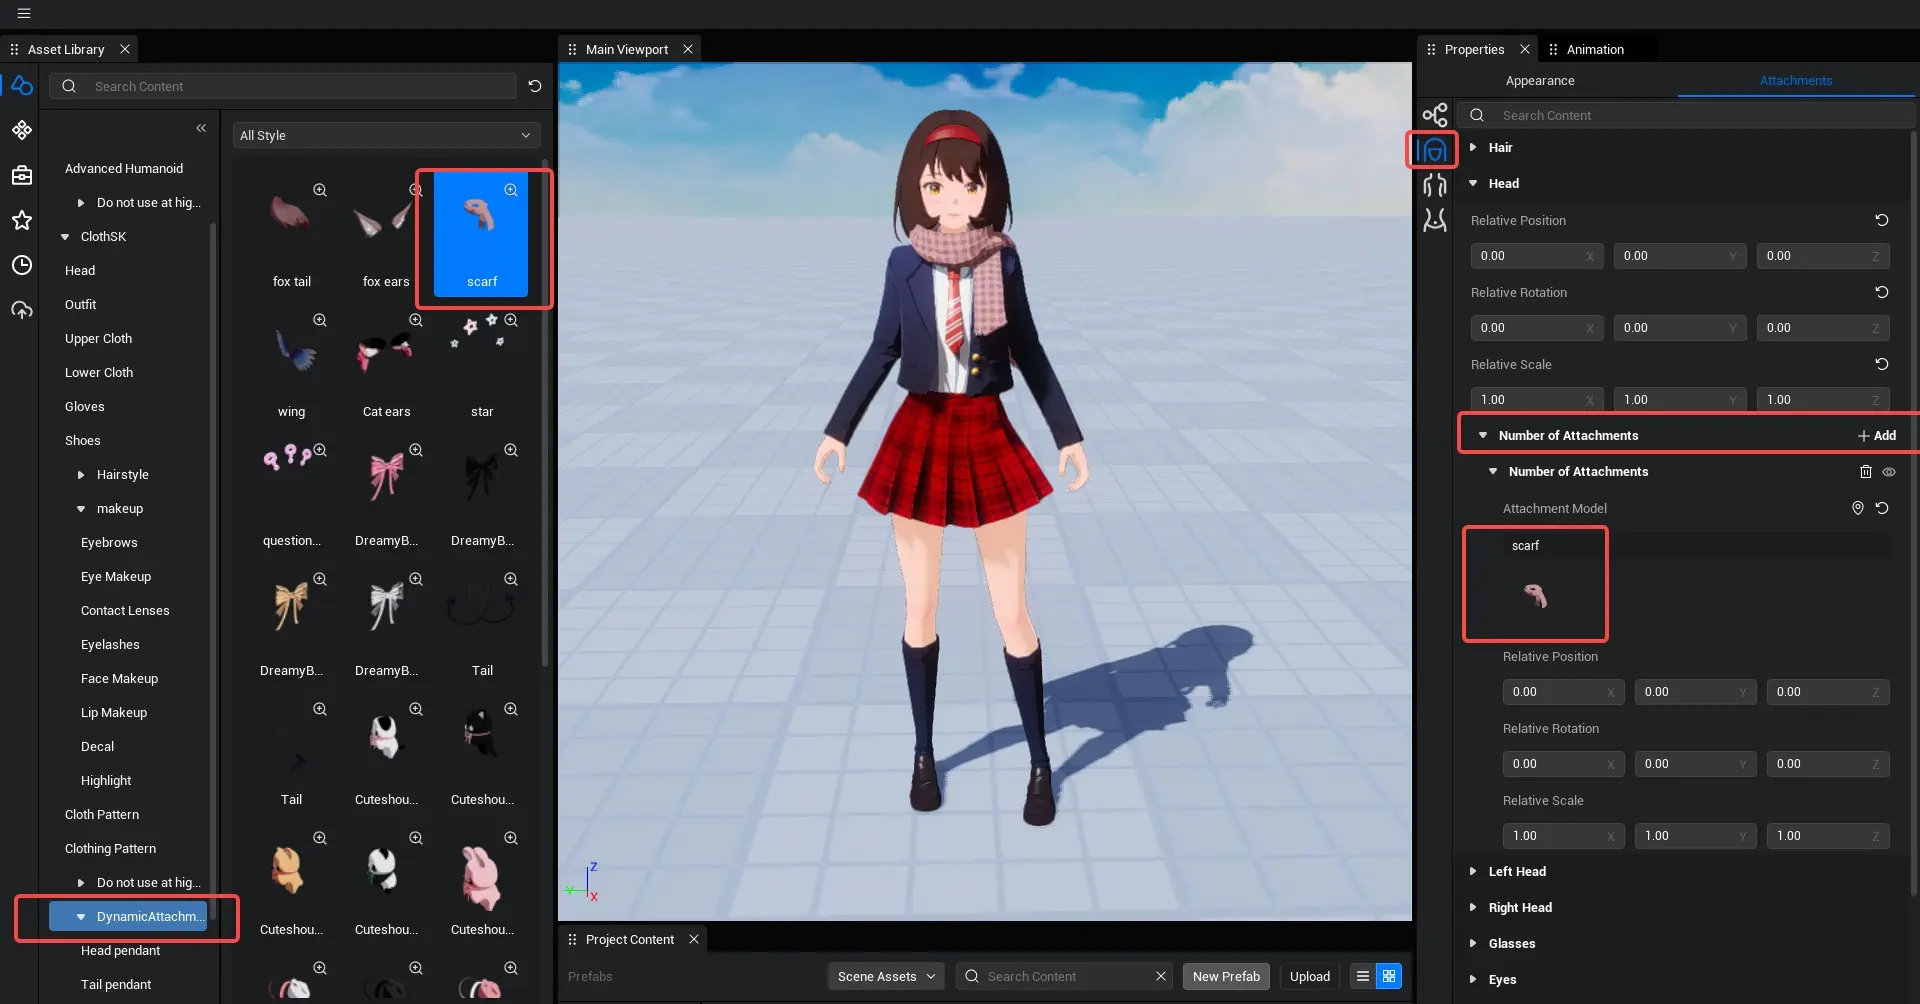
If the accessory placement is incorrect, click the accessory and adjust its position by dragging the model.
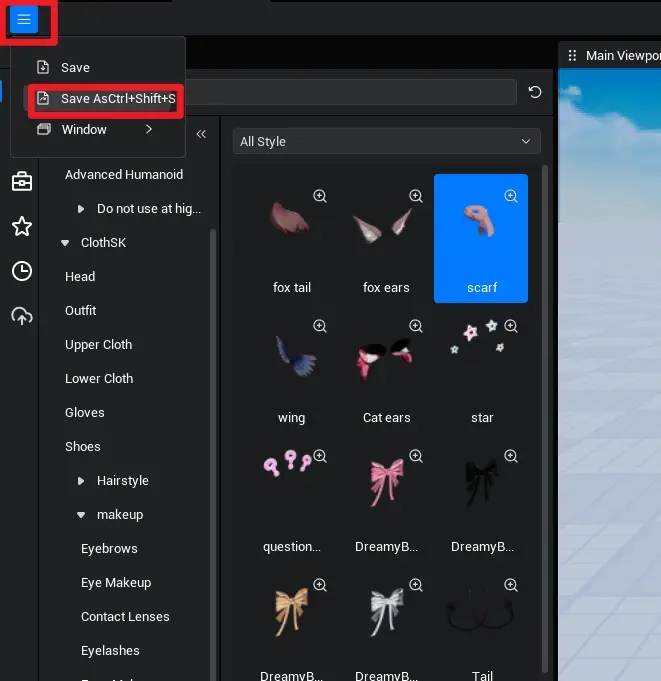
Save
After finishing the customization, select Project > Save As.
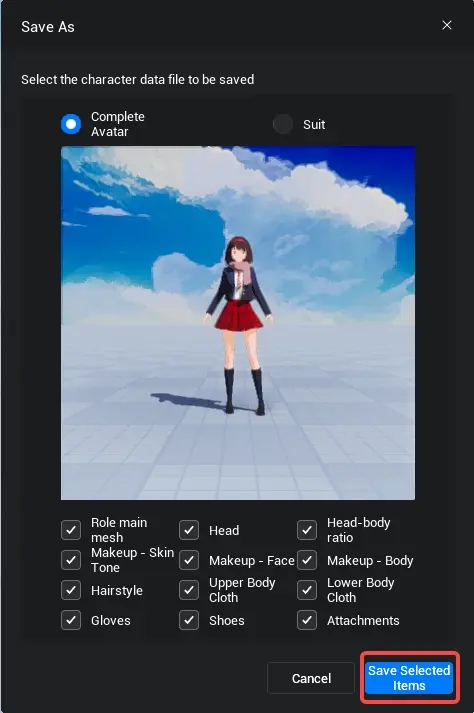
Check all items and save with a name of your choice.
Upload
Locate Saved File
- In the main interface, find your saved file under Project Content.
- Right-click the file and select Upload to send character data to the server.
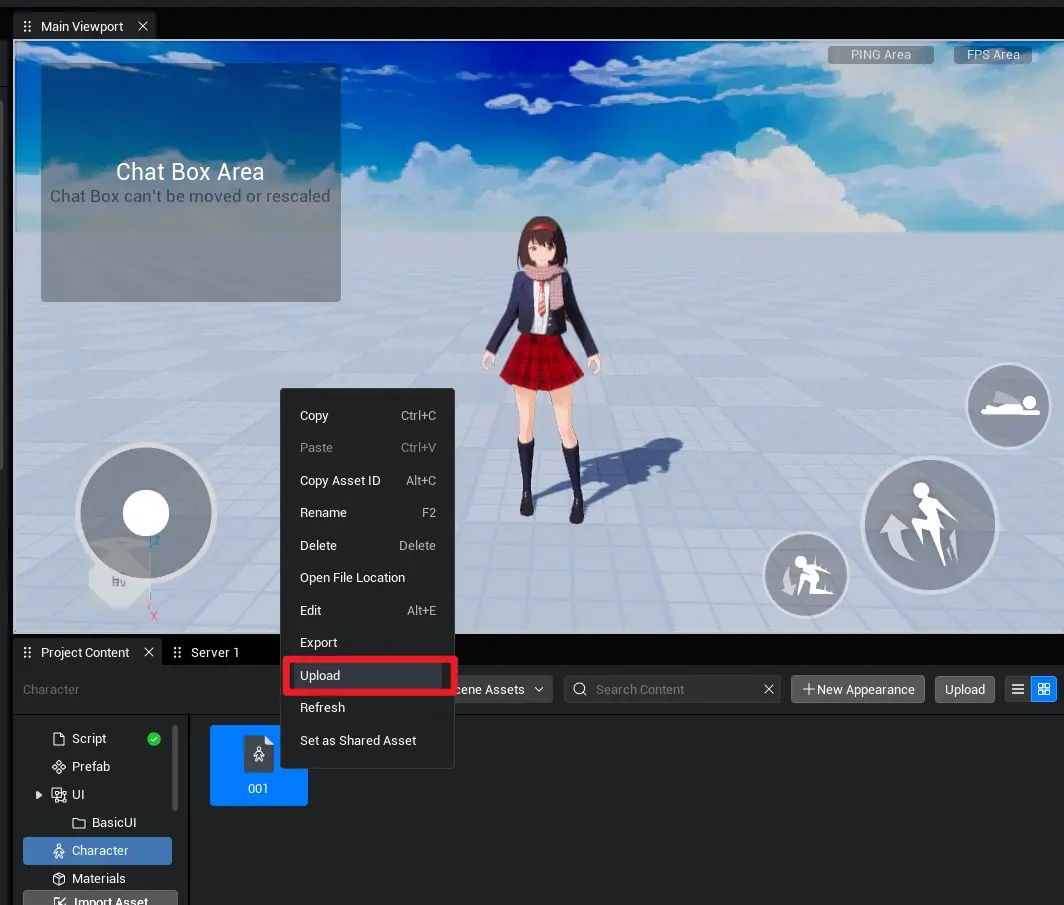
Check Resource Status
- Go to Creator Center > Resources > My Resources to verify the upload status.
