Model Rigging
Hairstyle Rigging Tutorial
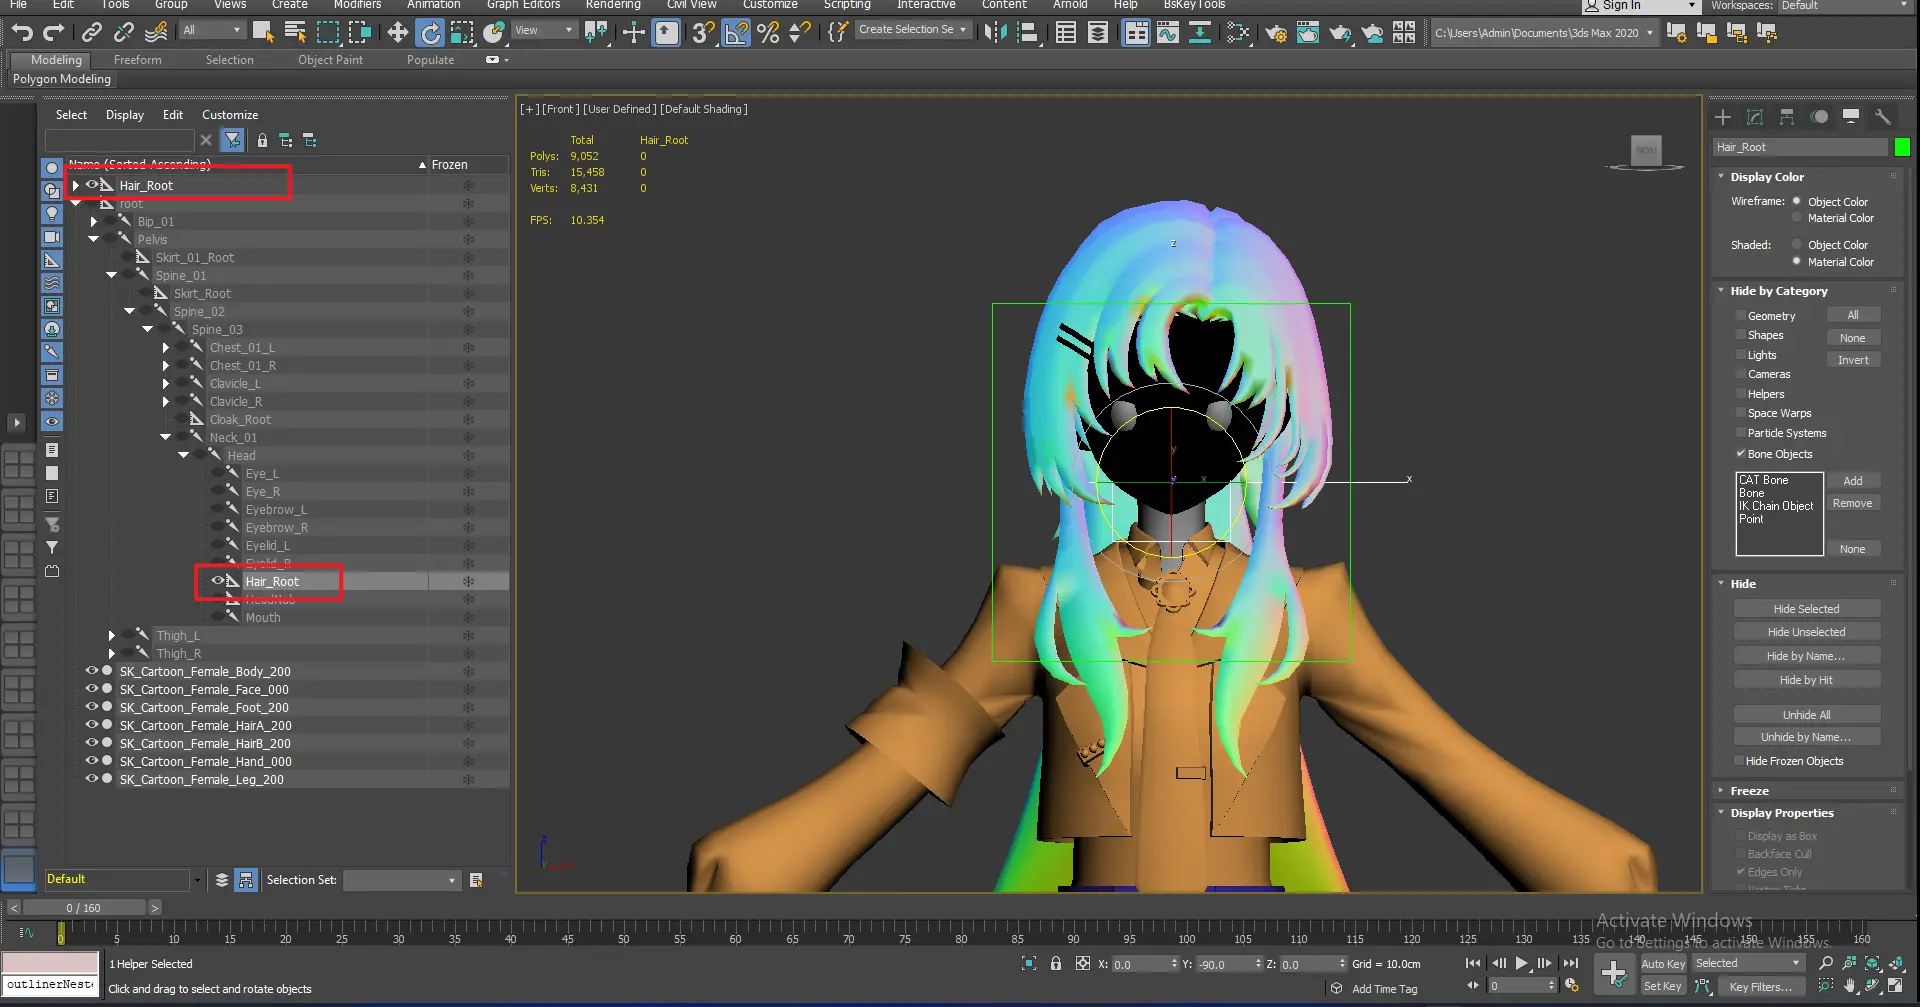
Create the Hair Attachment Point:
- Create a Hair_Root attachment point aligned with the Hair_Root point in the humanoid skeleton.
- The custom-created attachment point should have no rotation or displacement in its coordinates.
Note: There are two Hair_Root points:
One is part of the standard skeleton (cannot be modified).
The other is custom-created based on the hair model.
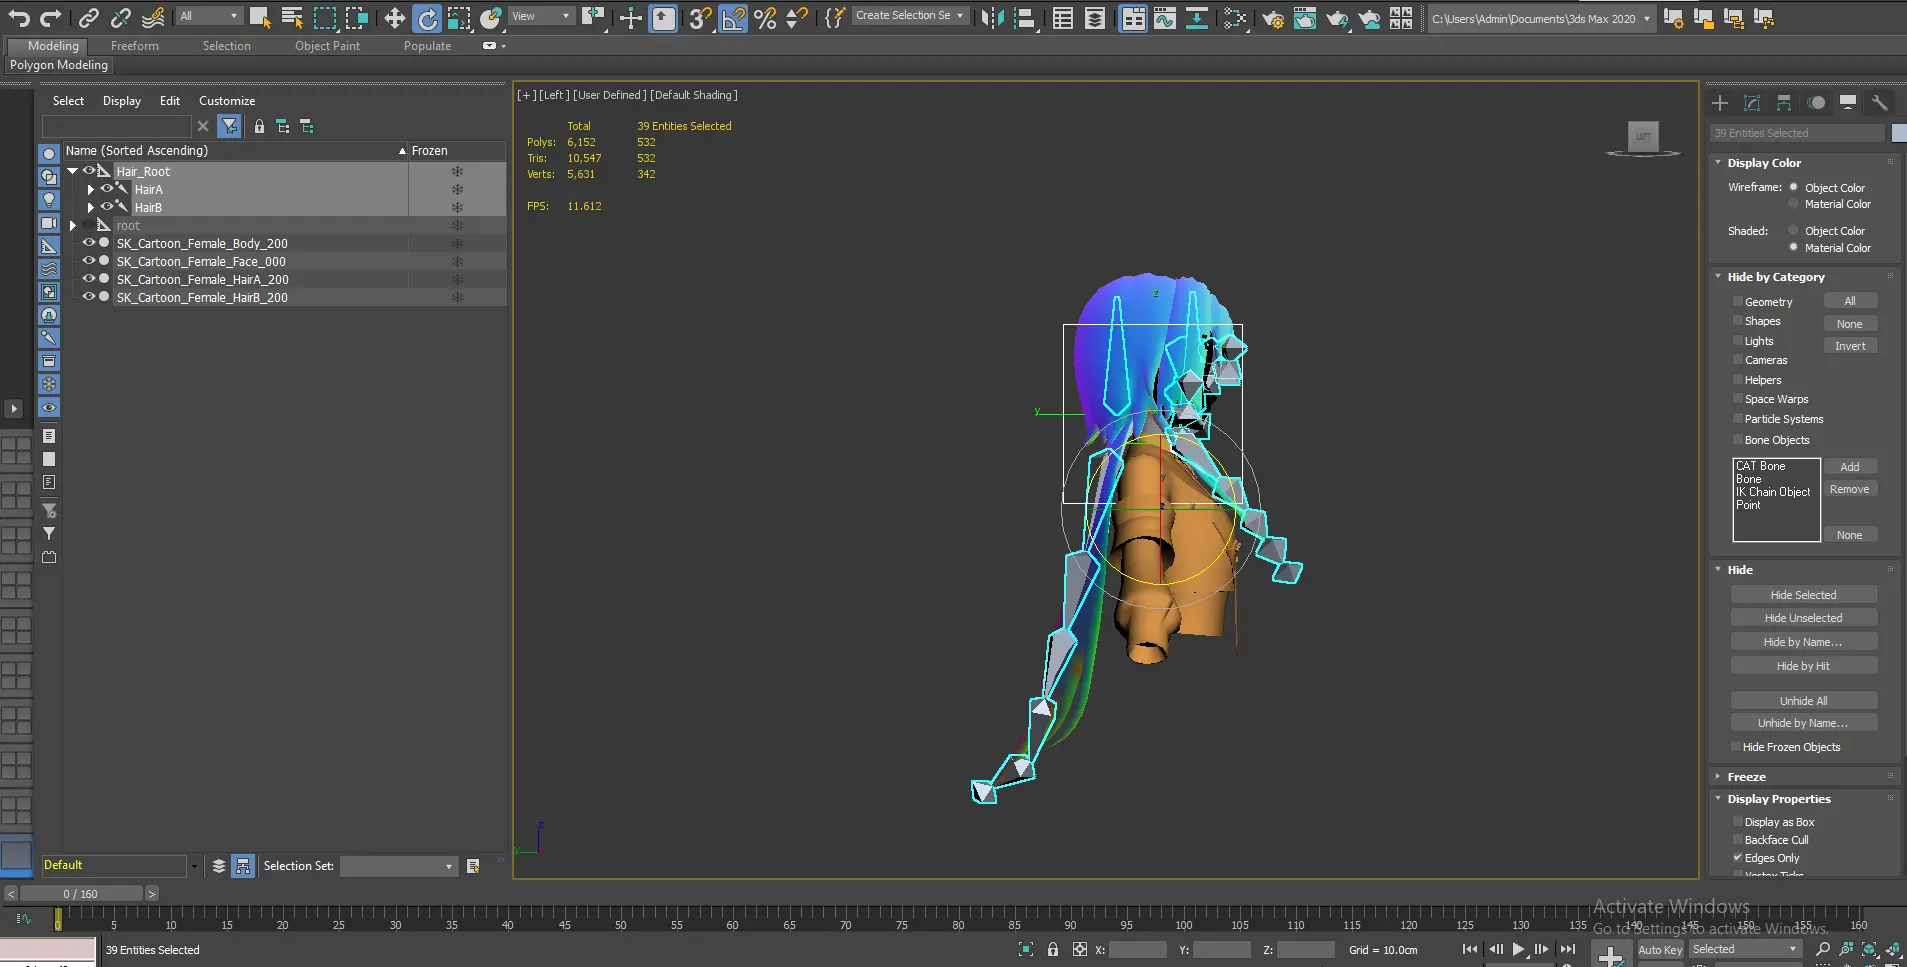
Create Hair Bones:
- Construct bones following the flow of the hairstyle.
- For front and back hair models, create separate bone chains: HairA for the front and HairB for the back.
- If the hairstyle does not separate front and back hair, only the HairB bone chain is needed.
Apply Skinning:
- Assign the Skin modifier to the front and back hair models.
- Add the corresponding bone chains (HairA and HairB) for their respective sections.
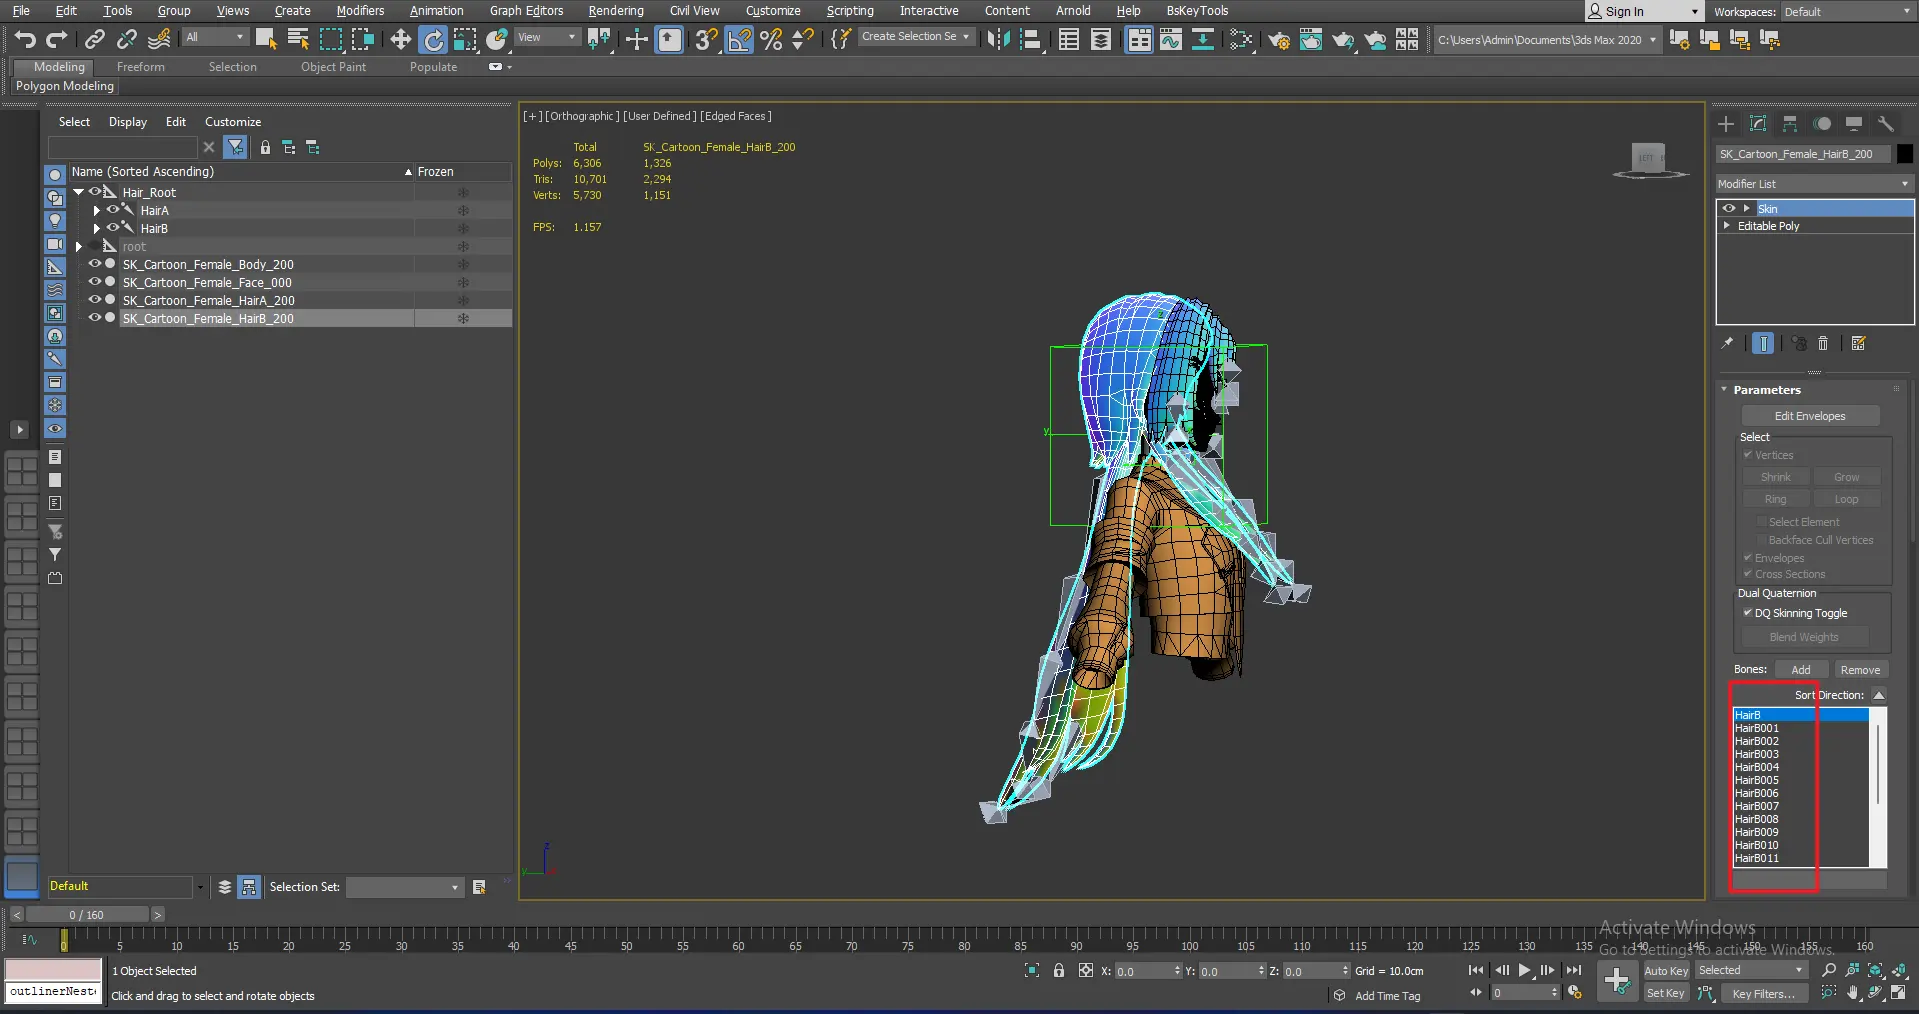
Bone Influence Limit:
- Each vertex can be influenced by a maximum of 4 bones. (Default settings in most DCC software exceed 4 and must be manually adjusted to 4.)
Weight Optimization:
- Adjust skeleton keyframes to inspect the binding weight information for overlaps or structural anomalies.
- Make targeted adjustments to optimize the weight distribution for smoother animations.
Full Workflow for Hairstyle Rigging
Clothing Rigging Tutorial
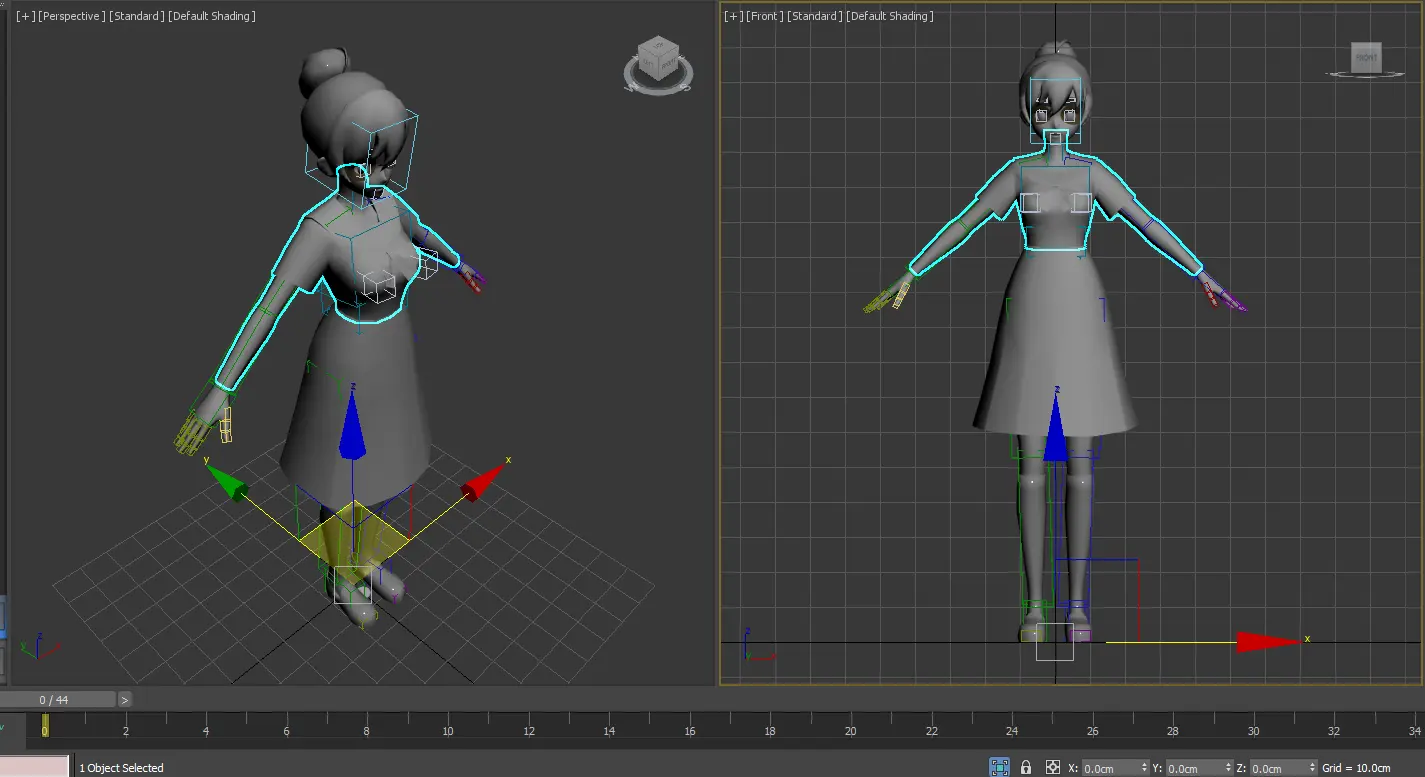
- Select the Appropriate Skeleton: Use either the internal or external skeleton for binding based on the model type.
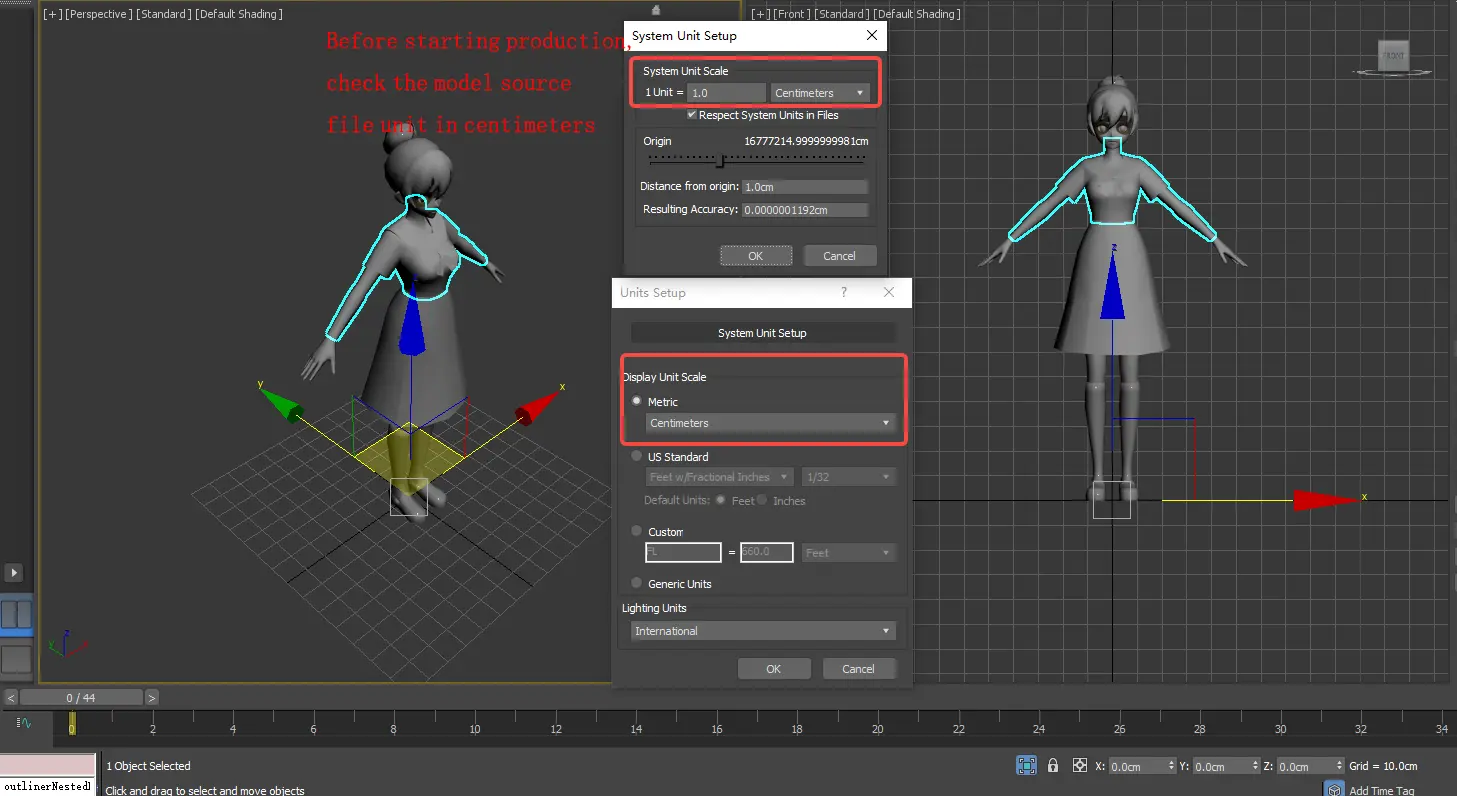
- Verify Model Orientation: Ensure the model's orientation matches the software's front view and the model's face is forward-facing. Confirm that the model's coordinates are set to (X/Y/Z = 0/0/0). Adjust if necessary.
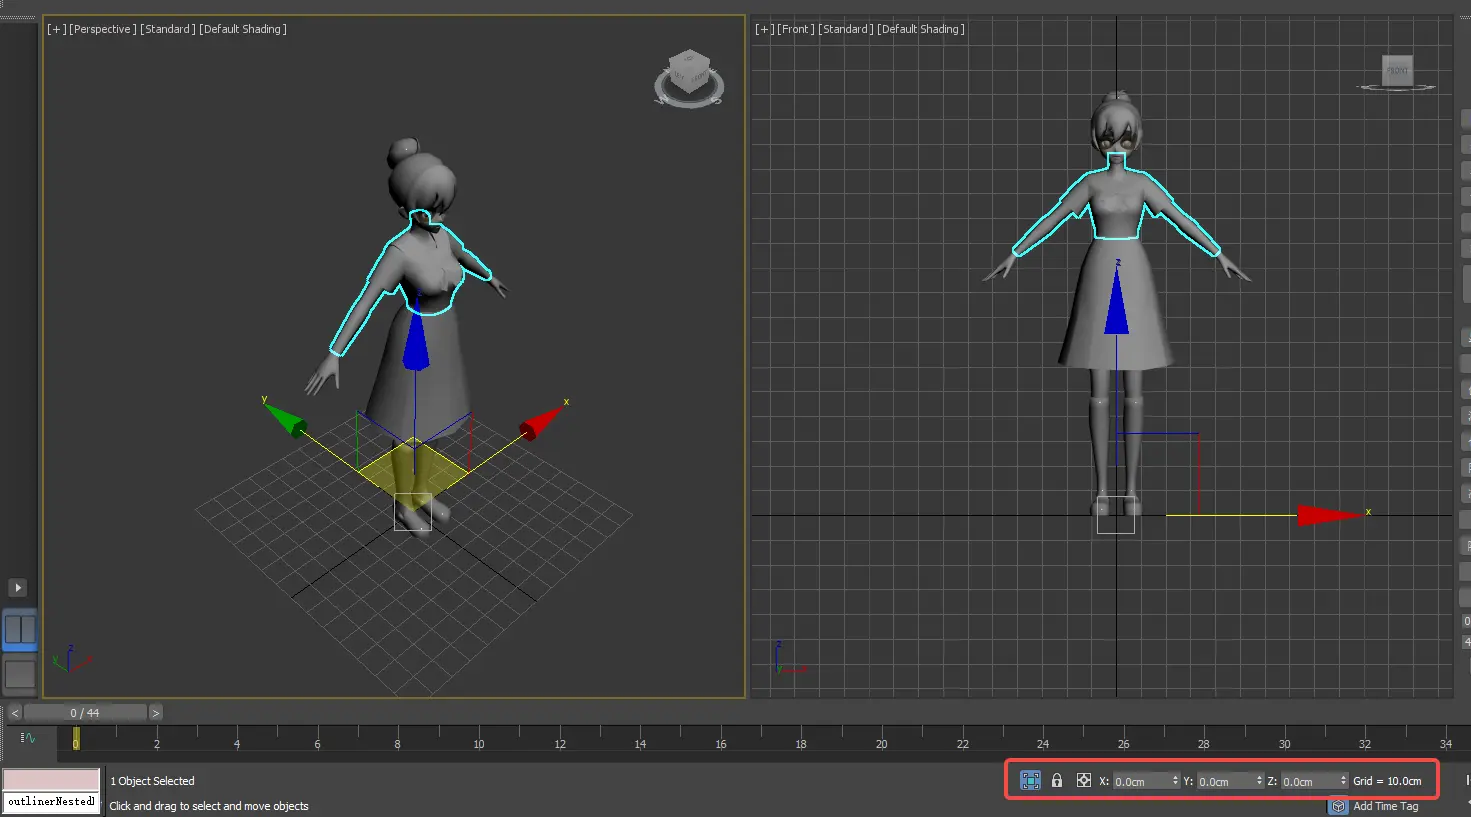
Unit Settings: Set the unit of measurement in the software to centimeters for consistency.
Match the Skeleton with the Model: Align the model's joints with the corresponding skeleton joints. Restrictions: Do not adjust skeleton hierarchy, naming, or size.
Apply Skin Modifier: Add the Skin modifier to the model and assign the required skeleton bones.
Exclude Certain Bones: Exclude Bip_01 and Root from the skinning process.
Bone Influence Limit: Ensure that each vertex is influenced by a maximum of 3 bones. (Most DCC software defaults exceed this and must be manually adjusted.)

- Adjust Keyframes for Testing: Modify skeleton keyframes to inspect binding weights for any overlaps or structural anomalies. Make necessary optimizations.
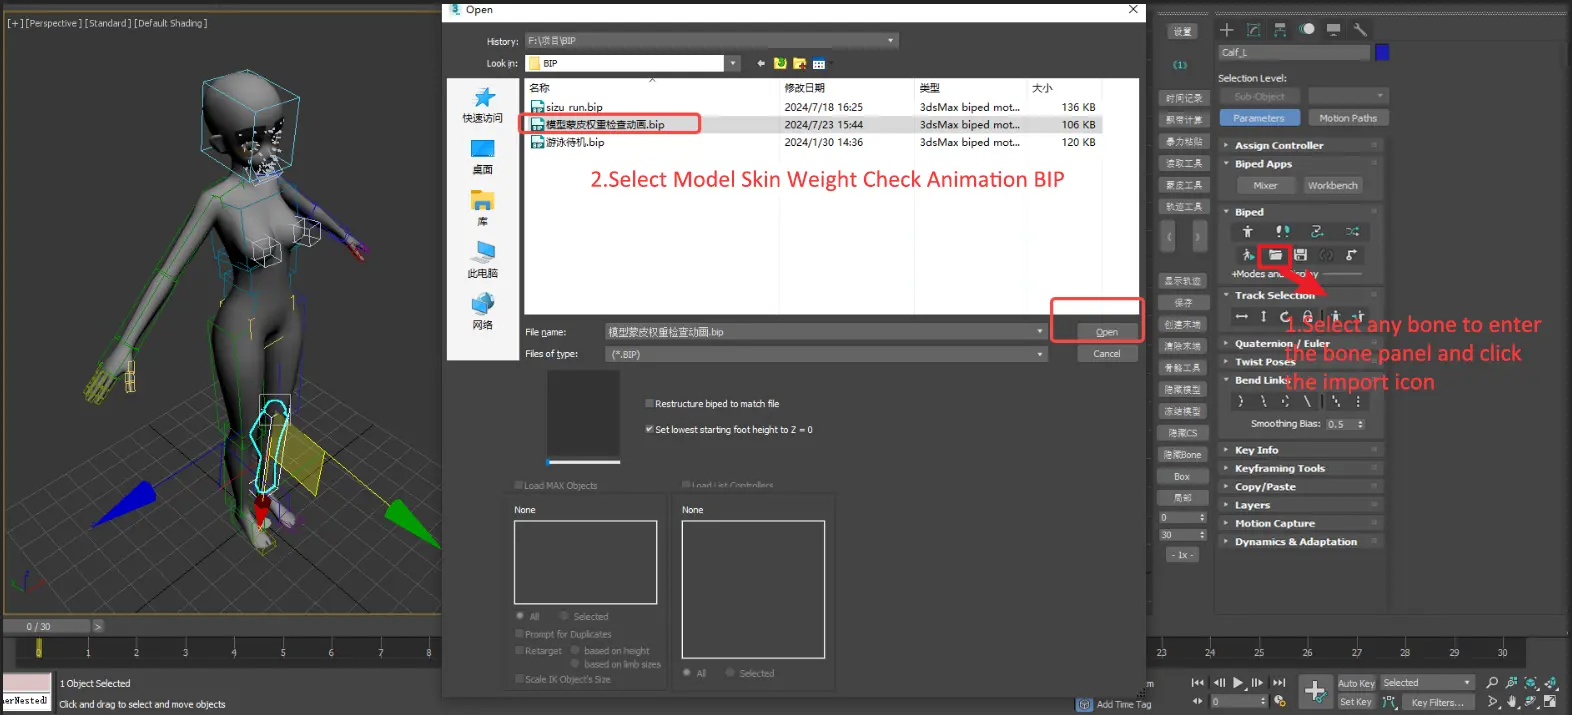
- Import Weight Check Animation: Test the model and skeleton for potential issues like stretching, clipping, or broken faces.
- Download: Skin Weight Check Animation
Seam Weight Standards for Base Model Integration:
Base Model Seam Alignment: Ensure weight consistency at seams to prevent clipping or breaking during animation.
Weight Assignment Example: For the waist seam, both the top and bottom models should share the same weight values (e.g., Spine_01:1).
Seam Location Female Weight Reference Weight Assignment Male Weight Reference Weight Assignment Neck (Top Seam): 
Head:0.5
Neck_01:0.5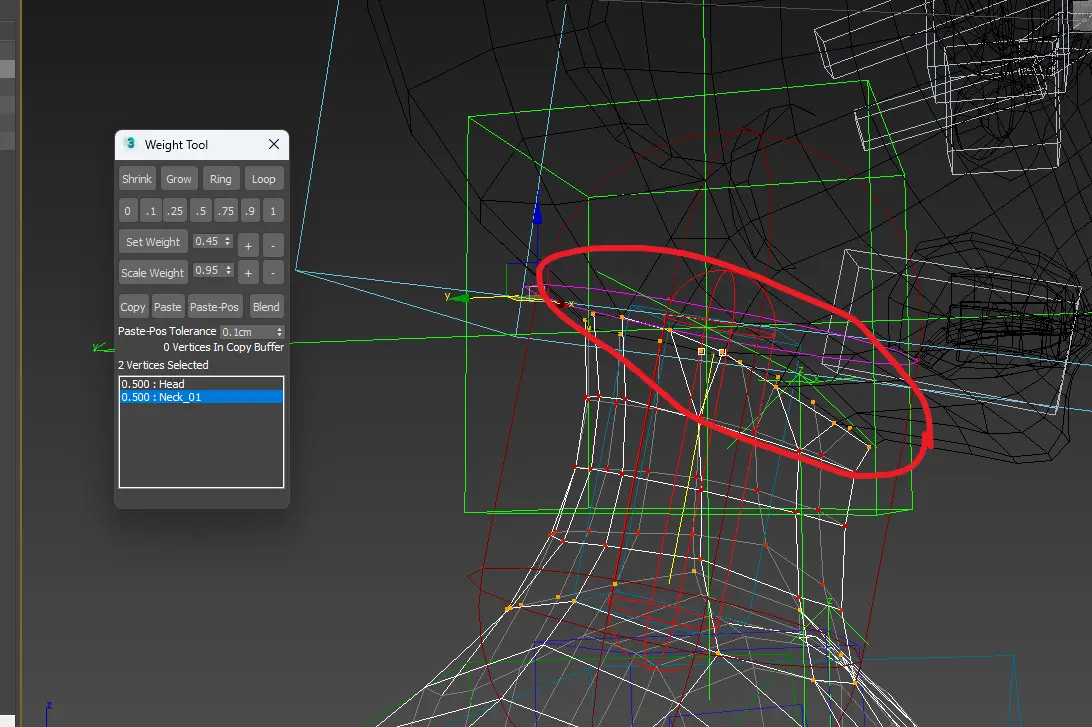
Head:0.5
Neck_01:0.5Glove (Top Seam): 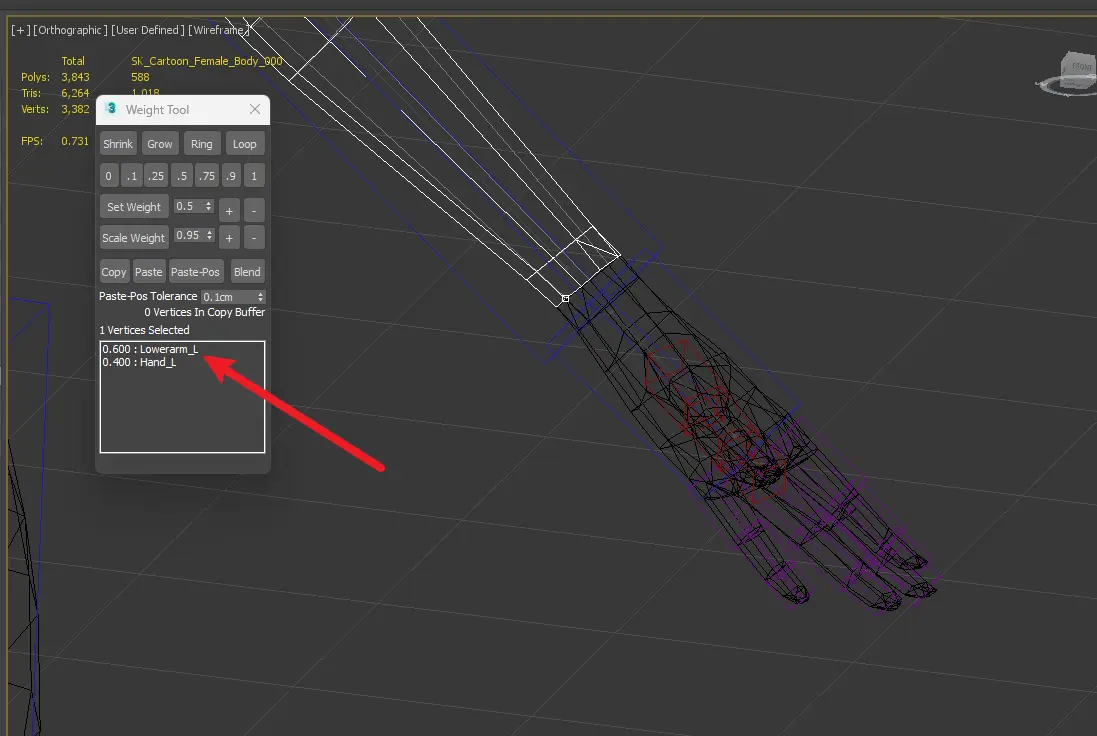
Hand_L:0.4
Lowerarm_L:0.6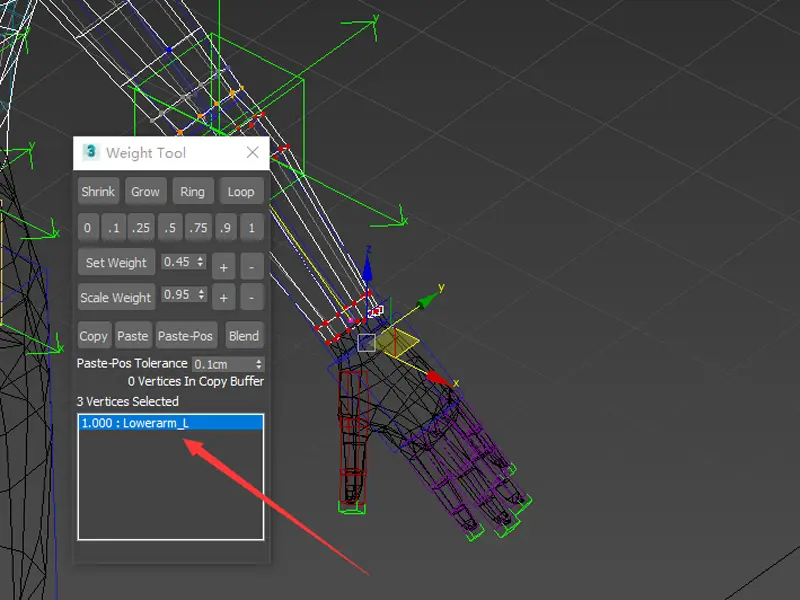
Hand_L:0
Lowerarm_L:1Top-Bottom Seam: 
Spine_01:1 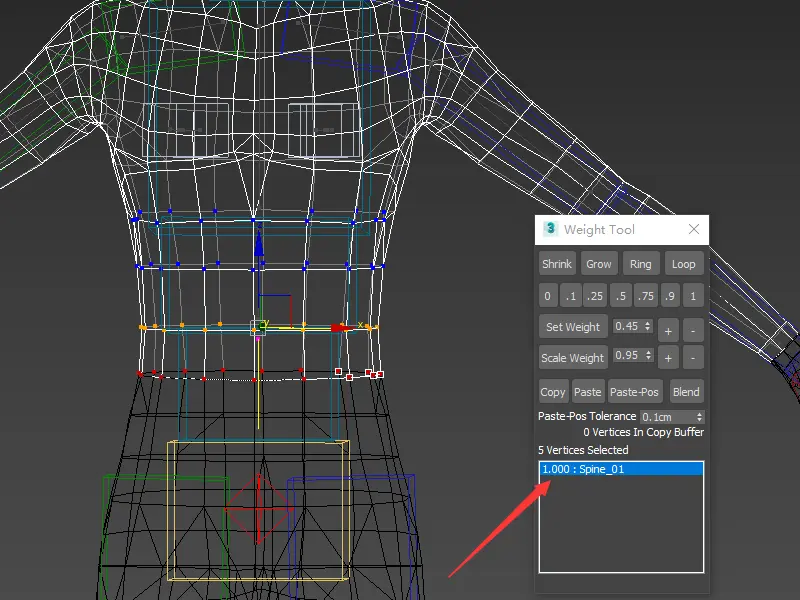
Spine_01:1 Bottom-Shoe Seam: 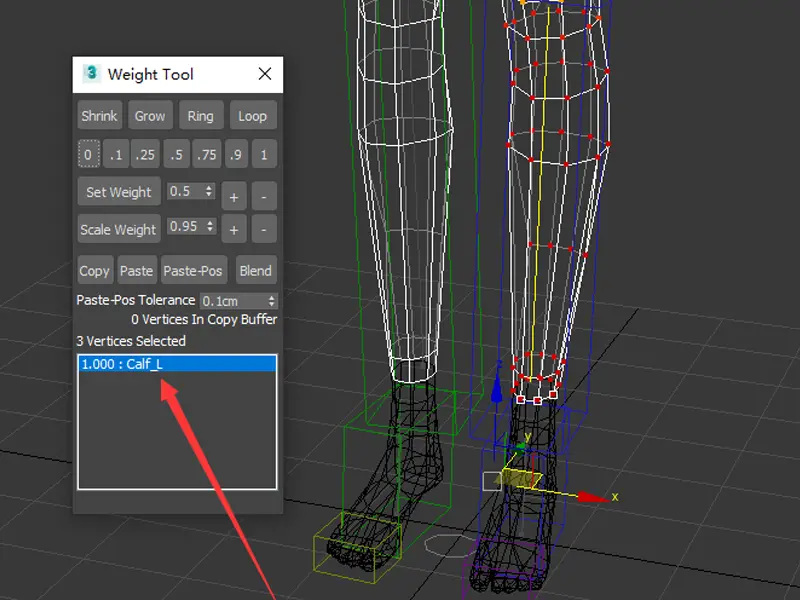
Calf_L:1 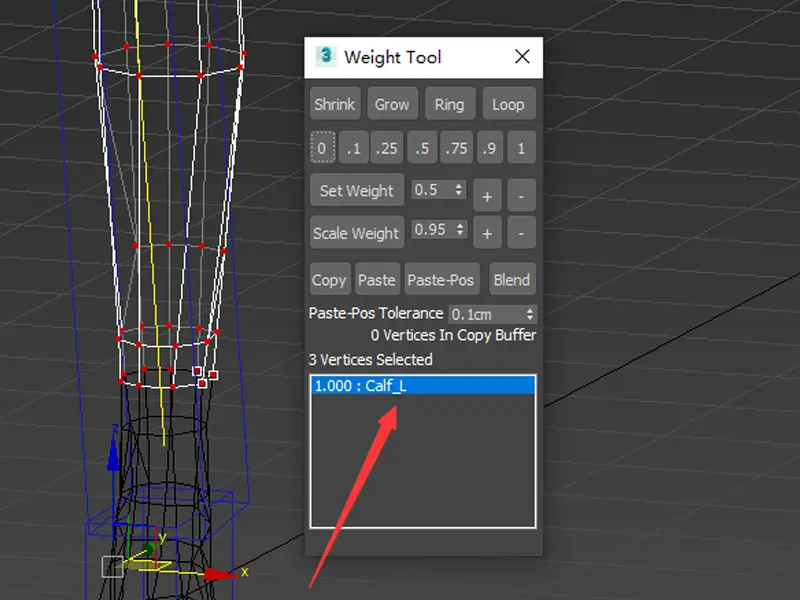
Calf_L:1