Resource Export
Export as FBX
Resources must be exported in FBX format.
Export from DCC software, ensuring that both the model and skeleton are included.
During export, verify the skeleton count against the skeleton verification table.
Do not modify the skeleton hierarchy or count.
General Guidelines
Select Components:
- Include the model and skeleton (including bones, attachment points, and terminal bones).
Axis Settings:
- Set Up Axis to Z-up.
Animation Panel Settings:
- Uncheck Animation during export.
External Outfit Components
- Included Parts:
- Top, bottom, gloves, and shoes (four parts).
- Bone Selection:
- Select all bones (including attachment points and terminal bones).
- Total bone count: 139.
- Model Selection:
- Select the clothing model.
- Total Entity Count:
- Bones + Model = 140.
- Export as FBX:
- After selecting the components, click Export FBX and configure the export settings accordingly.
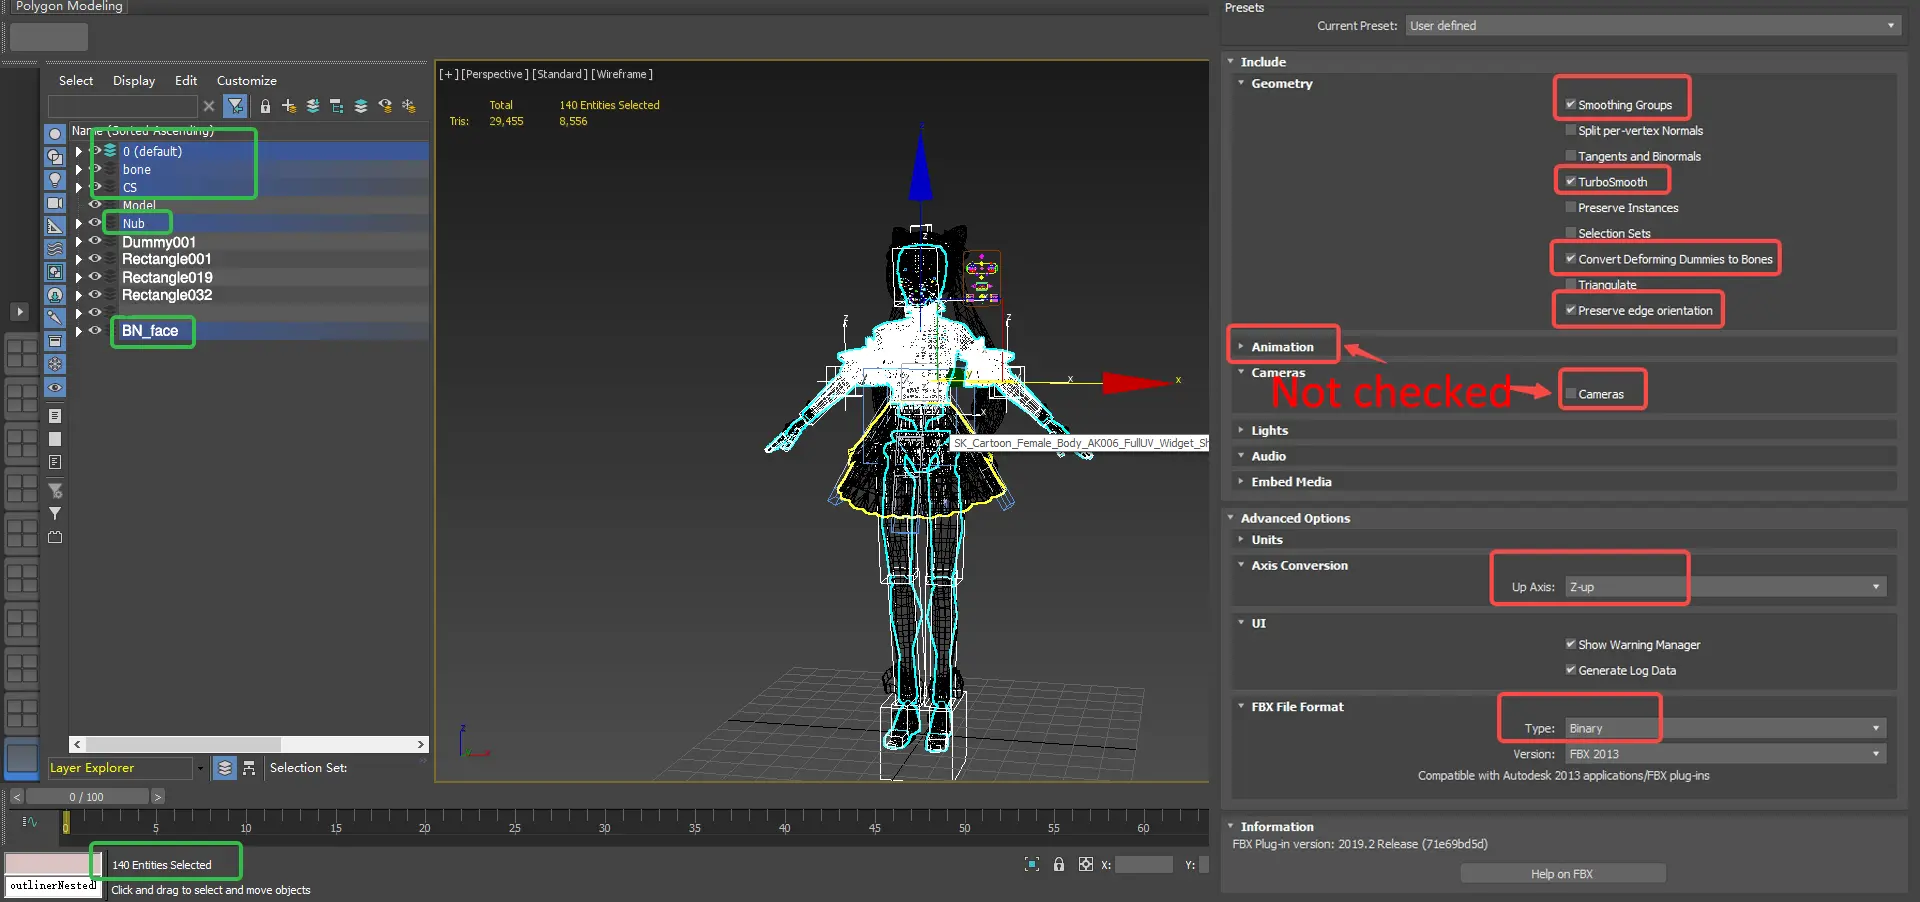
- Once exported, the resources can be uploaded to the GPark Editor for integration.
Internal Outfit Components:
Included Parts: Top, bottom, gloves, and shoes (four parts).
Bone Selection: Select all bones, including attachment points and terminal bones.
- Total Bone Count: 84.
- Total Entity Count: Bones + Model = 85.
Export Process:
- Click Export FBX and configure the FBX settings.
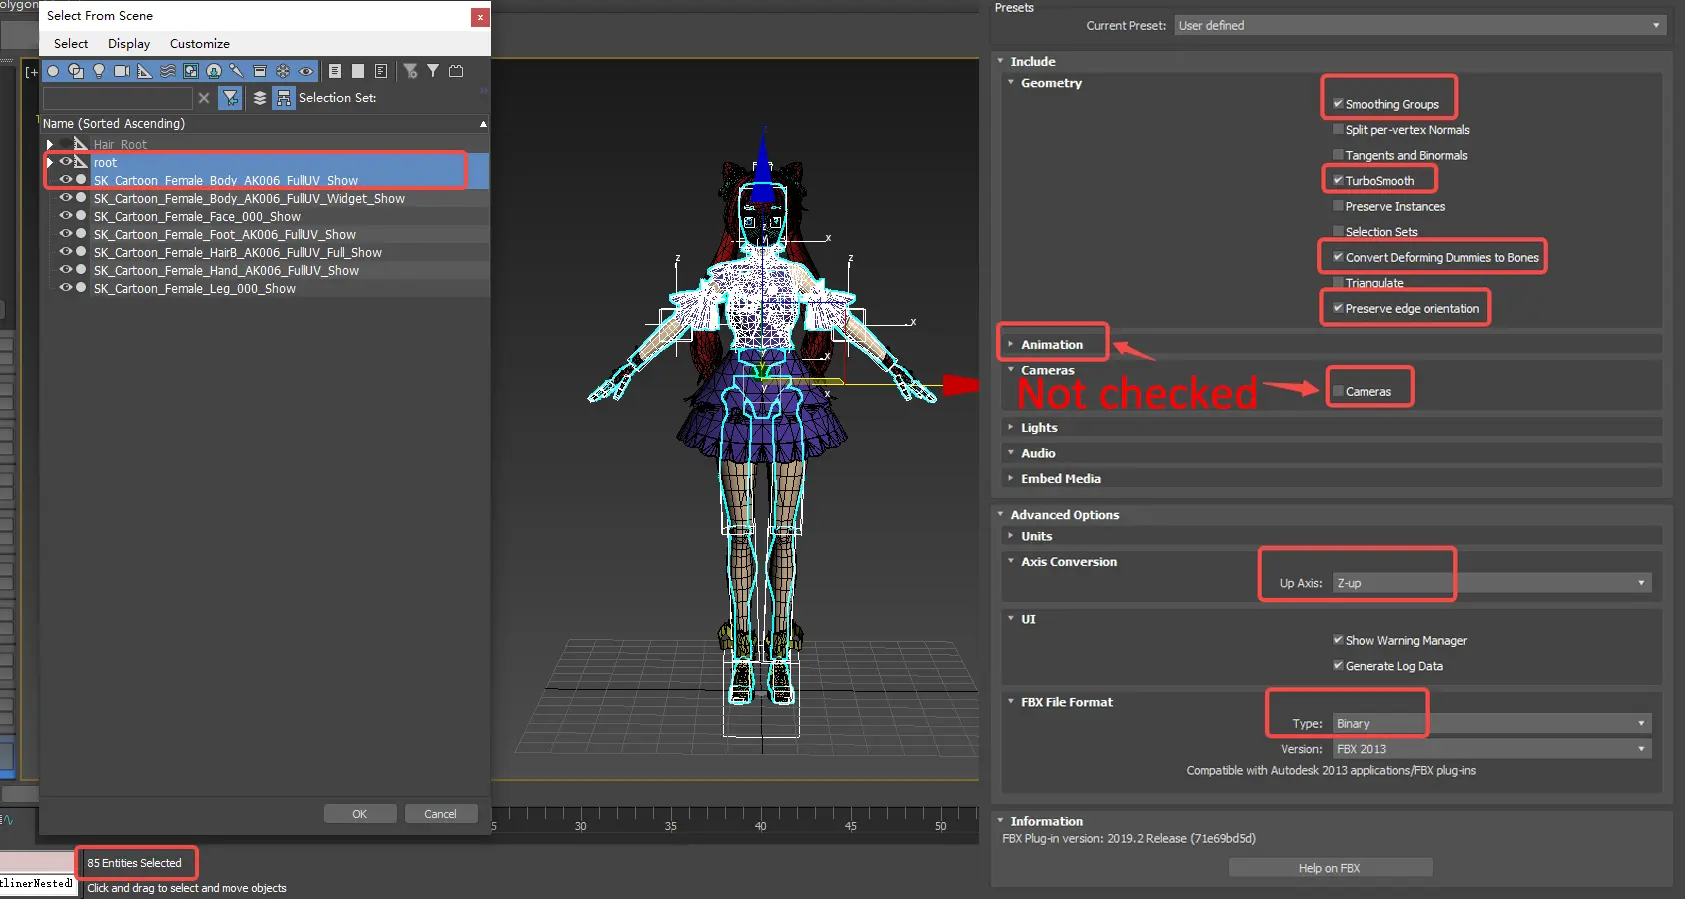
- Upload: Once exported, the resources can be uploaded to the GPark Editor:
Hair
Attachment Point Reset
- Select the Hair_Root virtual body attachment point and reset its coordinates to zero.
- Rotate the Y-axis by 90 degrees.
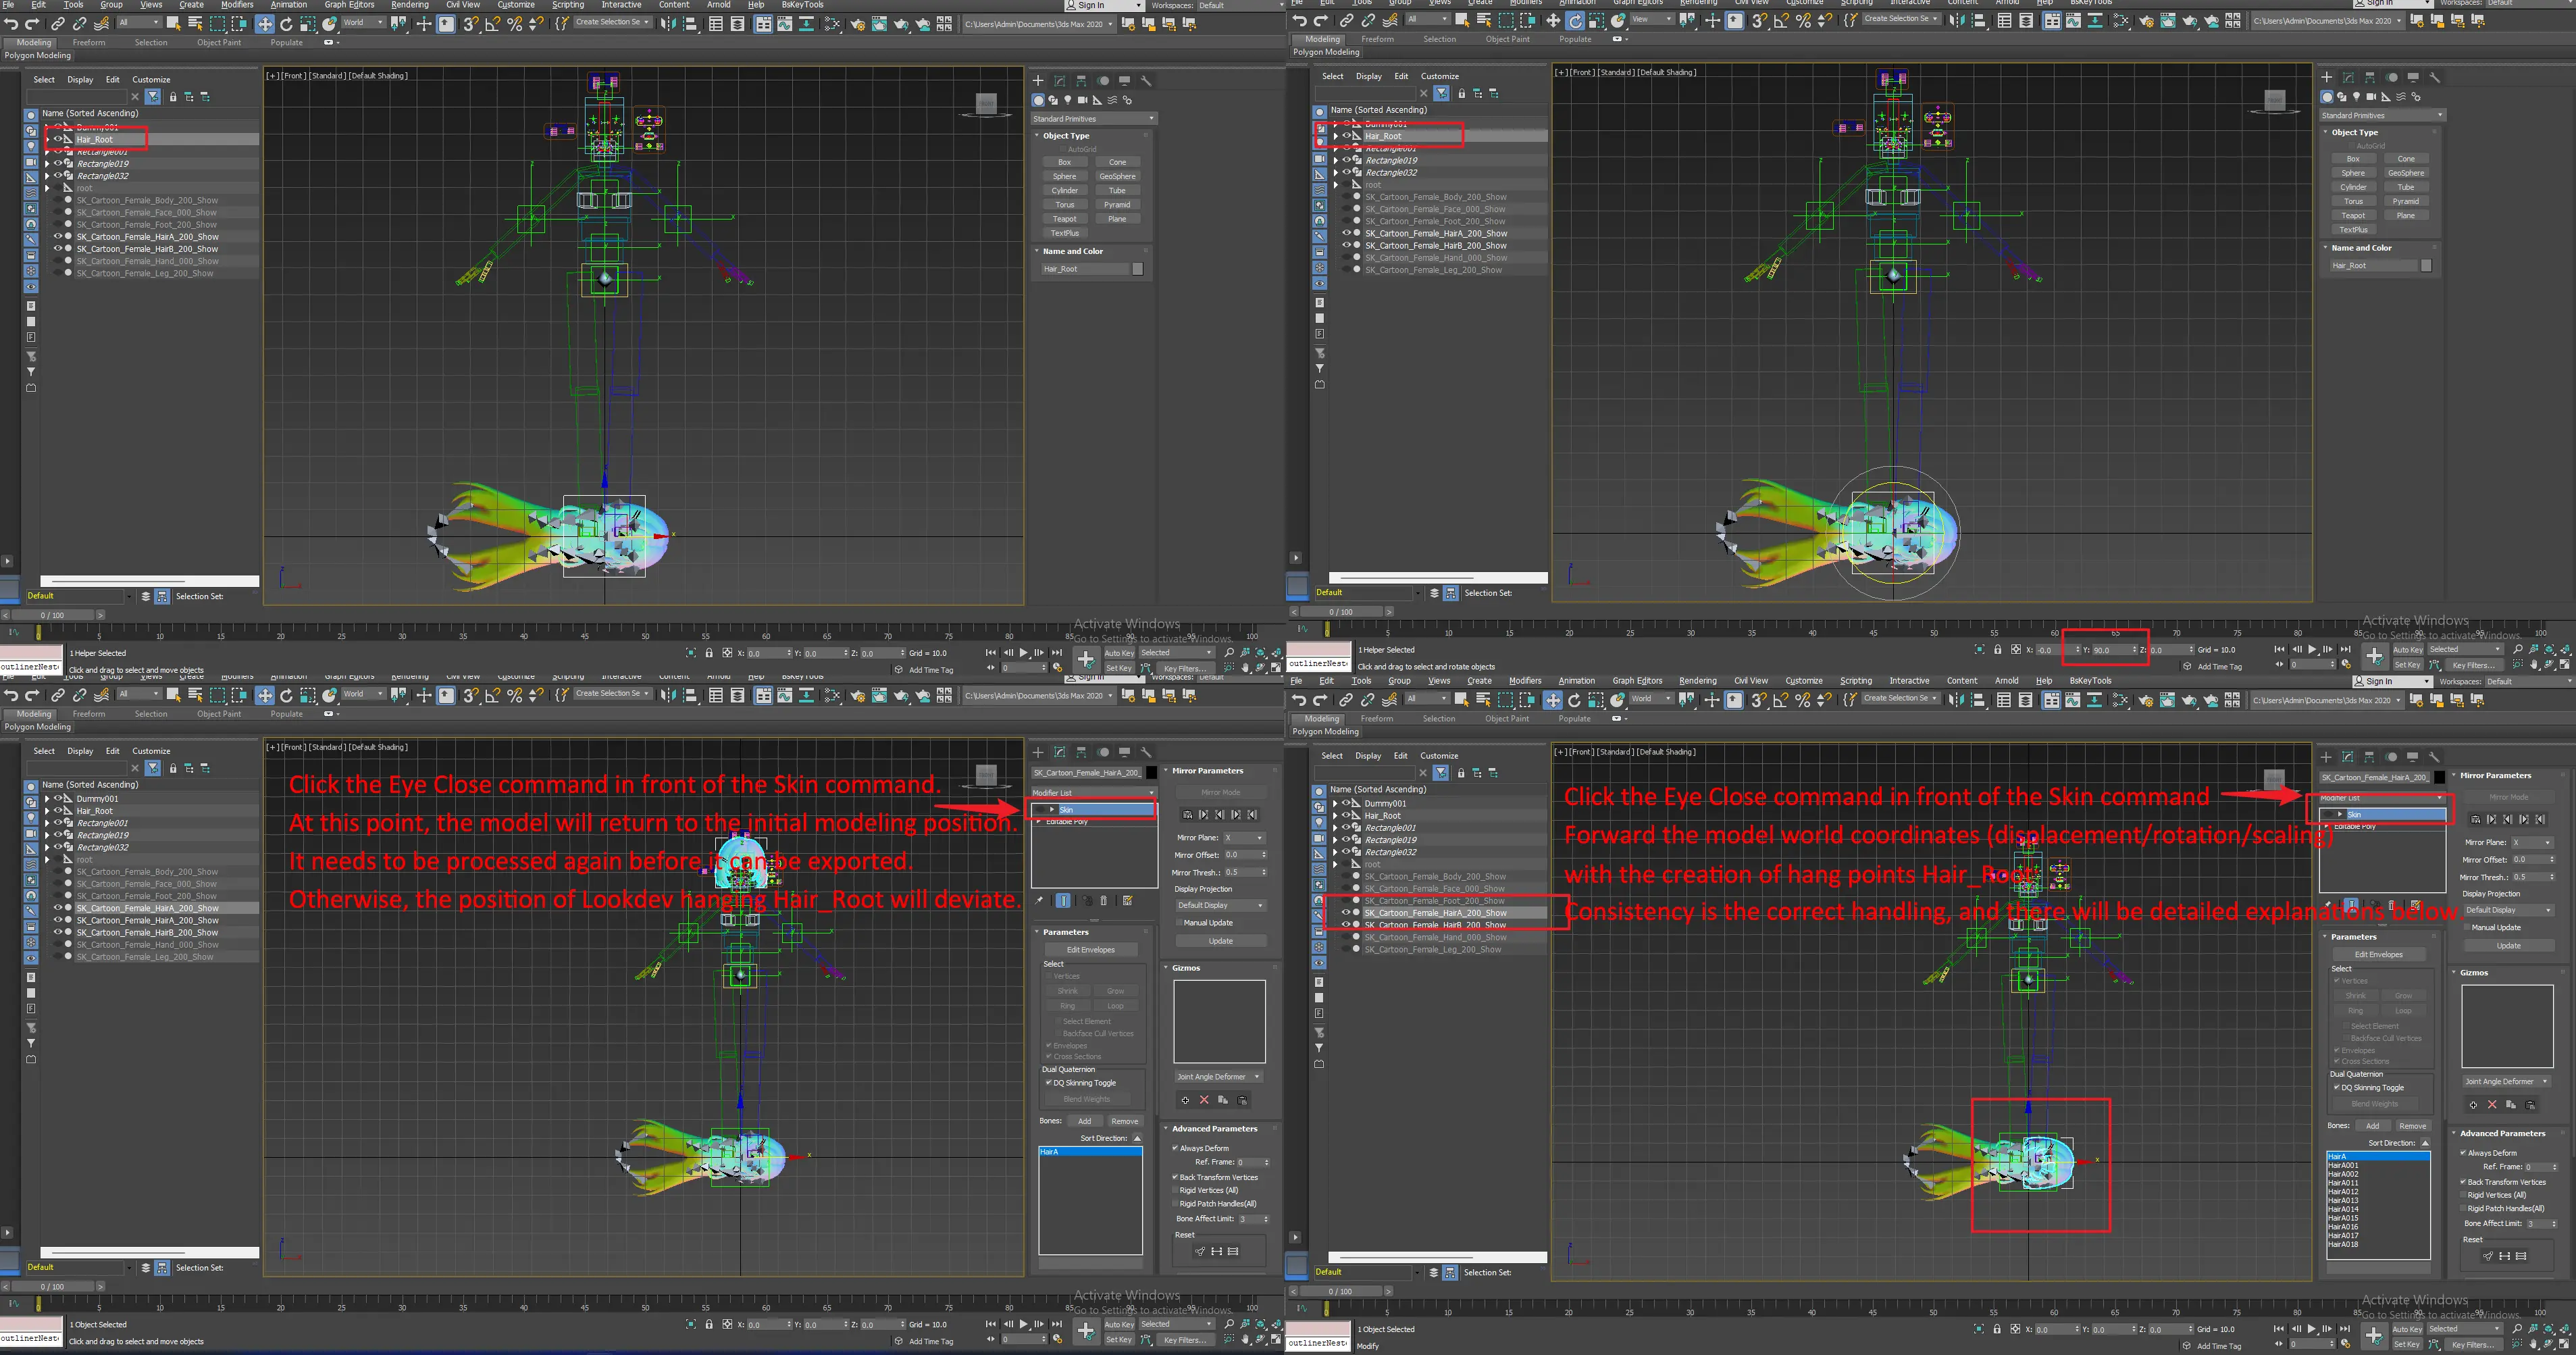
Unprocessed Model: When the skin modifier is disabled, the model coordinates do not align with the Hair_Root attachment point.
Example: Front hair before processing.
Processed Model: After processing, when the skin modifier is disabled, the model coordinates align perfectly with the Hair_Root attachment point.
Example: Front hair after processing.
Complete Hairstyle Export: Double-click Hair_Root to select both the hair skeleton chain and hair model.
- For hairstyles differentiated into front and back sections, select the front hair model with HairA bones and back hair model with HairB bones separately, and export the skin weight information.
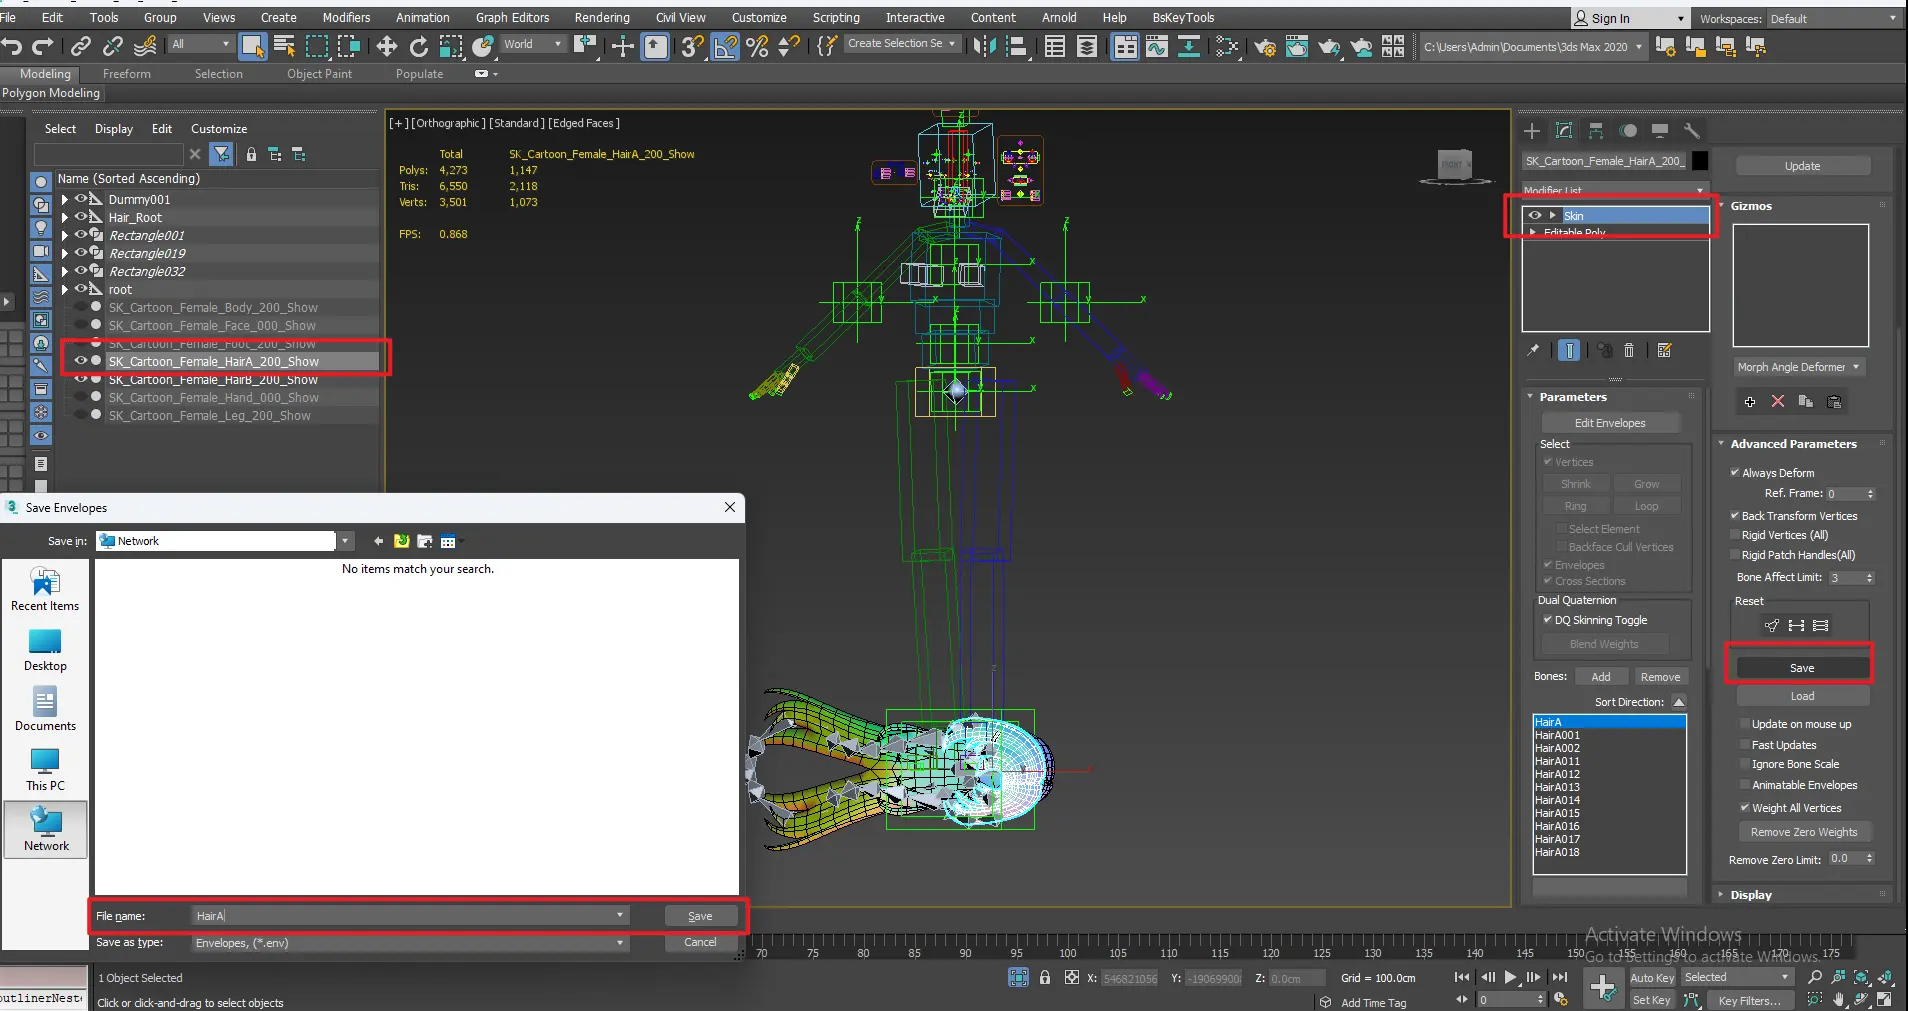
Collapsed Model Skin Data: Reapply the skin modifier to the collapsed model.

- Bone Influence Limit: Set the vertex influence limit to 3
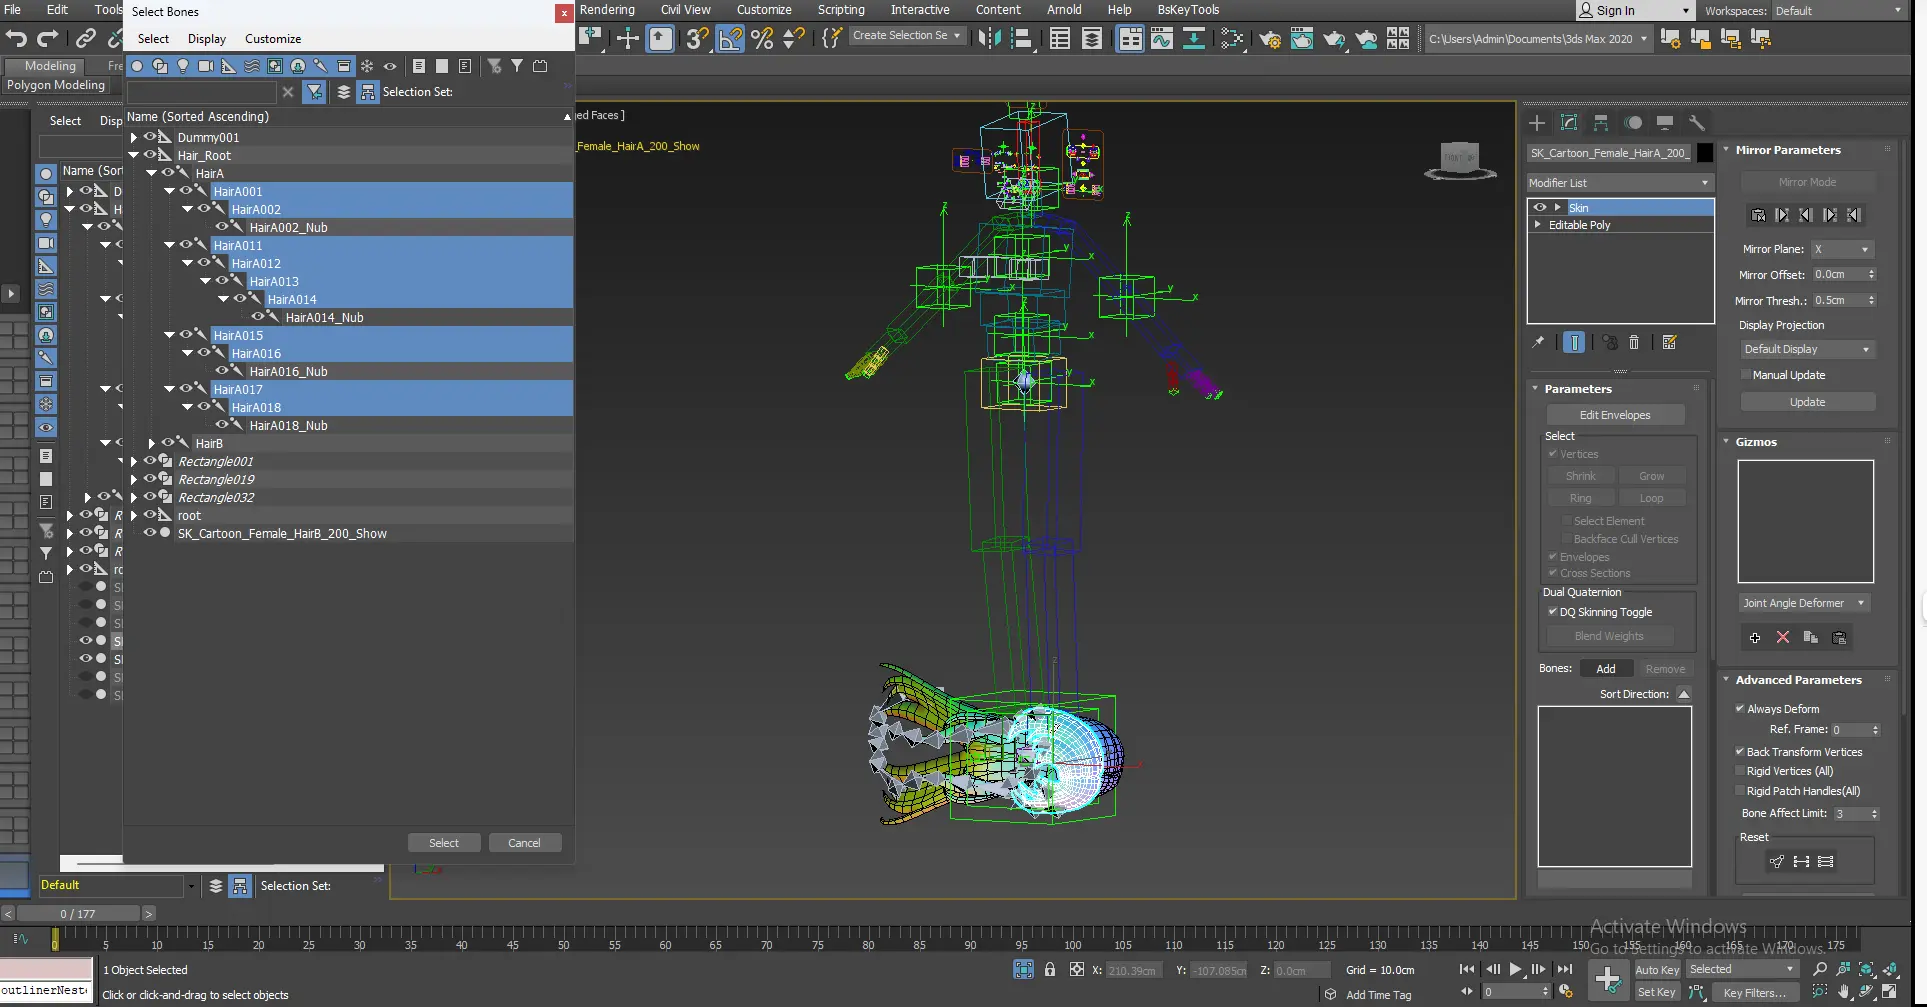
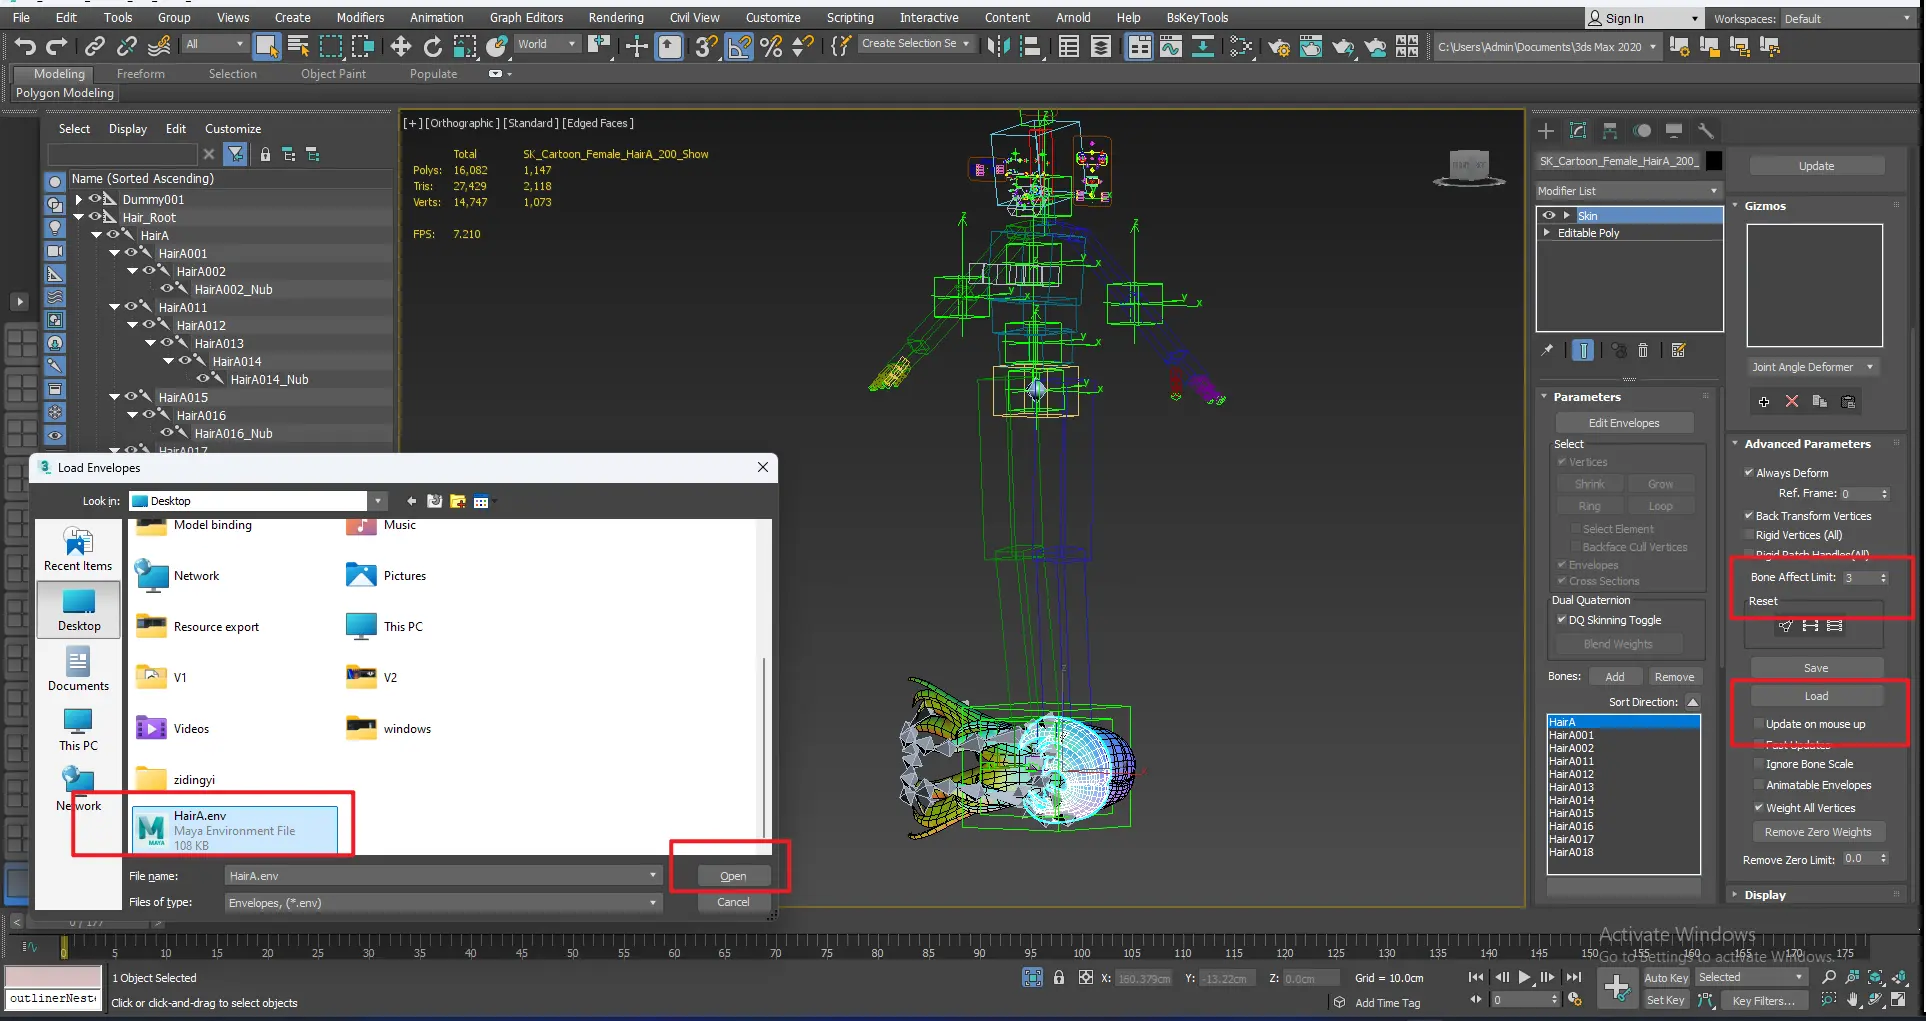
- Load Exported Skin Weight Data
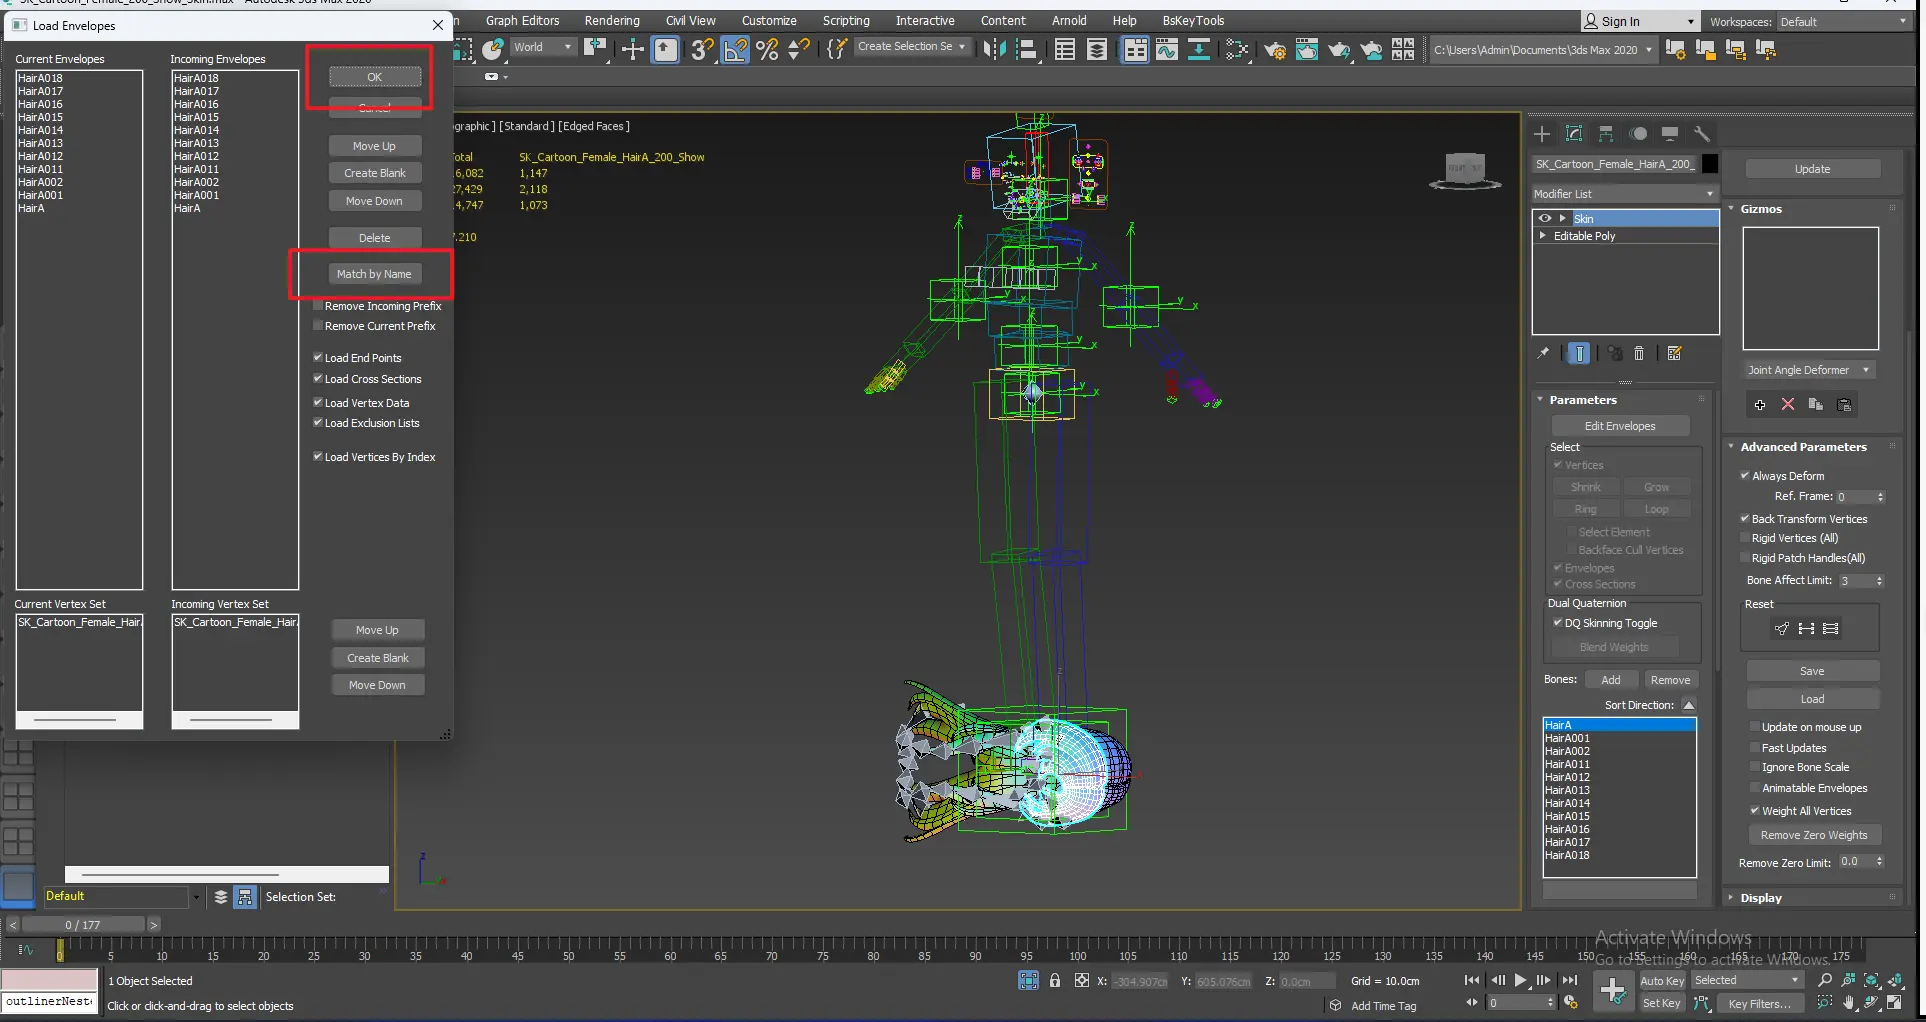
- Match by Name, then choose confirm.
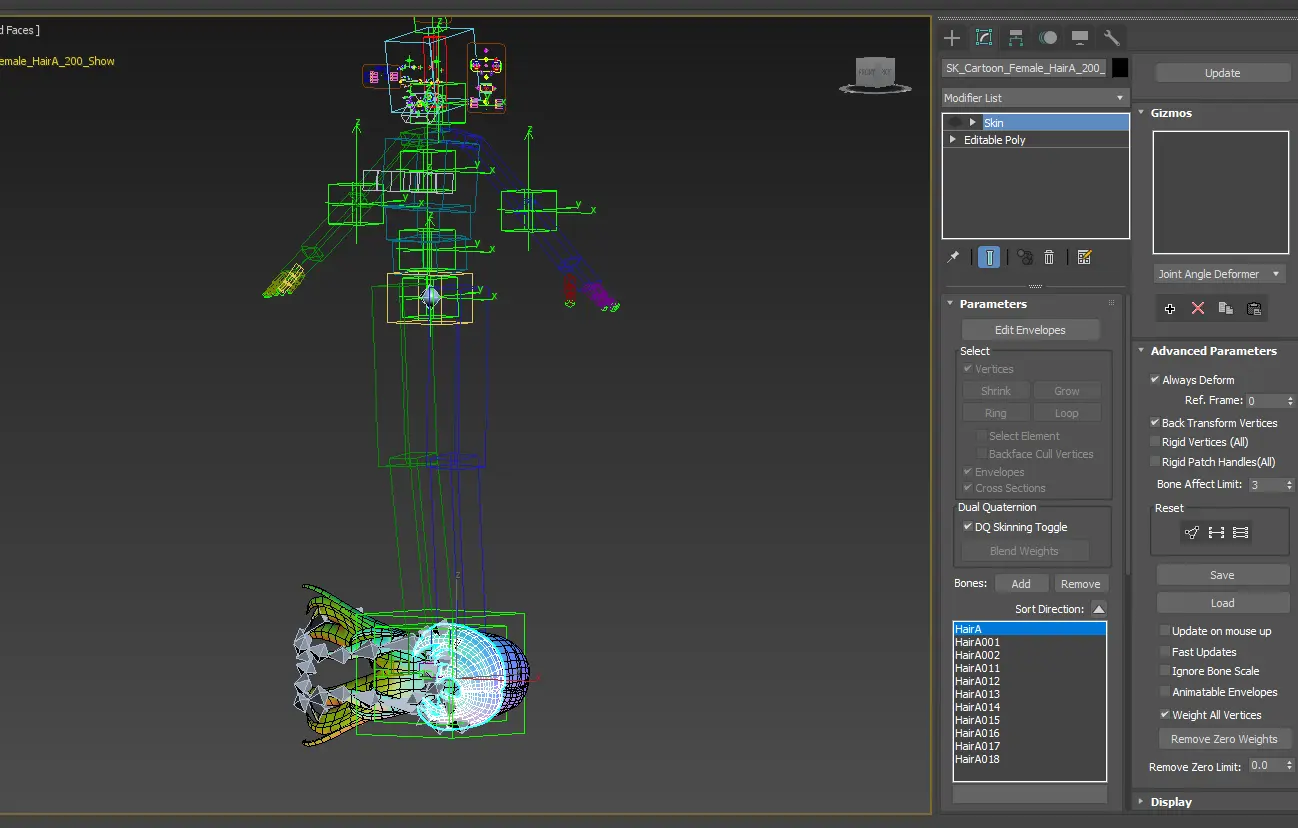
- At this stage, disabling the skin modifier will prevent the model from snapping back or deforming unexpectedly (e.g., front hair as an example).
- If the coordinate reset operation is not performed, the hair will be incorrectly attached to the wrong position in the editor.
Export
Complete Hairstyle:
- Double-click Hair_Root to select both the hair skeleton chain and the hair model.
Separated Front and Back Hair:
- Select the front hair model + HairA bones and the back hair model + HairB bones separately.
- Export each as an individual FBX file.
Entity Count:
- The total number of exported entities will depend on the number of custom bones in your setup.
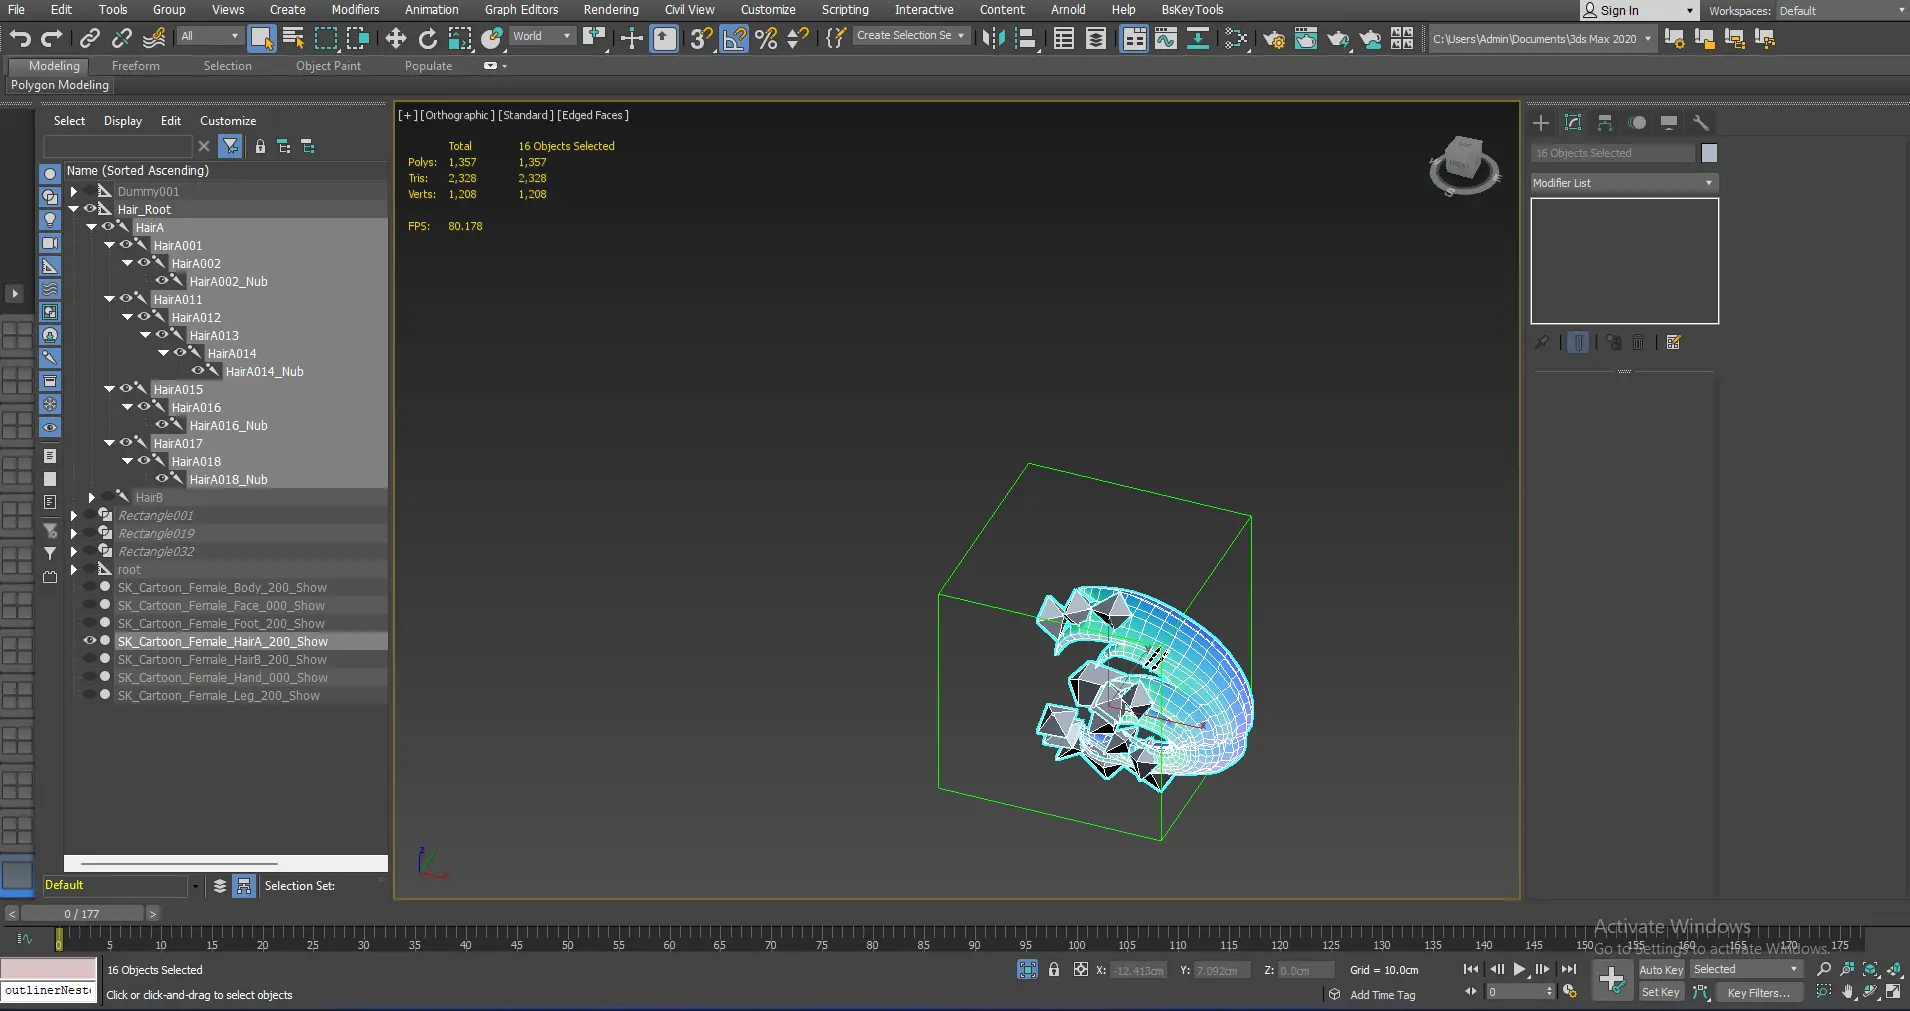
- Click Export FBX & FBX Export Settings (Verify Options):
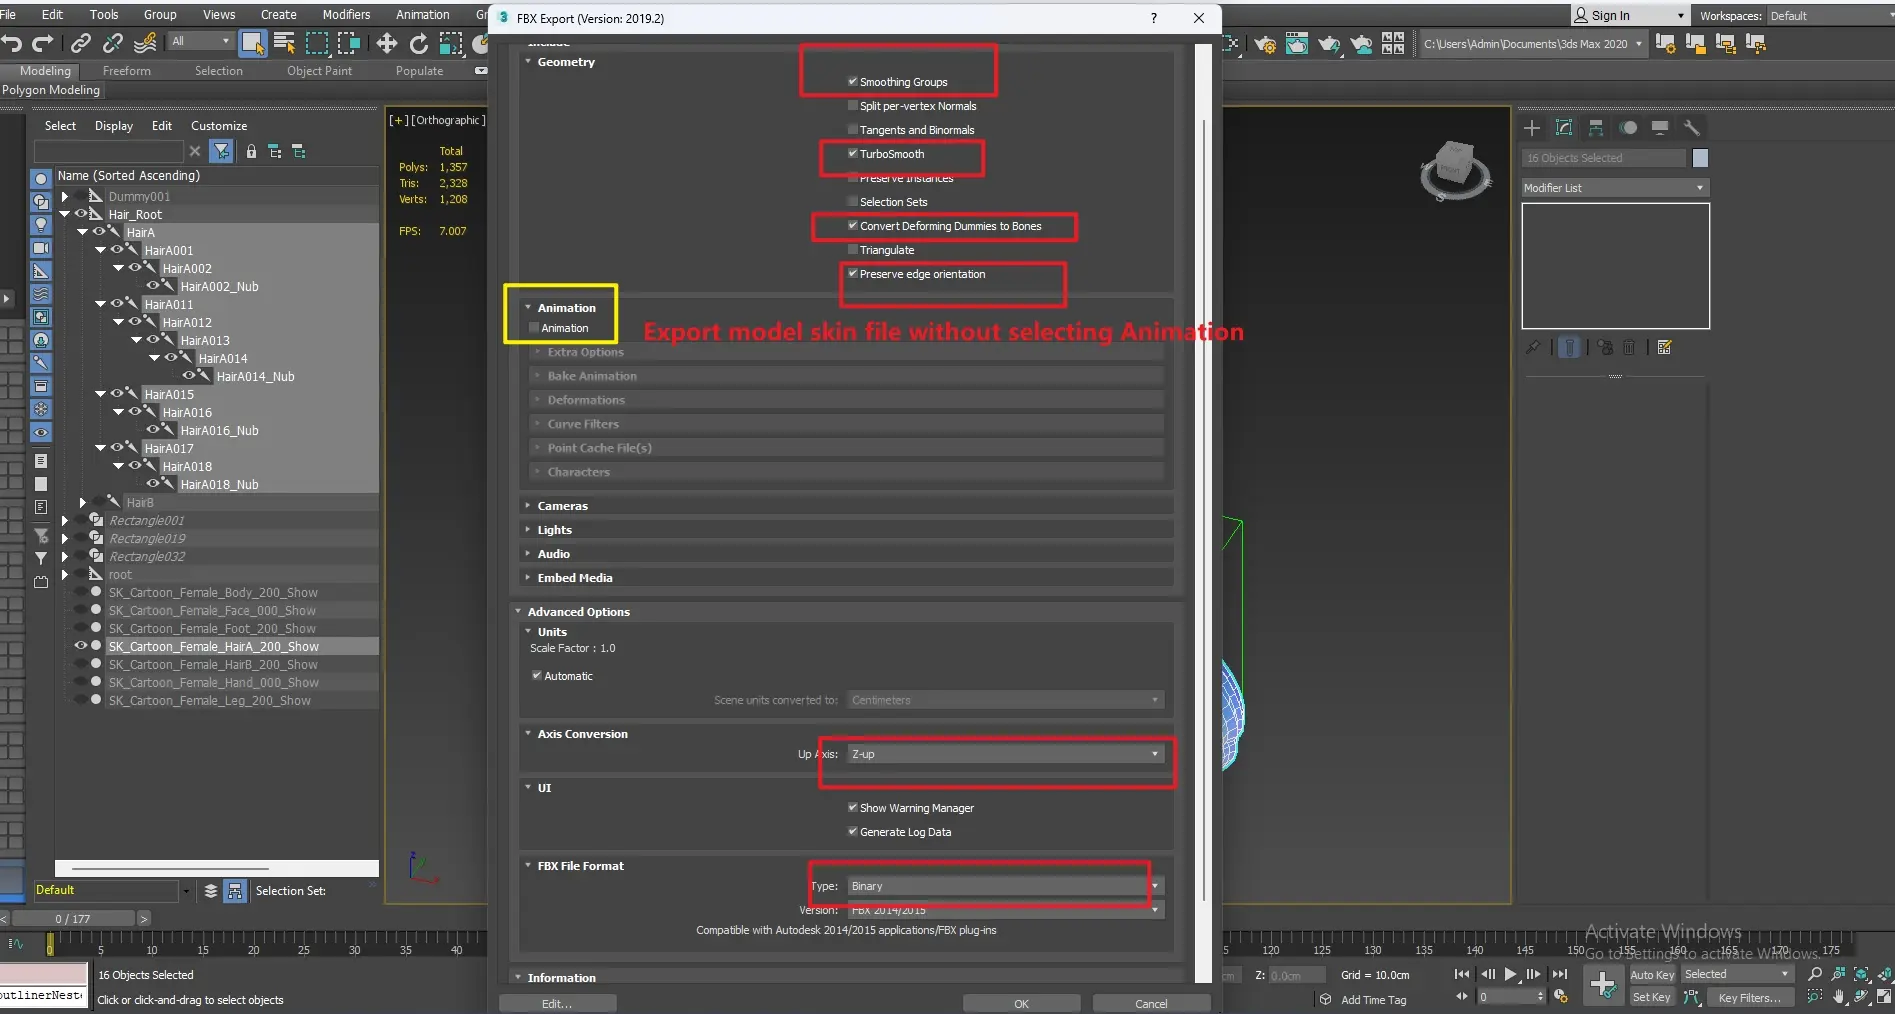
- After exporting, compress the files into a zip archive and send them to the operations team for processing.
 Editor Doc